As you import different data source types a
layer hierarchy is built up consisting of layers and sublayers.
Data sources of the same type are grouped as sublayers of a parent
layer.
In the following figure, the ESRI/Shape (see Shapefile
format) and GeoTIFF (see GeoTIFF
format) files are grouped as sublayers under their parent layers.
The last layer in the hierarchy becomes the front layer in the Map
View pane. For example, the Labels layer is displayed in front of
the GeoTIFF layer in the Map View pane.
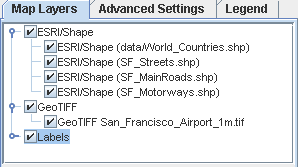
Standard layer hierarchy
You can rename layers and sublayers to make the name more
meaningful, (see Renaming
a map layer). For example, San Francisco Streets would be more
meaningful than SF_Streets.shp.
You can also set up your own layer hierarchy by creating new layers
and sublayers, (see Creating a map layer hierarchy). You can then
fill them with one or more of the data sources you have already
imported.
The following figure shows an example of a new parent layer called
Top Layer
into which the
SF_Streets.shp
file has been placed.
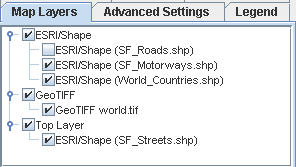
Customized layer hierarchy
Map layers can also be hidden from the layer tree, (see Hiding and showing a map layer in the tree).
For example, in a case where users can add more map layers to an
application that has a fixed background map, the application
developer may want to ensure that the user cannot alter or remove
this background map. The solution to this problem is to hide those
layers from the tree so that they cannot be modified.
You also have the possibility to move layers to different positions
in the hierarchy and to split layers or create filters on layers
that contain metadata (see Splitting or filtering a map layer). You can
send layers to the front (top) or back (bottom) of the hierarchy,
or change the position of a layer within the hierarchy.
The filtering mechanism allows you to create
a layer that displays only the objects that match a filter. You can
also split a layer by grouping together the objects that match the
same value for selected metadata. In both cases, the split/filtered
layers are added to the map layer hierarchy.
The following figure shows an example of an
ESRI/Shape file displayed according to a CONTINENT filter.
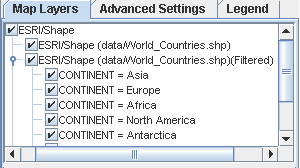
Split and filtered map layers
A pop-up menu is available in the Map Layers pane that allows you
to carry out most of the operations available in the Map Layers
pane. For more information, see Managing map layers and Split or filtered map layers.