注釈ツールバー Bean は、 IlvMapAnnotationToolBar クラスによって表されます。注釈ツールバーで作成した定義済み注釈を使用して地図に注釈を付けることができます。ツールバーを使用して、ポイント、折れ線、あるいは多角形の注釈をインタラクティブに追加できます。注釈ツールバーの例を、「注釈ツールバー」に示します。
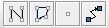
注釈ツールバー
注釈は、地図の特殊ゾーンに関する追加情報を説明したり、提供したりするために、地図上に作成される描画です。注釈はラベルとして貼られ、地図の座標系に関連して投影されて、 IlvCoordinateSystemProperty としてマネージャーに保存されます。JViews Maps の注釈は、専用 IlvGraphic オブジェクトです。ラベルはテキスト情報を提供するために表示でき、JViews Maps ラベリング機能を使用して貼られます。
注釈ツールバー Bean は、
JToolBar の拡張です。アプリケーションに Bean を含めるには、以下の手順に従います。
-
注釈ツールバー Bean をアプリケーションに含めるには、次の行コードを記述します。
IlvMapAnnotationToolBar annotations =new IlvMapAnnotationToolBar();
annotations.setView(view);
ツールバーでは、注釈オブジェクトのインタラクティブな作成ができるようになっています。API を使用して地図に注釈を追加することもできます。注釈を表示するのに使用されるオブジェクトは、専用の IlvGraphic です。 -
以下のコードを使用して注釈ツールバーの特定のプロパティーをカスタマイズすることができます。
// Set the size of the buttons.
annotations.setButtonSize(new Dimension(25, 25));
// Prevent the toolbar being dragged elsewhere.
annotations.setFloatable(false);
-
注釈をノードとして管理して、リンクの注釈を作成できるようにしたい場合は、そのことを以下のように指定する必要があります。
annotations.setGrapherMode(true);
-
注釈を IlvMapAnnotationToolBar.MapMarker として作成します。
-
    IlvPoint p = new IlvPoint(10, 50);
    IlvMapAnnotationToolBar.MapMarker m = new
       IlvMapAnnotationToolBar.MapMarker(p);
これらのグラフィック・オブジェクトは、 IlvGraphicLayerDataSource に保存されます。 IlvMapAnnotationModel クラスは、データ・ソースなどを提供することができます。 -
IlvGraphicLayerDataSource データ・ソースを取得します。
IlvMapAnnotationModel model = IlvMapAnnotationProperty.GetMapAnnotationModel(manager); IlvGraphicLayerDataSource dataSource = model.getDataSource(manager, "TEST"); String name = "TEST" + " Annotation"; dataSource.getInsertionLayer().setName(name); dataSource.add(m, IlvCoordinateSystemProperty.GetCoordinateSystem(manager)); -
注釈を挿入するレイヤーのスタイルを設定します。以下のコードでも、注釈が適切にラベル付けされるように、
label属性を設定することができます。if (dataSource.getInsertionLayer().getStyle() == null) { IlvMapStyle style = new IlvPointStyle(); style.setAttributeInfo(IlvMapAnnotationModel.info); style.setLabelAttribute(IlvMapAnnotationModel.info.getAttributeName(0)); dataSource.getInsertionLayer().setStyle(style); } IlvPointStyle ps = (IlvPointStyle)dataSource.getInsertionLayer().getStyle(); m.setStyle(ps); ps.setSize(5); ps.setType(IlvMarker.IlvMarkerFilledDiamond); ps.setForeground(Color.pink); -
feature属性を適切に付加します。ストリングA Labelは注釈ラベルに表示されます。String s = "A Label"; IlvFeatureAttributeProperty properties = new IlvFeatureAttributeProperty(IlvMapAnnotationModel.info, new IlvFeatureAttribute[] { new IlvStringAttribute(s)}); m.setNamedProperty(properties); -
データ・ソースを開始して注釈をマネージャーに追加します。ラベラーを起動させる必要がある場合もあります。
    try {

    manager.setInsertionLayer(dataSource.getInsertionLayer().getManagerLayer().
       getIndex());
      dataSource.start();
    } catch (Exception e) {
      e.printStackTrace();
    }
    IlvMapLabeler labeler = IlvMapLabelerProperty.GetMapLabeler(manager);
    labeler.setView(view);
    labeler.addLayer(dataSource.getInsertionLayer());
    labeler.performLabeling();