Interactors change the value of a parameter
or condition following mouse events on symbol objects. Use the
change in parameter value to coordinate state changes for multiple
symbol objects. For example, you can create a button whose
background color and text change when the button is clicked, or a
button with multiple rotating images.
Creating a push interactor for multiple objects
Push interactors in the Symbol Editor are
used to fulfill a state in a condition. When the condition has
been fulfilled, the object to which the condition is bound
changes representation. When a Push interactor is added to a
symbol, the condition can be reused by other objects to
coordinate symbol transformations.
-
In the Symbol Editor, open the symbol created in Creating a push interactor.
-
In the Symbol Outline pane, right-click the Text object.
-
From the pop-up menu, click New Condition.The New Condition dialog box opens.
-
In the “Other conditions defined for this symbol” pane, select [click=”BUTTON_DOWN”].
-
Click OK.The condition is selected under the Text object in the Symbol Outline pane.
-
In the Styling Customizer, select the Paint tab.
-
Select the Stroke On check box.
When you run this symbol in Preview mode,
the Text object is outlined when the mouse is pressed on the
Shape object.
Creating a rotation interactor for multiple objects
A rotation interactor changes the value
of a parameter. As the value of the parameter changes, the
objects bound to it are transformed. By binding more than one
object to a rotation parameter, you create synchronized
movements in a symbol.
To rotate multiple objects:
-
In the Symbol Editor, create a new symbol.For more information, see Making a new symbol.
-
Add a Rotation interactor on the Text object bound to a float parameter.Use the method explained in Creating a rotation interactor.
-
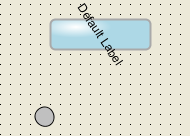
Create an ellipse object to the left of the Shape object.
-
With the new ellipse object selected, click the Transform tab in the Styling Customizer.
-
Bind the Angle field to the rotation parameter by setting the following values in the Transform Element Using Parameter dialog box:
- Parameter Min: 0
- Parameter Max: 100
- Value Min: 360
- Value Max: 0
-
Select the Center Relative to Base Element check box.
-
Test this symbol by clicking Preview.
-
Save this symbol.
When you rotate the mouse over the Shape
object, the ellipse rotates in the opposite direction to the
text object.

Rotating multiple objects