Before creating symbols, you need to know what you are creating
them for. The use case for project planning is explained in Planning a project for the Symbol Editor. A
full explanation of the BAM project is explained in The BAM Dashboard example.
You can create a new symbol in one of
three ways:
-
Click File > New.
-
Click the New Symbol at the upper left of the Symbol Editor window.
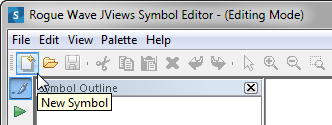 The New Symbol button
 -
Press Ctrl+N.
The default symbol is displayed in the
drawing pane.
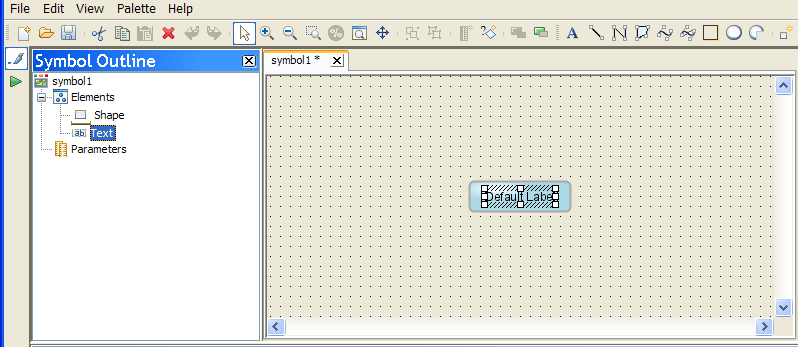
The default symbol
The default symbol shown in the figure The default symbol contains two objects: the
Shape object and the Text object. The handles around the Text
object indicate that it is selected.
The position and coordinates of objects in
a symbol are relative to the base object. The base object is the
object on which the coordinates and position of all other objects
in the symbol are calculated. The base object in a symbol is
indicated in the Symbol Outline pane with a red underline.
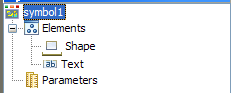
The base object indicator
When a symbol is opened in the
Symbol Editor, the actions available are indicated by the active
buttons in the menu bar. The objects contained in the symbol are
displayed in the Symbol Outline pane on the left of the
Symbol Editor. Customization options for the selected object are
displayed in the Styling Customizer pane at the bottom of the
Symbol Editor.
Note
You can create a new symbol from an
existing one by double-clicking the latter in the Symbol Palettes
pane.