Tree component services
Describes the services that are available for a tree: view services and adapter services.

List the different services available for a tree.
Details how to fill a tree with business objects using the API or a project file.
Describes how to use the default view interactor to associate actions with different events and build a pop-up menu to display in the view.
Describes how to use object interactors to associate behavior with business objects.
Describes how to use the selection model to set, modify, and retrieve objects.
Describes how to filter the nodes displayed by the tree component.
Details how to specify the business classes to be accepted for or excluded from display in the tree component.
Describes how to specify a sort order for tree nodes.
Describes how to control whether an object is treated as a tree leaf.
Describes how to set a list of origins to explicitly select the root nodes to be displayed by the tree component.
Introduction
This section describes the services that are available for a tree. They are of two kinds:
View services, related to the tree view
Adapter services, related to the tree model
Filling the tree with business objects
The tree can be filled with business objects through an
IltDefaultDataSource, as illustrated by the following code.
How to fill a tree with business objects
// Create a tree component and connect it to a data source
IlpTree treeComponent = new IlpTree();
IltDefaultDataSource dataSource = new IltDefaultDataSource();
// The second parameter specifies which kind of object contained
// in the data source the tree will show
treeComponent.setDataSource(dataSource, IltNetworkElement.GetIlpClass());
// Create a business object and insert it in the data source
IltObjectState os = new IltBellcoreObjectState();
os.set(IltBellcore.State.EnabledActive);
IltNetworkElement london =
new IltNetworkElement("Fax", IltNetworkElement.Type.Fax, os);
dataSource.addObject(london);
Note that a data source can also load an XML file containing business objects, as shown in
Creating a tree component: a sample.
You can also use project files to easily create and load data source business objects into your tree component, as illustrated below:
How to fill a tree with business objects using a project file
You can create the following project file to indicate the type of data source to be used and the XML file that contains the data source information:
<?xml version="1.0"?>
<tgo xmlns:xsi = "http://www.w3.org/2001/XMLSchema-instance"
xsi:noNamespaceSchemaLocation = "ilog/cpl/schema/project.xsd">
<datasource javaClass="ilog.tgo.datasource.IltDefaultDataSource"
fileName="network.xml"/>
</tgo>
Once the project file is specified, you can load it in the component using method
IlpTree.setProject(URL projectURL) or
IlpTree.setProject(IlpProject project). See
Loading a project file for details.
Interacting with the tree view
The
IlpTree allows you to associate behavior with the tree view as a whole, and with the business objects it contains.
In particular, using the default view interactor, you can:
associate actions with mouse events and focus events,
associate actions with keyboard events,
define a pop-up menu factory to build a pop-up menu that displays in the view.
The
IlpTree is associated with an
IlpDefaultViewInteractor, which should satisfy most needs. You can retrieve this interactor by calling the method
getViewInteractor().
How to associate an action with a mouse event in the tree view
You can associate actions with mouse events by using either CSS or the API. The following CSS extract shows how to proceed:
Tree {
interactor: true;
}
Interactor {
viewInteractor: @+viewInt;
}
Subobject#viewInt {
class: 'ilog.cpl.interactor.IlpDefaultViewInteractor';
action[0]: @+viewAction0;
}
Subobject#viewAction0 {
class: 'ilog.cpl.interactor.IlpGestureAction';
gesture: BUTTON3_CLICKED;
action: @+myAction;
}
Subobject#myAction {
class: MyAction;
}
The same configuration can be achieved through the API, as follows:
IlpTree tree = // ...
// Retrieve the view interactor
IlpViewInteractor viewInteractor = tree.getViewInteractor();
// Create an action
Action myAction = new MyAction();
// Clicking the 3rd mouse button will trigger myAction
viewInteractor.setGestureAction(IlpGesture.BUTTON3_CLICKED,myAction);
You can find out whether this event occurred on an IlpObject by means of the following code (which should be in the MyAction class).
How to check whether a given action occurred
// Implementation of the ActionListener interface
public void actionPerformed(ActionEvent e) {
// JTGO interactors use IlpViewActionEvent
IlpViewActionEvent viewEvent = (IlpViewActionEvent)e;
// Get the IlpObject (if any) where the interaction occurred
IlpObject ilpObj = viewEvent.getIlpObject();
// Perform operation on the given object
}
How to associate an action with a keyboard event in the tree view
You can associate actions with keyboard events by using either CSS or the API. The following CSS extract shows how to proceed:
Tree {
interactor: true;
}
Interactor {
viewInteractor: @+viewInt;
}
Subobject#viewInt {
class: 'ilog.cpl.interactor.IlpDefaultViewInteractor';
action[0]: @+viewAction0;
}
Subobject#viewAction0 {
class: 'ilog.cpl.interactor.IlpKeyStrokeAction';
keyStroke: 'typed D';
action: @+myAction;
}
Subobject#myAction {
class: MyAction;
}
The same configuration can be achieved through the API, as follows:
// Create an action
Action myAction = new MyAction();
// Typing CTRL+D will trigger myAction
viewInteractor.setKeyStrokeAction(
KeyStroke.getKeyStroke('D',java.awt.Event.CTRL_MASK),myAction);
How to define a pop-up menu factory for the tree view
You can customize a pop-up menu factory for the tree view either through CSS or through the API. The following CSS extract shows how to configure a CSS file to add a pop-up menu factory:
Tree {
interactor: true;
}
Interactor {
viewInteractor: @+viewInt;
}
Subobject#viewInt {
class: 'ilog.cpl.interactor.IlpDefaultViewInteractor';
popupMenuFactory: @+viewPopupMenuFactory;
}
Subobject#viewPopupMenuFactory {
class: MyPopupMenuFactory;
}
The same configuration can be achieved through the API, as follows:
// Subclass IlpAbstractPopupMenuFactory, which has useful shortcuts
IlpPopupMenuFactory popupMenuFactory = new IlpAbstractPopupMenuFactory(){
// Add the identifier of each of the selected objects to the menu
public JPopupMenu createPopupMenu (IlpObjectSelectionModel ilpSelectionModel)
{
// Create an empty popup menu
JPopupMenu menu = new JPopupMenu();
// Access the selected objects from the selection model
Collection selectedObjects = ilpSelectionModel.getSelectedObjects();
// fill the menu according to the current selection
return menu;
}
};
The following code shows you how to associate the defined pop-up menu factory with the tree component.
How to associate a pop-up menu factory with the tree component
// Set the popup menu factory to the view interactor
viewInteractor.setPopupMenuFactory(popupMenuFactory);
NOTE The selection is updated prior to invoking the pop-up menu factory. Specifically, right-clicking a selected object keeps the entire current selection, while clicking a unselected object cancels the current selection and selects the object clicked. Clicking outside any object clears the selection.
Please refer to
Interacting with the graphic components for a detailed description of interactors and gestures.
Interacting with the tree nodes
The topic
Interacting with the tree view describes how to set an interactor for the entire tree view. You can also associate behavior with business objects (for a class or for individual objects), as well as with individual
IlpTreeNode instances. To do so, you use object interactors, which provide the same options as the view interactor, that is:
associating actions with mouse events,
associating actions with keyboard events,
defining a pop-up menu factory to build a pop-up menu that displays on representation objects.
The object interactor handles any events occurring on the object with which the interactor is associated, provided the view interactor has enabled the use of object interactors. You can check this by means of the isUsingObjectInteractor method or modify it with the setUsingObjectInteractor method. Object interactors are enabled by default.
No default interactor is associated with any object. To associate actions with mouse or keyboard events or to define a pop-up menu factory, you first have to create an
IlpObjectInteractor. You may use the
IlpDefaultObjectInteractor, extend it, or create your own implementation.
How to associate an object interactor with a representation object in the tree
You can associate an object interactor with a representation object by using either CSS or the API. The following CSS extract shows how to proceed:
Tree {
interactor: true;
}
object."ilog.tgo.model.IltNetworkElement" {
interactor: @+objInteractor;
}
Subobject#objInteractor {
class: 'ilog.cpl.interactor.IlpDefaultObjectInteractor';
}
The same configuration can be achieved through the API, as follows:
IlpTree tree = // ...
IlpTreeController treeController = tree.getController();
// Create an object interactor
IlpObjectInteractor objectInteractor = new IlpDefaultObjectInteractor();
// Associate the object interactor with a given representation object
IlpTreeNode treeNode = // ...
treeController.setObjectInteractor( treeNode, objectInteractor);
// Configuring the specific object interactor is similar to configuring
// a view interactor.
objectInteractor.setGestureAction(IlpGesture.BUTTON3_CLICKED,
new MyAction());
Actions related to mouse and keyboard events can be customized in the same way as for the view interactor. A pop-up menu factory can also be defined in the same way as for the view interactor. Please refer to
Interacting with the tree view.
Please refer to
Interacting with the graphic components for a detailed description of interactors and gestures.
Handling the selection
The selection model requirements for an
IlpTree are defined by the interface
IlpTreeSelectionModel. This model extends the Swing
TreeSelectionModel to provide convenience operations when working with business objects (
IlpObject).
The selection model is responsible for setting, modifying, and retrieving the objects selected in the
IlpTree.
The
IlpTreeSelectionModel interface provides the following basic methods:
modifying or retrieving the selected
IlpObject instances,
setting or retrieving the selection mode,
registering or unregistering selection listeners.
This interface also has a number of advanced features described in
Architecture of the tree component of this section.
The following code shows you how to access the
IlpTreeSelectionModel of an
IlpTree.
How to access the selection model of a tree component
IlpTree tree = ...
//...
// Retrieve the selection model
IlpTreeSelectionModel selectionModel = tree.getSelectionModel();
How to retrieve selected objects from the selection model
The following code sample shows you how to retrieve the selected
IlpObject instances from the selection model.
Collection selection = selectionModel.getSelectedObjects();
Iterator it = selection.iterator();
while (it.hasNext()) {
IlpObject node = (IlpObject)it.next();
// Do what you want with the selected node
// ...
}
The sample
<installdir> /samples/tree/basic demonstrates the use of the selection model.
Setting the selection look and feel
The
IlpTree allows you to choose between the look-and-feel for the selection:
HIGHLIGHT_SELECTION_LOOK_AND_FEEL : the standard mode, where a selected cell appears highlighted.
CHECKBOX_SELECTION_LOOK_AND_FEEL : in this mode, a check box is displayed next to each tree node. A check mark indicates that the corresponding node is selected. Clicking a check box or a cell switches the selection state of the corresponding node. In this mode, the highlighting only indicates which cell has the focus.
NOTE In this mode, collapsing a node does not deselect its descendants.
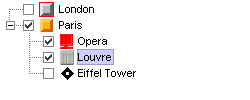
Sample tree using the check box selection look and feel
The following code shows you how to activate the CHECKBOX_SELECTION_LOOK_AND_FEEL.
How to activate a selection look and feel
IlpTree tree = ...
// Activate the CHECKBOX_SELECTION_LOOK_AND_FEEL
tree.setSelectionLookAndFeel
(IlpTreeView.CHECKBOX_SELECTION_LOOK_AND_FEEL);
Filtering the tree nodes
The tree component allows you to filter the nodes that are displayed. To do so, attach an instance of
IlpFilter to the tree component by using the method
setFilter. The
accept() method of the filter object will be invoked whenever the tree is prompted to display an
IlpObject. If the method returns
false, the object will not be shown in the tree. In the same way, an object will not be shown if its parent is not displayed.
For example, write the following code to show only objects of the class
IltNetworkElement.
How to filter objects to be shown in the tree component
IlpTree tree = // ...
// Create a new IlpFilter instance
IlpFilter filter = new IlpFilter(){
// This method is called for every object in the data source
public boolean accept (Object object){
IlpObject ilpObject = (IlpObject)object;
IlpClass clz = ilpObject.getIlpClass();
// Check if the class == IltNetworkElement
return clz.equals(IltNetworkElement.GetIlpClass());
}
// Set the filter to the tree
tree.setFilter(filter);
All the objects are refiltered whenever a new filter is set. If the filter is null (which is the default), all the objects under the root nodes will be displayed.
To retrieve the active filter, use the method
getFilter.
NOTE The filtering takes actually place at the adapter level.
Accepted and excluded classes
You can specify the business objects that will be represented or not in the tree component depending on their business classes. To do so, you need to specify the business classes to be accepted or excluded using methods
setAcceptedClasses or
setExcludedClasses in the tree component adapter. To retrieve the adapter, use the
getAdapter method. The adapter must be an instance of a subclass of
IlpAbstractTreeAdapter.
How to specify excluded classes in the tree component
You can specify that business objects from specific business classes are not represented in the tree component. You can do that using the API,
setExcludedClasses method, or using CSS.
The following example shows you how to prevent objects from business classes
IltAlarm and
IltLed to be represented:
Adapter {
excludedClasses[0]: "ilog.tgo.model.IltAlarm";
excludedClasses[1]: "ilog.tgo.model.IltLed";
}
How to specify an accepted class in the tree component
By default, all business classes are accepted by the tree component. If you want to specify exactly which business classes to represent, you should combine the list of excluded and accepted classes, so that you exclude all business classes except those that are marked in the accepted class list.
In the following example, the tree component is configured in a way that it graphically represents only business objects from the class
IltNetworkElement.
Adapter {
excludedClasses[0]: "ilog.tgo.model.IltAlarm";
excludedClasses[1]: "ilog.tgo.model.IltObject";
acceptedClasses[0]: "ilog.tgo.model.IltNetworkElement";
}
NOTE The filtering that is performed through the use of the accepted and excluded class lists takes actually place at the adapter level.
Please refer to
The Adapter rule to know how to configure excluded and accepted classes through CSS.
Sorting the tree nodes
The tree component allows you to sort the displayed nodes. By default, the tree adapter sorts nodes using an arbitrary order (see
ARBITRARY_COMPARATOR) in which the same set of objects is always displayed in the same order.
You can specify your own order by providing an object that implements the Comparator interface before the nodes are created. The compare() method of the comparator object will be called for pairs of IlpObject instances in the data source to establish a sort order. Objects are ordered locally, that is, within their parent node.
To retrieve the current sort order, use the method getSortComparator.
All the objects are sorted again when a new comparator is set.
For convenient sorting based on the attribute values of the business objects,
JViews TGO provides the predefined
IlpAttributeComparator class as an implementation of the
Comparator interface. This class sorts objects based on the values of one or more of their attributes.
How to sort tree nodes
The following code sample shows you how to use
IlpAttributeComparator to implement the sorting of tree nodes. This sample is available in
<installdir> /samples/framework/datasource-explorer where
<installdir> is the directory where you have installed
JViews TGO.
// Create a comparator to sort all the nodes in the tree
// Use the predefined class IlpAttributeComparator to sort
// The first sort parameter is directory, so directories appear before files
// then the 'name' attribute
// then the 'path' attribute, as name is sometimes null (for roots)
IlpAttributeComparator sorter =
new IlpAttributeComparator(dataSource.fileClass.getAttribute("directory"),
false);
sorter.setDirectionAndOrder(dataSource.fileClass.getAttribute("name"),2,true);
sorter.setDirectionAndOrder(dataSource.fileClass.getAttribute("path"),3,true);
// Set the sorter to the tree BEFORE setting the data source
treeComponent.getAdapter().setComparator(sorter);
Controlling the display of objects as tree leaves
By default, the tree adapter considers an object to be a tree leaf when the method
getContainerInterface returns
null for that object.
You can have a finer control over whether an object should be considered as a tree leaf or not by means of the property
expansion. By default, this property is set to the value
ExpansionType.IN_PLACE, which produces the default behavior described earlier. To have an object considered as a leaf, even if the method
getContainerInterface does not return
null, you must set this property to
ExpansionType.NO_EXPANSION. For information on how to set a property value, see
Introducing cascading style sheets.
NOTE If an object is a leaf, that is, if its method
getContainerInterface returns
null, there is no way to represent it as a tree branch.
Setting a list of origins
The tree component takes by default as root nodes all the objects in the data source that do not have a parent. However, you can explicitly select the root nodes to be displayed through the adapter that forms a bridge between the data source and the tree component. To retrieve the adapter, use the
getAdapter method. The adapter for the tree component must be an instance of a subclass of
IlpAbstractTreeAdapter.
The root nodes can be changed by modifying the list of
origins for the adapter. These origins are set and retrieved as
IlpObject identifiers.
The method getOrigins allows you to get the list of current origins. The method isShowingOrigin indicates whether the origins themselves or their child objects are represented as root nodes. By default, the list of origins is empty and the origins are not shown, which means that all objects without a parent are shown as root nodes. Thus, the entire contents of the data source are displayed in the tree.
NOTE The origins are specified using identifiers, not the
IlpObject instances. You can retrieve the identifier of an
IlpObject with the
getIdentifier method of the object.
To change the list of origins, use the setOrigins method. This method takes a list of business object identifiers as its first parameter. Its second parameter is a Boolean flag that indicates whether or not the origins themselves should be shown as root nodes.
Calling this method with an empty list and the second parameter set to true empties the tree:
setOrigins(Collections.EMPTY_LIST, true);
Calling the method with an empty list and the second parameter set to false restores the default; that is, all the objects in the data source are shown:
setOrigins(Collections.EMPTY_LIST, false);
How to show an object as the root node of a tree
To show only a given
IlpObject as the root node of a tree, use the following code:
IlpTree tree = ....;
IlpObject originObject = .....;
java.util.List originList = new ArrayList();
originList.add(originObject.getIdentifier());
tree.getAdapter().setOrigins(originList, true);
For additional methods to help you manage origins, see
IlpAbstractHierarchyAdapter.
Copyright © 2018, Rogue Wave Software, Inc. All Rights Reserved.