
This section shows you how to modify the attribute of a cell by embedding a control, disable cells, make a cell readonly, cover cells, and merge cells.
The CellAttribute_CS tutorial, which is located in the Tutorials subdirectory of your Objective Grid for Microsoft .NET installation directory, shows how to use styles, covered cells, floating cells, and merged cells.
To get started, follow these steps:
Use the steps in Section 3.2.2 to set the initial grid size to 5 rows and 5 columns.
Turn off the grid lines: Go to the design view for Form1.cs. Select the grid, and then find the Design section in the properties grid. Set DrawGrid to false.
Replace the code in FormLoad() with the following code:
private void FormLoad(object sender,
                      System.EventArgs e) {
  bool prevLock = gridControl1.LockUpdate(true);

  // Populate several cells
  Range r1 = Range.Cells(1, 1, 3, 3);
  Style s1 = new Style();
  s1.Value = "TestData";
  gridControl1.SetStyleRange(r1, s1);

   //
   // ... more stuff to be added here
   //

  gridControl1.LockUpdate(prevLock);
}
|
Build and run the application.

In FormLoad(), replace this line of code:
// ... more stuff to be added here |
with the following code:
// Change the cell style in cell (1,1) so that it // contains a drop down box with 3 choices. Style s2 = gridControl1[1,1].Style; s2.Control = Stingray.Grid.ControlType.DropDown; s2.ChoiceList = "Choice 1\nChoice 2\nChoice 3"; |
Build and run the application.
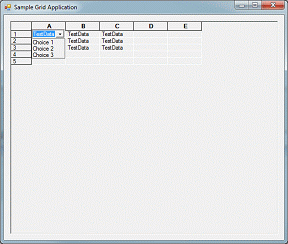
Select cell A:1. It turns into a drop-down list from which you can choose Choice 1, Choice 2, or Choice 3, as shown in Figure 11.
Select any cell and change its value.
Before the line gridControl1.LockUpdate(prevLock); in FormLoad(), add the following code:
Style s3 = gridControl1[2,2].Style; s3.Enabled = false; |
Build and run the application.
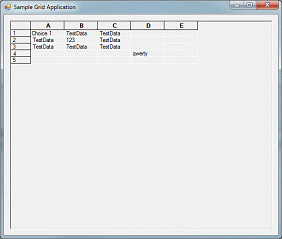
Compare the behavior of cell B2 with the other cells by trying to select it using the mouse or cursor keys. You cannot make cell B2 active.
Click cell B2 while pressing the CTRL key, and then press the delete key. The contents of that cell are deleted.
Making a cell readonly is similar to disabling it. Below this code:
Style s3 = gridControl1[2,2].Style; s3.Enabled = false; |
add the following code:
s3.ReadOnly = true; |
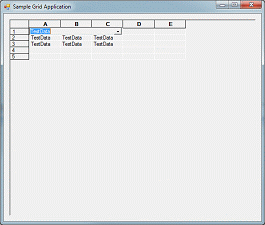
Make one cell cover a number of adjacent cells by adding the following code:
// Using cell 1,1 to cover cells 1,2 and 1,3 gridControl1.SetCoveredCellsRowCol( 1, 1, 1, 3 ); |
This task requires modifying one of the grid-wide properties.
Using the form designer, activate the properties for gridControl1.
Under the Behavior section, locate the MergeCells property and set its value to DelayEval.
Add the following code fragment to the LoadForm() method:
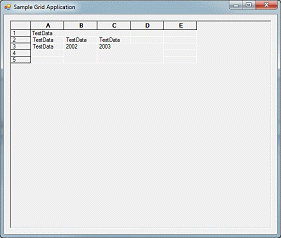
// Merged Cells
Style sMerged = new Style();
sMerged.MergeCell =
   MergeCellType.BothDirectionsAndSameStyle;
sMerged.Value = "2002";
gridControl1[3,2].Style = sMerged;
gridControl1[4,2].Style = sMerged;
gridControl1[5,2].Style = sMerged;

sMerged.Value = "2003";
gridControl1[3,3].Style = sMerged;
gridControl1[4,3].Style = sMerged;
gridControl1[5,3].Style = sMerged;
gridControl1[3,4].Style = sMerged;
gridControl1[4,4].Style = sMerged;
gridControl1[5,4].Style = sMerged;

sMerged.Dispose();
|
Build and run the application.
Copyright © Rogue Wave Software, Inc. All Rights Reserved.
The Rogue Wave name and logo, and Stingray, are registered trademarks of Rogue Wave Software. All other trademarks are the property of their respective owners.
Provide feedback to Rogue Wave about its documentation.