
This section shows you how to change the number of rows and columns in the grid, store data in the grid, and read data from the grid.
The CellValue_CS tutorial, which is located in the Tutorials subdirectory of your Objective Grid for Microsoft .NET installation directory, shows how to write to the grid and read from the grid.
To get started, follow these steps:
In Visual Studio, create a new C# "Windows Application" project:
File|New Project|Visual C# projects…
Select Windows Application.
Name the project and click OK. A main form (Form1) is automatically added to the project, and displayed. The form is displayed in design mode. Resize the form as desired.
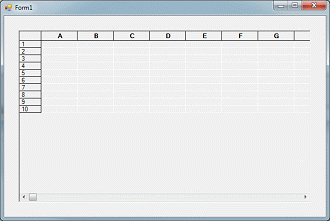
Drop a GridControl onto the empty form. Enlarge the grid control.
Build and run the application. The grid is empty and has a default size of 30 rows by 30 columns.
Right mouse button click on the form and select View Code. Near the top of the file and right after the last "using…" statement add the following line:
using Stingray.Grid; |
You can change the number of rows and columns in two ways:
Modify the appropriate grid properties from the form designer (this section)
This technique sets the initial size of your grid (what appears when you launch your program).
Call the grid API directly from within your program (Section 3.2.2)
This technique allows you to change the size of the grid any time after program start up.
To modify the appropriate grid properties from the form designer:
Right-click the form and select Properties. Then, right-click the grid and select Properties. A separate set of properties appears for each.
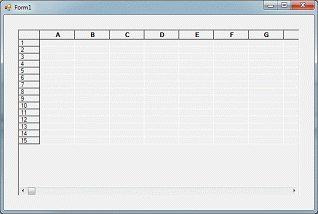
Modify the grid properties: Find ColCount and RowCount, and modify their values to 8 and 10, respectively. Press Enter. The grid in the designer shows the new sizes.
Build and run the application.
In code view, find the constructor (the default name is Form1()).
After the call to the InitializeComponent() method, add the following code:
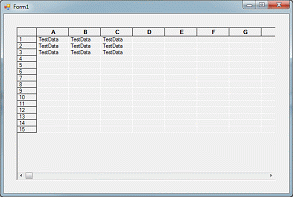
// Resize the grid from the initial size to 15x10 gridControl1.RowCount = 15; gridControl1.ColCount = 10; |
Build and run the application.
Click the form's title bar, and then select the Events button in the properties table (the lightning bolt). A property called Load appears under the Behavior section.
Type FormLoad in the value field and press Enter. A class method called FormLoad() is created. Add the following code:
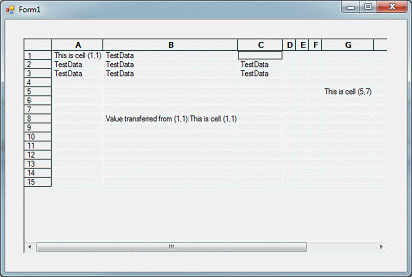
// Populate several cells Range r1 = Range.Cells(1, 1, 3, 3); Style s1 = new Style(); s1.Value = "TestData"; gridControl1.SetStyleRange(r1, s1); |
Build and run the application.
Add the following code right after the code fragment you added above:
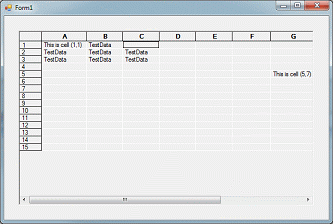
// Manipulate individual cells gridControl1[1,1].Style.Value = "This is cell (1,1)"; gridControl1[5,7].Style.Value = "This is cell (5,7)"; gridControl1[1,3].ClearValue(); |
Build and run the application.
When modifying multiple cells, it is a good idea to call LockUpdate() to prevent unnecessary redrawing and flickering. To call LockUpdate(), write FormLoad this way:
private void FormLoad(object sender,
                      System.EventArgs e) {
  bool prevLock = gridControl1.LockUpdate(true);

  // Populate several cells
  Range r1 = Range.Cells(1, 1, 3, 3);
  Style s1 = new Style();
  s1.Value = "TestData";
  gridControl1.SetStyleRange(r1, s1);

  // Manipulate individual cells
  gridControl1[1,1].Style.Value = "This is cell (1,1)";
  gridControl1[5,7].Style.Value = "This is cell (5,7)";
  gridControl1[1,3].ClearValue();

  gridControl1.LockUpdate(prevLock);
}
|
You can read values from individual cells from the grid using GetValueRowCol():
// Copy the contents of (1,1) to another cell
string cellValue = gridControl1.GetValueRowCol(1,1);
gridControl1[8,2].Style.Value = "Value transferred from (1,1):" +
                         cellValue;
|
You cannot use gridControl1[1,1] in place of gridControl1.GetValueRowCol(1,1). gridcontrol[1,1] represents a Cell object, not a Value.
Copyright © Rogue Wave Software, Inc. All Rights Reserved.
The Rogue Wave name and logo, and Stingray, are registered trademarks of Rogue Wave Software. All other trademarks are the property of their respective owners.
Provide feedback to Rogue Wave about its documentation.