Pipeline script setup
Pipeline scripts let you define your job steps directly in Jenkins. You can write the script manually, generate parts with the Snippet Generator, or combine both approaches. The Snippet Generator is a quick way to build sample steps and see how they are structured
Credentials
This plugin integrates with the Jenkins Credential Store, simplifying the management of P4 Server (P4D) connection across multiple Jenkins jobs. For details about creating a Perforce Password Credential or Perforce Ticket Credential, see Add a credential.
Add a new Pipeline script
To set up a new pipeline script job, follow these steps to create the project and begin configuring its settings.
- From the Jenkins dashboard, click New item from the sidebar menu.
- At the top of the page, enter a name for the new job in the Enter an item name field.
- Click Pipeline.
- Click OK to start configuring your new Pipeline script.
-
(Optional) Add a description in the Description field.
-
(Optional) Select any build triggers in the Triggers section.
-
Proceed with configuring the job.
Pipeline configuration
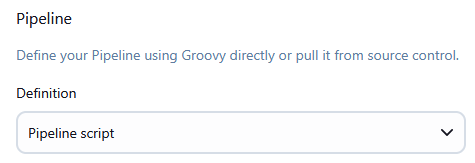
Definition
To configure the pipeline to use a pipeline script, select Pipeline script from the Definition dropdown.
Script
Create your scripts with the Snippet Generator and paste them into the Script text box. For instructions about creating scripts with the Snippet Generator, see Pipeline Syntax Snippet Generator.
Example script snippet generated for p4sync:P4 Sync
P4Sync is the simplest way to populate your Jenkins workspace from Perforce,
In this example:
-
credentialis the Perforce credential stored in Jenkins. -
formatensures each workspace is unique. -
streamSourcepoints to the Perforce stream to sync from. -
autoCleanmakes sure the workspace is cleaned and synced fresh for each build.
See the example script below:
p4sync(
    charset: 'none',
    credential: 'Local Perforce 20231',
    format: 'jenkins-${NODE_NAME}-${JOB_NAME}-${EXECUTOR_NUMBER}',
    populate: autoClean(
        delete: true,
        modtime: false,
        parallel: [enable: false, minbytes: '1024', minfiles: '1', threads: '4'],
        pin: '',
        quiet: true,
        replace: true,
        tidy: false),
    source: streamSource('//streams-depot/StreamA'
    )
)
Declarative pipeline scripts
When using a Declarative Pipeline (the newer pipeline { ... } syntax), Jenkins automatically adds a Declarative Checkout SCM step at the start of the build. This means you may see one extra step in the build log, even if your script only defines three stages, the log will show four.
To prevent Jenkins from doing this automatic checkout, you can disable it by adding the following to your pipeline:
options { skipDefaultCheckout() }
Example without skipDefaultCheckout():
pipeline {
    agent any

    stages {
        stage('Build') {
            steps {
                echo 'Building...'
            }
        }
        stage('Test') {
            steps {
                echo 'Testing...'
            }
        }
        stage('Deploy') {
            steps {
                echo 'Deploying...'
            }
        }
    }
}
This script defines three stages, but Jenkins will show four steps in the build because of the automatic checkout.

Example with skipDefaultCheckout():
Add options { skipDefaultCheckout() } to the agent.
For example:
pipeline {
    agent any

    options { skipDefaultCheckout() }

    stages {
        stage('Build') {
            steps {
                echo 'Building...'
            }
        }
        stage('Test') {
            steps {
                echo 'Testing...'
            }
        }
        stage('Deploy') {
            steps {
                echo 'Deploying...'
            }
        }
    }
}
With skipDefaultCheckout(), only the stages you define are run. This is especially useful if you’re already handling Perforce syncs explicitly in your pipeline.
Use Groovy Sandbox
By default, the Use Groovy Sandbox option is enabled, which allows standard Groovy code to run safely. If you need to run P4Groovy code, clear this checkbox.
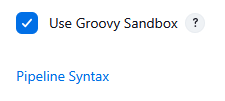
Pipeline Syntax
To create your script with the Snippet Generator, click the Pipeline Syntax link. The Pipeline Syntax Snippet Generator opens in a new browser tab
Pipeline Syntax Snippet Generator
If you’re not sure how to write a pipeline script from scratch, the Snippet Generator is a quick way to build scripts and see how they are structured. It uses a form-based interface similar to the one used for Freestyle jobs.
To open it, click Pipeline Syntax. The generator will open in a new browser tab.

Sample Step
The options available in the Snippet Generator depend on which Sample Step you select:
- Populate and workspace behavior steps:
- p4sync: P4 Sync: The simplest way to populate your Jenkins workspace from Perforce. For more information, see p4sync: P4 Sync.
- checkout: General SCM: Provides full access to the populate options available in Freestyle jobs. Select checkout: General SCM from the dropdown and choose Perforce Software as the SCM. For more information, see checkout: General SCM.
- p4: P4Groovy: A Groovy interface to the P4 API for Java, allowing you to run Perforce commands in the pipeline DSL (Domain Specific Language). For more information, see p4: P4Groovy.
- Post build steps:
- cleanup: Perforce: Cleanup:Cleans up the workspace after the build. For more information, see cleanup Perforce: Cleanup.
- p4approve: P4 ApproveImpl Review: (P4 Code Review required). Sets the P4 Code Review review state when the build completes. For more information, see p4approve: P4 ApproveImpl Review.
- p4publish: P4 Publish: Jenkins automatically shelves or submits build assets to the PerforceP4 Server. For example, you can use this to publish a PDF of the release notes to the P4 Server. For more information, see p4publish: P4 Publish.
- p4tag: P4 Tag: Jenkins can tag builds automatically when a build completes. Tags are stored in the PerforceP4 Server as Automatic Labels based on the workspace at the time of tagging. For more information, see p4tag: P4 Tag.
- Build step:
- p4unshelve: P4 Unshelve: Unshelves one or more shelved changes into your Jenkins workspace as part of the build. For more information, see p4unshelve: P4 Unshelve.
After configuring the required Sample Steps, you can then generate the pipeline script.
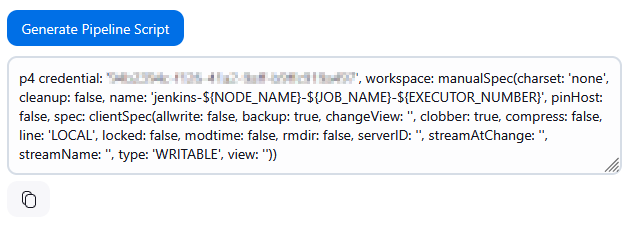
Generate Pipeline Script
To generate your pipeline script:
-
Click Generate Pipeline Script. The resulting script appears in the text box below.
-
Copy the generated script.
-
Return to your Jenkins Pipeline job configuration and paste the script into the Script box.
Below is an example of a script that sets up a unique Perforce workspace for the Jenkins Pipeline build, ensuring isolated, consistent file handling.
Save
After adding scripts to your Pipeline job, click Save to store your configuration.
Building
When you have created your scripts, your job is ready to run. For more information, see Building Jobs.
Further pipeline script information
Multiple Syncs
If your build script requires multiple Perforce sync operations, each sync must use a unique workspace name. Reusing the same workspace name can cause conflicts or unexpected behavior.
How to set a unique workspace name
You can customize the workspace name using the Workspace Name Format field in the Jenkins job configuration.
The default format is:
-
jenkins-${NODE_NAME}-${JOB_NAME}-${EXECUTOR_NUMBER}
A custom format could be:
-
jenkins-${NODE_NAME}-${JOB_NAME}-${EXECUTOR_NUMBER}-libs
When you use a custom format, Jenkins will reflect this in the generated pipeline snippet, making it easier to identify and manage multiple syncs.
Build Triggers
If no triggers are set, Jenkins will build based on the Polling build filters in use.
- Perforce triggered build: A build trigger can be added to the job after you have tested the job and proved that it works correctly. For instructions about configuring a build trigger, see Automatic build.
- Poll SCM: If you enable Poll SCM, ensure that your Auto build filters are configured to suit regular builds and that the polling frequency is longer than the time the build takes to complete.
Polling
Jenkins polls for each sync step in a build script and also for the Jenkinsfile if using Pipeline script from SCM.
The checkout: General SCM advanced populate option provides checkboxes to disable polling and changelog collection if needed.
Advanced Polling
Polling requires access to previous build data (build.xml). P4 Plugin tracks the previous build change using a syncID as a polling operation might iterate over multiple sync steps. The syncID is normally calculated from the client workspace name, but must be unique enough to distinguish between multiple sync steps, but common enough to identify previous builds.
The syncID must be:
-
Unique enough to distinguish multiple sync steps – so Jenkins can correctly track each separate sync in your pipeline without confusing one step for another.
-
Consistent enough to link to previous builds – so Jenkins knows which changes have already been processed.
For this reason if the client Workspace name contains any of the following variables their values will be ignored when determining the syncID:
- NODE_NAME (which may change between agents)
- BUILD_NUMBER (which changes for each build)
- EXECUTOR_NUMBER (changes based on the execution thread)
In rare cases, you can override the syncID by specifying the attribute on a workspace: class.
Changelist reporting limitations
Jenkins ties changelist reporting to individual p4 sync or checkout commands.
If the same changelist is synced multiple times in a single job, it will appear once for each sync in the Status and Changes pages.
The P4 Plugin cannot override this behavior.