Folders list - List tab
The List tab on the Folders list displays a list of items or subfolders in a selected folder. You can perform actions on the items or subfolders plus many of the other actions available in item lists, such as email other users, add workflow events to items, and run reports. See Using item lists.
To view the list, click the List tab in the Folders list. You can switch from viewing items in the list to viewing subfolders for the selected folder. See Changing display options.
Keep the following in mind:
- Actions you can perform on folders depend on access given in security groups you are in and permissions for specific folders. If you cannot work with a folder, the folder icon is gray. If a folder is locked, a lock icon is displayed on the folder and you cannot perform any actions on it. Items you can view and edit in folders depend on access given in security groups and the item workflow. See Managing access to folders.
- You can also perform many of the following actions plus other from the Actions menu. Click Actions and choose an action.
- You can only add test cases to test case suite folders and test runs to test case suite folders.
| To: | Do this: | More info |
|---|---|---|
| Search for an item in the list | Enter a value in the Search field. Matching results are displayed as you type. | |
| Add an existing item to the selected folder | Click Add and choose Existing Item. | Adding items to folders |
| Add a new item and add it to the selected folder | Click Add and choose the item type to add. | Adding items to folders |
| Add an item to another folder and keep it in the current folder | Click  next to the item and choose Add to Folder. next to the item and choose Add to Folder. |
|
| Move an item to another folder and remove it from the selected folder | Drag it to the other folder in the Folders tree or click next to the item and choose Move to Folder. |
Moving items between folders |
| Open the selected item or folder | Click next to the item or folder and choose View. |
Viewing items in folders |
| Edit an item in the selected folder | Click next to the item and choose Edit. |
Editing items in folders |
| Edit the selected folder | Click next to the folder and choose Edit. |
Editing folder details |
| Adding a workflow event to an item | Click Workflow to open the Workflow bar if it is not already open. Select the item to add the event to and click the event button. | Adding workflow events to items |
| Rank items in selected folder | Click Rank Items. | Ranking items in folders |
| Order items in a test case or test run suite folder | Click Order Items. | Ordering items in test suites |
| Copy the selected item's number | Click next to the item and choose Copy Item Number. |
|
| Email Helix ALM users and other recipients about an item | Select the item, click  , and choose an option. To send email unrelated to a specific item, do not select any items. , and choose an option. To send email unrelated to a specific item, do not select any items. |
Emailing from Helix ALM |
| Run a report | Click  and mouse over the report to run. Choose HTML to run the report in HTML format or PDF to save it in PDF format. and mouse over the report to run. Choose HTML to run the report in HTML format or PDF to save it in PDF format. |
Running reports and Saving reports as PDFs |
| Remove the selected item from a folder | Click next to the item and choose Remove from Folder. |
Removing items from folders |
| Delete the selected folder | Click next to the folder and choose Delete. You can also delete folders from the Folders tree. |
Deleting folders |
Tip: If you select a test run suite folder, you can see an overview of the progress on completing the test runs in the suite. A progress bar provides a quick visual of the current status of the test suite. See Viewing the completion status of test run suites.
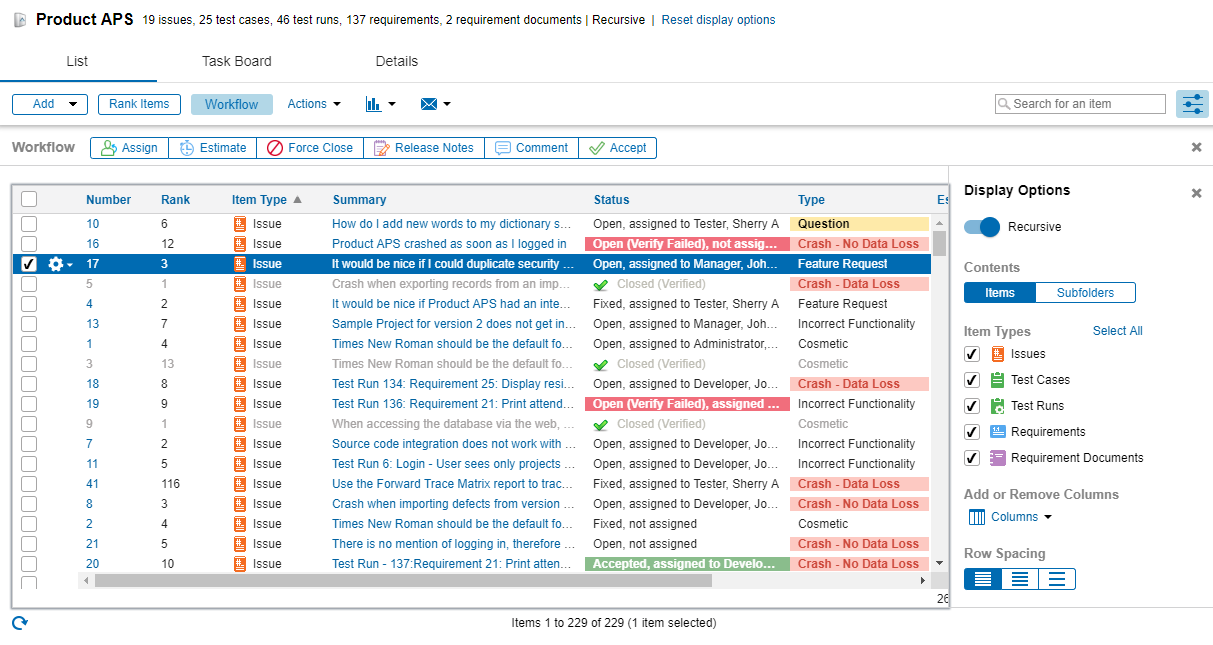
You can select options to change what the List tab displays and how it is displayed. To open the Display Options pane, click  .
.

A summary of items displayed, items excluded, and other display options is displayed next to the folder name. To reset the display options to the default, click Reset display options next to the summary. The Display Options pane opens if it is not already.
Note: You can also set display options on the Task Board tab. See Using task boards.
Recursive/Not recursive
To show all items or subfolders in the selected folder, switch to Recursive. Switch to Not recursive to only show items or subfolders in the selected folder.
Contents
Select Items to view items in the list or Subfolders to view subfolders in the list.
Item Types
Select the item types to display in the list. Click Select All to select all item types. You must select at least one type. These options are not available if a test case or test run suite folder is selected.
If multiple item types are selected, but you only want to display one type, mouse over the type to display and click  . All other item types are cleared.
Filter
If only one item type is selected to display in the list, you can apply a filter. See Applying filters. You can also:
- Search for a filter.
- Add a new filter—Choose Add Filter in the Filters list. See Adding filters.
- Edit an existing filter—Mouse over the filter to edit in the Filters list and click
 . See Editing filters.
 - Delete a filter—Mouse over the filter to delete in the Filters list and click
 . See Deleting filters.
 - Perform an advanced search.
Click Clear to clear the selected filter.
Add or Remove Columns
- To add a column to the list, click Columns and choose the column to add. You can also search for a column.
- To remove a column, click Columns choose the column to remove. Check marks indicate currently displayed columns. You can also mouse over a column heading in the list and click
 to remove it.
To add or remove columns in the list, click Columns and choose the column to add or remove. A check mark indicates columns that are displayed.
Row Spacing
To adjust the spacing of rows in the list, click a row spacing button.
| Button | Spacing |
|---|---|

|
Narrow |

|
Normal |

|
Wide |
Customizing columns in the list
- To add and remove columns, select them in the Display Options pane. See Changing display options.
- To rearrange columns, click the column heading to move and drag it to the new location.
- To resize a column, drag the divide bar on the right side of a column to change the width.
- To sort items in the list based on values in the column, click a column heading. An arrow is displayed to indicate the sort order. An up arrow indicates ascending order and a down arrow indicates descending order. Click the column heading again to switch the sort order.
- To sort items based on a secondary value, Shift+click another column heading. For example, you may want to sort issues based on product and then by type. A double arrow indicates the column is used as secondary sort criteria and the sort order. Shift+click the column heading again to switch the sort order from ascending to descending or vice versa.


