The JViews Gantt JSF component set
Presents some examples to illustrate how to use JViews Gantt JSF components.

Explains how to create various types of simple views.
Explains how to enable scroll bars in a Gantt sheet view
Presents an example using the Designer for
JViews Gantt.
Presents an example using the Designer for
JViews Charts.
Presents examples of connecting data source components to Gantt chart components.
Presents examples of connecting data source components to chart components.
Describes how to customize data display in a Gantt chart by using Cascading Style Sheets.
Describes how to customize the chart data display using Cascading Style Sheets.
Describes how to install interactors in a Gantt chart.
Describes how to install interactors in a chart.
Describes the use and behavior of the select interactor in a Gantt chart..
Describes the resize activity interactor used to resize a selected activity.
Describes Hitmap technology and its customization.
Describes how to connect a message box to a Gantt chart view.
Describes how to connect a message box to a
chartView.
Explains how to add a pop-up menu.
Explains how to use CSS classes to set pop-up menu properties for styling purposes.
Explains how to implement and configure server action listeners.
Explains how to implement and configure intercept interactors.
Describes the use of interactors for multiple purposes.
Describes the implications of session expiration and how to keep a user session alive when it is about to expire.
Creating simple views
The view component is the central component of a JViews JSF application. All the other components depend on or interact with this view. The first and simplest page that can be made with a JViews JSF component is an empty view.
Creating a Gantt chart view
Creating an empty view
<jvgf:ganttView style="width:500px; height:300px;" />
This produces a 500 by 300 pixel Gantt chart.
Declaring the namespace
The namespace jvgf (for JViews Gantt JSF) must be declared in the page as follows:
<%@ taglib
uri="http://www.ilog.com/jviews/tlds/jviews-gantt-faces.tld"
prefix="jvgf" %>
Using the width and height attributes
Using the style to specify the size of the component is preferable, but an alternative is to use the width and height attributes.
<jvgf:ganttView width="500" height="500" />
NOTE The Schedule chart view component is used in the same way (tag attributes, behavior, and so on) as the Gantt chart view component. The fundamental difference concerns the wrapped component that is used to produce a view: an instance of
IlvScheduleChart or of
IlvGanttChart. Other practical differences are mentioned where appropriate.
Creating a chart view
The first and simplest page that can be made with a JViews Charts JSF component is a chart view showing the default built-in data set.
Creating an empty view
To specify an empty view:
<jvcf:chartView style="width:500px; height:300px;" />
This produces a 500 by 300 pixel chart.
Declaring the namespace
The namespace jvcf (for JViews Charts JSF) must be declared in the page as follows:
<%@ taglib
uri="http://www.ilog.com/jviews/tlds/jviews-chart-faces.tld"
prefix="jvcf" %>
Using the width and height attributes
Using the style to specify the size of the component is preferable, but an alternative is to use the width and height attributes.
<jvcf:chartView width="500" height="500" />
Enabling scroll bars in Gantt sheet views
Use the attributes sheetHScrollable and sheetVScrollable to make the Gantt sheet view scrollable. The default value for these attributes is false. If you set the value of sheetHScrollable to true then the Gantt sheet view will have a horizontal scroll bar. If you set the value of sheetVScrollable to true then the Gantt sheet view will have a vertical scroll bar.
The following code example shows how to add horizontal and vertical scroll bars:
<jvgf:ganttView id="gantt" project="/data/gantt.igpr"
style="width:800px;height:400px" imageFormat="PNG"
tableInteractorId="tableGroup" sheetInteractorId="sheetGroup"
sheetHScrollable="true"
sheetVScrollable="true">
JViews Gantt Designer project
The easiest way to configure the style and the data source of a hierarchy chart (Gantt or Schedule chart) is to set a JViews Gantt Designer project to the Gantt view component. This is done with the data attribute of the tag that points to an igpr file.
For more information about the Designer for JViews Gantt, see Using the Designer.
<jvgf:ganttView id="gantt"
data="data/gantt.igpr"
style="width:800;height:400" />
You can set the CSS style sheet and data source separately.
NOTE Items on the Interactions tab of the Designer, such as scroll bar options, do not work in thin-client environments. For information on using interactors with thin clients, see
Installing interactors in a Gantt chart.
JViews Charts Designer project
The easiest way to configure the style and the data source of a chart is to set a JViews Charts Designer project to the chart view component. This is done with the data attribute of the tag that points to an icpr file.
For more information about the Designer for JViews Charts, see Using the Designer.
<jvcf:chartView id="chart"
data="data/chart.icpr"
style="width:800;height:400" />
You can set the CSS style sheet and data source separately.
NOTE Items on the Interactions tab of the Designer, such as scroll bar options, do not work in thin-client environments. For information on using interactors with thin clients, see
Installing interactors in a chart.
Data source binding in JViews Gantt
If a project is not already set and you want to set a data source to a Gantt chart, a data source component should be connected to the Gantt chart component.
Using an SDXL file
An easy way to connect to a data source is to use an XML file.
<jvgf:ganttView style="width:500 px; height:300 px;"
data="resources/gantt.sdxl" />
Using a value binding
Another way to specify a data source is to use a value binding. In this case, the Gantt data model is provided by a bean property:
<jvgf:ganttView [...] data="#{ganttBean.ganttModel}" />
The bean should then provide the Gantt data model through its getGanttModel method:
public IlvGanttModel getGanttModel() {
if (ganttModel == null)
ganttModel = createDefaultModel();
return ganttModel;
}
To use the value binding attribute, the bean must be declared in the faces-config.xml file or the managed-beans.xml file:
<faces-config>
<managed-bean>
<description>A gantt demo bean</description>
<managed-bean-name>ganttBean</managed-bean-name>
<managed-bean-class>GanttBean</managed-bean-class>
<managed-bean-scope>session</managed-bean-scope>
</managed-bean>
</faces-config>
For further information about these configuration files, see the
http://java.sun.com/j2ee/javaserverfaces/reference/index.html JavaServer™ Faces specifications.
NOTE The JViews Gantt JSF component properties are all bindable.
Creating a component in a managed bean
Another way to specify the data source is to create an
IlvGanttChart component directly in a managed bean:
<jvgf:ganttView id="chart"
style="width:500;height:300;"
chart="#{ganttBean.gantt}" />
Here the IlvGanttChart component is created directly by your bean instance and you can set the data source in the bean code as shown in the bean getter:
public IlvGanttChart getGantt() {
if (ganttChart == null) {
ganttChart = new IlvGanttChart();
ganttChart.setGanttModel(getGanttModel());
}
return ganttChart;
}
The bean must be declared in the faces-config.xml file or the managed-bean.xml file.
Data source binding in JViews Charts
If a project is not already set and you want to set a data source to a chart, a data source component should be connected to the chart component in order to display something.
Using an XML file
An easy way to connect to a data source is to use an XML file.
<jvcf:chartView style="width:500 px; height:300 px;"
data="resources/data.xml" />
Using a value binding
Another way to specify a data source is to use a value binding. In this case, the data source is provided by a bean property:
<jvcf:chartView [...] data="#{dataBean.dataSource}" />
The bean should then provide the data source through its getDataSource method:
public IlvDataSource getDataSource() {
if(source == null) {
IlvDataSource source = new IlvDefaultDataSource();
double x = {1, 3, 2, 4, 6, 5};
IlvDefaultDataSet dds = new IlvDefaultDataSet("Sample", x);
source.setDataSet(0, dds);
}
return source;
}
To use the value binding attribute, the bean must be declared in the faces-config.xml file or the managed-beans.xml file:
<faces-config>
<managed-bean>
<description> A Data Bean </description>
<managed-bean-name>dataBean</managed-bean-name>
<managed-bean-class>DataBean</managed-bean-class>
<managed-bean-scope>session</managed-bean-scope>
</managed-bean>
</faces-config>
For further information about these configuration files, see the
JavaServer Facesspecifications.
Creating a component in a managed bean
Another way to specify the data source is to create an
IlvFacesChart component directly in a managed bean:
<jvcf:chartView id="chart4"
style="width:500;height:300;"
chart="#{chartBean.chart}" />
Here the IlvFacesChart component is created directly by your bean instance and you can set the data source in the bean code as shown in the bean getter:
public IlvChart getChart() {
try {
IlvFacesChart chart = new IlvFacesChart();
IlvDataSource source = new IlvDefaultDataSource();
double x[] = {1, 3, 2, 4, 6, 5, 10, 2, 3, 0};
IlvDefaultDataSet dds = new IlvDefaultDataSet("Sample", x);
source.setDataSet(0, dds);
chart.setDataSource(source);
return chart;
} catch (Exception e) {
e.printStackTrace();
}
return null;
}
The bean must be declared in the faces-config.xml or the managed-bean.xml file.
Styling Gantt chart data with CSS
After you set the data source, you can customize the way it is displayed. You can use Cascading Style Sheets (CSS) to style your data. CSS can be applied with a styleSheets attribute:
<jvgf:ganttView id="gantt" [...] styleSheets="data/gantt.css" />
The CSS file must be present in the data directory of the Web application. The style sheet file specification can also be a value binding, that is, a value provided by a bean.
Styling chart data with CSS
After you set the data source, you can customize the way it is displayed. You can use Cascading Style Sheets (CSS) to style your data. CSS can be applied with a styleSheets attribute:
<jvcf:chartView id="chart5" [...] styleSheets="data/styleSheet.css" />
The CSS file must be present in the data directory of the Web application. The style sheet file specification can also be a value binding, that is, a value provided by a bean.
Installing interactors in a Gantt chart
You can now install interactors in the Gantt chart to interact with it. For example, install a scroll interactor in the table and sheet views:
<jvgf:sheetScrollInteractor id="sheetScroll" />
<jvgf:tableScrollInteractor id="tableScroll" />
<jvgf:ganttView tableInteractorId="tableScroll"
sheetInteractorId="sheetScroll"/>
Different interactors can be installed in the table and the sheet views. For example, you can install a row expand or collapse interactor on the table view and a scroll interactor in the sheet view.
Installing interactors in a chart
You can install interactors in the chart to allow interaction with the chart. For example, install a zoom interactor:
<jvcf:chartView [...] interactorId="zoom" />
<jvcf:chartZoomInteractor id="zoom" />
You can zoom on the chart by clicking and dragging a rectangle. By default, the zoom interactor only zooms along the x-axis. To zoom the chart freely or to constrain it along the y-axis, use the
XZoomAllowed and
YZoomAllowed attributes. You can also customize the appearance of the zoom interactor rectangle by using the
lineWidth and
lineColor attributes. A pan interactor is also available to scroll a
chartView. A message box component can also be used to display messages originating from interactors and other components.
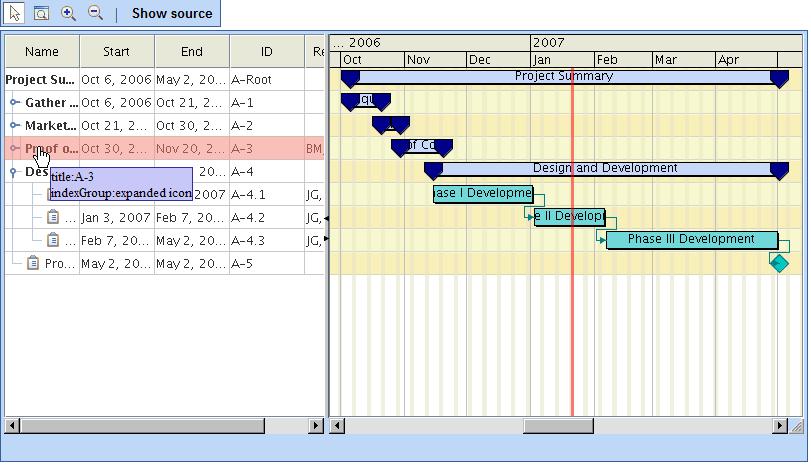
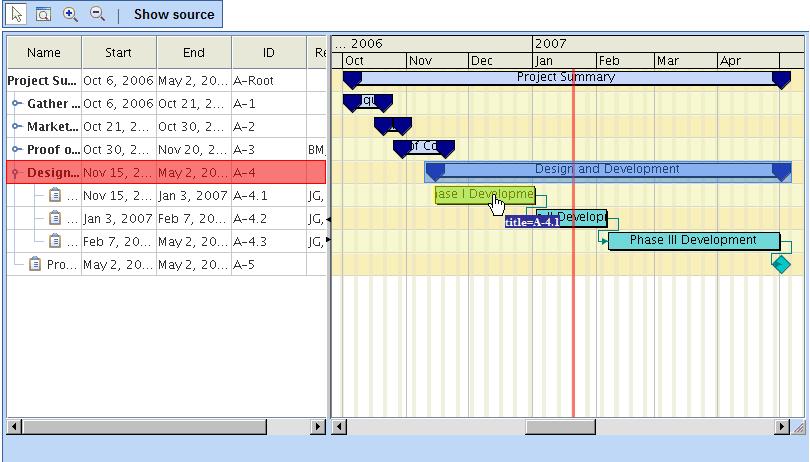
Select interactor
The select interactor allows you to:
select activities, resources, reservations or constraints, either in the Gantt table or in the Gantt sheet,
move activities and reservations in the Gantt sheet.
These operations occur without performing a full refresh of the page.
To define select interactors for the Gantt table and Gantt sheet use the following tags:
<jvgf:selectInteractor id="tableSelect">
<jvgf:selectInteractor id="sheetSelect">
To set them on a view, use the following code:
<jvgf:ganttView id="thegantt"
[...]
tableInteractorId="tableSelect"
sheetInteractorId="sheetSelect">
NOTE If you just want to trigger a server-side action when an object is clicked, use the nodeSelectInteractor instead.
Moving the selected items
The select interactor allows you to move the selection when:
The
moveAllowed property of the interactor is set to
true (default value).
The server-side object is movable. By default, activities and reservations are movable. Resources and constraints cannot be moved.
Configuring the rendering of the selection
The way the selection is performed and displayed can be customized on the ganttView tag by using a selection manager facet as follows:
<jvgf:ganttView id="thegantt"
tableInteractorId="tableSelect"
sheetInteractorId="sheetSelect">
<facet name="tableSelectionManager">
<jvgf:selectionManager imageMode="false" [...] />
</facet>
<facet name="sheetSelectionManager">
<jvgf:selectionManager imageMode="false" [...] />
</facet>
</jvgf:ganttView>
The selection manager has two display modes:
Image mode (default)
The image is refreshed after each selection. A new image is requested from the server at each selection which allows the client to get attractive selection graphics.
Regular mode
Rectangles representing the selection are displayed on top of the view. The round-trip to the server is minimal; it does not require a new image to be generated and therefore the response time is shorter but the selection feedback is limited to a selection rectangle.
Other parameters can be configured on the selection manager to specify the line width, the color of the selection rectangle used in regular selection mode, or to define whether the selection rectangles are filled or hollow.
<jvgf:selectionManager lineWidth="1" lineColor="orange" fillOn="true"/>
The selection must be configured separately for the Gantt sheet and Gantt table by using the corresponding sheetSelectionManager and tableSelectionManager facets.
Listening for changes to the selection
To register a listener that will be called when the selection changes use the following code:
<jvgf:selectionManager […]
onSelectionChanged="displayProperties(selection)" />
The onSelectionChanged attribute value is a JavaScript™ code that is executed when the selection has changed. The execution context defines the variable selection, which stores the current selection as an array.
The JavaScript code can be a function as follows:
// Display the identifier and object type of all the selected objects.
function displayProperties(selection) {
for (var i = 0; i < selection.length; i++) {
alert(selection[i].getID()+" "+selection[i].getObjectType());
}
}
The possible values for the objectType property are activity, constraint, reservation, and resource.
The value of the property ID for activities and resources is the same as the property ID of IlvActivity and IlvResource in the IlvGanttModel. Constraints and reservations have no such property in the IlvGanttModel; the value of their property ID is constructed from the identifiers of the activities and resources they relate to.
NOTE >> You may set a listener and a property accessor on both the tableSelectionManager and the sheetSelectionManager, but this is not required nor always useful. A selection manager handles only objects available in the corresponding component.
Therefore, in a ganttView the selection manager for the Gantt table handles only activities; the selection manager for the Gantt sheet handles both activities and constraints. In this case, listening to changes in the selection only through the sheetSelectionManager fits most purposes.
In a scheduleView the selection manager for the Gantt table handles only resources; the selection manager for the Gantt sheet handles only reservations. Depending on your needs you may want to listen to changes in the selection for both the sheetSelectionManager and tableSelectionManager.
Retrieving and setting properties of selected objects
Besides the ID and objectType properties of the selected object, you might want to retrieve the properties of the selected objects in the JViews Gantt data model. This can be done by configuring a property accessor on the selection manager used to handle the changes in the selection:
<jvgf:selectionManager
propertyAccessor="{#serverBean.propertyAccessor}" [...] />
with:
public class ServerBean {
private IlvFacesGanttPropertyAccessor accessor =
new IlvFacesGanttPropertyAccessor();
public IlvFacesGanttPropertyAccessor getPropertyAccessor() {
return accessor;
}
}
The IlvFacesGanttPropertyAccessor contains several methods that can either be called or redefined to configure or specialize the way it gives access to model properties.
Once the property accessor is defined, you can access the properties of the selected objects in a JavaScript selection listener.
// Display properties of all the selected objects.
function displayProperties(selection) {
for (var i = 0; i < selection.length; i++) {
var propertiesNames = selection[i].getObjectPropertyNames();
for (var j = 0; j < propertiesNames.length; j++)
alert(selection[i].getObjectProperty(propertiesNames[j]));
}
}
NOTE In image mode the mechanism to retrieve properties is not active by default. To activate it, you must force an additional request to the server by setting the selectionManager attribute forceUpdateProperties to true. In regular mode the properties are available without any overhead.
You can also change property values on the client and commit these changes to the server-side model. To do this, first set the ganttView as editable:
<jvgf:ganttView editable="true" [...] />
Then, to change property values and commit the changes to the server:
// Modify a property on the first selected object in the Gantt sheet.
thegantt.getSheetSelectionManager().getSelection()[0].setObjectProperty(
"propertyName",
"propertyValue");
// [Other modifications]
// Commit the changes to the server.
thegantt.getSheetSelectionManager().commitSelectionProperties(true, oncompleted, onfailed);
In the example:
oncompleted is a JavaScript function that is called when the server has completed the changes to handle errors that may have occurred while setting the new values. The parameter of the
oncompleted function is an array of
IlvSelectionPropertiesError objects that describe the errors that occurred while setting the changed values.
onfailed is a JavaScript function that is called when the commit could not occur due to network problems.
A property value must be either a JavaScript String or null. For more information on property values see
Predefined properties of Gantt data model objects and
User-defined properties of Gantt data model objects. For information on marshalling or unmarshalling the property values, see
Marshalling and unmarshalling property values.
Marshalling and unmarshalling property values
The property values are exchanged between the server and the client as String values and may also be null.
The server uses
IlvConvert to convert model object property values to String and from a string back to object properties. The following table lists the types specific to
JViews Gantt for which converters are installed by default.
Converters registered for marshalling or unmarshalling properties
Type | Converter |
java.util.Date | Uses an ilog.views.util.beans.editor.IlvDatePropertyEditor |
ilog.views.gantt.IlvConstraintType | Uses an ilog.views.gantt.beans.editor.IlvConstraintTypeEditor |
ilog.views.gantt.IlvDuration | Uses an ilog.views.gantt.beans.editor.IlvDurationEditor |
Refer to ilog.views.util.convert.IlvConvert for information on how to register a converter for a specific Java™ type. Note that you can register either a java.beans.PropertyEditor to handle the conversion to and from String or two instances of IlvConverter, one to convert from the value type to String and one to convert from String to the value type.
On the client side, no converter is provided. The client is responsible for making sure that the property values sent to the server are valid String values or null, such that they can be unmarshalled by the server-side conversion mechanism. The server ignores property values that it cannot unmarshall and notifies the client of the error using the oncompleted handler that is defined when commitSelectionProperties is called.
Predefined properties of Gantt data model objects
The following table lists the predefined objects of the Gantt data model, their properties, their server-side Java type, and the corresponding client-side values.
Predefined Gantt data model objects and related properties
Object Type | Property Name | Server-side Type | Client-side Value |
activity | endTime | java.util.Date | String representing the number of milliseconds elapsed since 1970-01-01 00:00:00 GMT |
| id | String | Same as the server-side value. |
| name | String | Same as the server-side value. |
| startTime | java.util.Date | See endTime |
resource | id | String | Same as the server-side value. |
| name | String | Same as the server-side value. |
| quantity | Float | String value |
constraint | constraintType | ilog.views.gantt. IlvConstraintType | Possible values: "End-End", "End-Start", "Start-End", "Start-Start". |
| fromActivity | ilog.views.gantt. IlvActivity | ID of the IlvActivity |
| toActivity | ilog.views.gantt. IlvActivity | ID of the IlvActivity |
reservation | activity | ilog.views.gantt. IlvActivity | ID of the IlvActivity |
| resource | ilog.views.gantt. IlvResource | ID of the IlvResource |
On the server, values of type java.util.Date are converted to String and back using the ilog.views.util.beans.editor.IlvDatePropertyEditor. You can create the corresponding JavaScript Date object on the client using the following JavaScript code:
var date = (value == null) ? null : new Date(parseInt(value));
Conversely, to create the property value suitable for committing to the server, use the following JavaScript code:
var value = (date == null) ? null : date.valueOf().toString();
User-defined properties of Gantt data model objects
Gantt data model objects that implement IlvUserPropertyHolder may contain user-defined properties. To handle a user-defined property properly on the server, you must:
2. Register the type of the property value in your ilog.views.gantt.faces.dhtml.component.IlvFacesGanttPropertyAccessor, as follows:
public class ServerBean {
private IlvFacesGanttPropertyAccessor accessor;
public ServerBean() {
accessor = new IlvFacesGanttPropertyAccessor();
// The user defined property 'myProperty' on activities,
// is of type MyPropertyType.
accessor.registerType(IlvActivity.class,
"myProperty",
MyPropertyType.class);
}
public IlvFacesGanttPropertyAccessor getPropertyAccessor() {
return accessor;
}
}
By default, all user-defined properties are exported to the client and are settable. You can customize this behavior by extending IlvFacesGanttPropertyAccessor and redefining one or all of the methods getPropertyNames(), acceptProperty(), acceptGetProperty(), and acceptSetProperty().
Selecting an object by its identifier
Objects can be selected by their identifiers with the JavaScript method
selectById.
The object identifiers are controlled by the
IlvGanttSelectionSupport.IdentifierFactory set on
IlvGanttSelectionSupport.
The identifiers are built by the default factory implementation:
IlvActivity, identifier of the activity as returned by
getID().
IlvConstraint, identifier of the
from and
to activities, which are separated by a slash; for example, a constraint from the activity
A-1 to the activity
A-2 gets the identifier
A-1/A-2.
IlvResource, identifier of the resource as returned by
getID().
IlvReservation, identifier of the activity and resource, which are separated by a slash; for example, a reservation of the resource
R-1 for the activity
A-1 gets the identifier
A-1/R-1.
The selectable type of object depends on the type of hierarchy chart displayed:
Gantt chart: Only activities and constraints can be selected.
Schedule chart: Only resources and reservations can be selected.
For example, you can select one activity in a Gantt chart as follows:
thegantt.getTableView().getSelectionManager().selectById("A-1", "activity");
This method call deselects the objects currently selected and selects the activity with the identifier A-1. You can extend or reduce the selection by selecting or deselecting an activity as follows:
thegantt.getTableView().getSelectionManager().selectById("A-1", "activity",
true);
This method call keeps the existing selection and selects the object with the identifier A-1 if it is not already selected. Otherwise, it will deselect it.
Clear the selection
To clear the selection use the JavaScript method
deselectAll.
For example:
thegantt.getTableView().getSelectionManager().deselectAll();
Resize activity interactor
The resize activity interactor allows you to resize a selected activity. Because this interactor works together with the select interactor, an interactor group consisting of both these interactors must be defined.
To define one object, use the following tag:
<jvgf:resizeActivityInteractor id="resize"/>
The following code example shows how you can set the object on the Gantt view:
<jvgf:selectInteractor id="sheetSelect" />
<jvgf:resizeActivityInteractor id="resizeInteractor"/>
<jv:interactorGroup id="sheetGroup" interactors="sheetSelect resizeInteractor" />
<jvgf:ganttView id="gantt" sheetInteractorId="sheetGroup" project="/data/gantt.igpr"
style="width:800px;height:400px" imageFormat="PNG"
tableInteractorId="tableGroup" sheetInteractorId="sheetGroup"
messageBoxId="messages" waitingImage="images/wait.gif"
resizable="true" editable="true">/>
In the interactorGroup definition the values of the attribute interactors must be listed in order with selectSheet preceding resizeInteractor. This order is necessary because the resize interactor depends on the select sheet interactor.
Using Hitmap technology
Describes Hitmap technology and its customization.
Provides an overview of the Hitmap technology for JViews Gantt.
Describes how to use the tooltip interactor to show customized tooltips when moving the mouse over graphic objects.
Describes how to use the highlight interactor to highlight graphic objects when moving the mouse over them.
Explains how to use multiple interactors at the same time.
Describes the customization of Hitmap information to generate specific requests.
The Hitmap technology
When you use the tooltip interactor, the highlight interactor or the cursorChange interactor, JViews Gantt requests Hitmap information automatically.
Hitmap information is generated for Gantt tables and Gantt sheets. Hitmap requests for Gantt tables and Gantt sheets are separate.
The default implementation can generate Hitmaps for Gantt activities, time indicators, Gantt links and rows of Gantt tables.
To enable
JViews Gantt to support the Hitmap feature, you can use the
IlvGanttHitmapSupport class on the server side. An instance of this
IlvGanttHitmapSupport class will be created lazily during Hitmap request. The Hitmap is generated on demand which means that it will be generated only when the current interactor of the view needs it. The Hitmap request is sent after the image is loaded.
To enable the JViews Gantt view component to perform Hitmap requests, you must add an interactor that will create the Hitmap for the view component (for example, the tooltip interactor, highlight interactor and so on). For example, in the JSP page, you can add the following code:
<jvf:highlightInteractor id="tableHighlight" color="#ff8877" />
<jvf:highlightInteractor id="sheetHighlight" color="#ffff00" />
<jvgf:ganttView id="gantt" chart="#{ganttBean.gantt}"
tableInteractorId="tableHighlight" sheetInteractorId="sheetHighlight"
... />
If the default Hitmap generation does not satisfy your requirements, you can customize it. You also have further options for Hitmap generation using the methods
setSheetHitmapRunnable and
setTableHitmapRunnable provided in the class
IlvGanttHitmapSupport. For more details, see the sample
<installdir> /jviews-gantt/samples/jsf-gantt-editing.
Tooltip interactor
The tooltip interactor allows you to show customized tooltips when moving the mouse over graphic objects. Using Hitmap technology, the tooltip can be constructed and displayed on the client side without a round-trip to the server.
JViews provides a JavaServer™ Faces (JSF) component for this interactor. To use the tooltip interactor you must first insert the tooltip interactor tag into your JSF page.
To define one object, use the following tag:
<jvf:tooltipInteractor id="tableTooltipInteractor"/>
<jvf:tooltipInteractor id="sheetTooltipInteractor"/>
You can use the interactor as follows:
<jvgf:ganttView id="viewId" tableInteractorId="tableTooltipInteractor" sheetInteractorId="sheetTooltipInteractor"/>
Example Gantt chart with tooltip
You might want to have both the pan interactor and the tooltip interactor working at the same time. The interactor group is designed for this purpose.
You can make two interactors work together as follows:
<jvgf:sheetScrollInteractor id="sheetScroll" />
<jvgf:tableScrollInteractor id="tableScroll" />
<jvf:tooltipInteractor id="tableTooltip"/>
<jvf:tooltipInteractor id="sheetTooltip"/>
<jv:interactorGroup id="tablePanAndtooltip"interactors="tableScroll tableTooltip" />
<jv:interactorGroup id="sheetPanAndTooltip"interactors="sheetScroll sheetTooltip " />
<jvgf:ganttView id="gantt" chart="#{ganttBean.gantt}"
style="width:800px;height:400px"
imageFormat="PNG"tableInteractorId="tablePanAndtooltip"
sheetInteractorId= "sheetPanAndTooltip" ... />
Using the tooltip template
The tooltip template allows easier tooltip styling with enhanced performance. To use the tooltip template, you must specify the value of the template attribute for the tooltip interactor, as shown in the following example.
<jvf:tooltipInteractor id="tooltipInteractor" template="tooltip_callback"/>
In order to work with the tooltip template feature, the tooltip data for the Hitmap information that you generated on the server must be in a valid JSON format. For example:
jviews_hitInfos={
tooltip:[,
{'properties':'values','name':'node1'},
{'properties':'values','implementation':'workflow','name':'Graphics Framework','type':'workflow'},
{'properties':'values','name':'node2'},
{'properties':'values','name':'node4'}
]}
For more information about Hitmap information customization, see
Customizing Hitmap information.
There are two types of tooltip template: the HTML template and the JavaScript callback.
Using the HTML template
To use the HTML template, you can create the template as shown in the following example.
<jvf:tooltipInteractor id="tooltipInteractor"
template="<div style='background:#333399;font-size:70%;font-weight:bold;color:white;'>properties=<%properties%></div>" />
In the preceding code example, <%properties%> corresponds to the key of your JSON object generated from the server. This will be replaced by the value of the key of your JSON object when the tooltip is displayed.
Using the JavaScript callback
To use the JavaScript callback, you need to write the JavaScript callback to show the tooltip which will be invoked when the tooltip is displayed.
When writing your own JavaScript callback, there are two parameters for you to use in your callback function:
Name | Description |
view | The view object. |
index | The index of the current graphic element. |
The following code is a JavaScript callback sample which generates a dynamic tooltip.
<script type="text/javascript">
function tooltip_callback(view, index) {
var message = view.getHitInfos().tooltip[index]; //retrieve the tooltip message of current index
var msg = '<table class=\'jviews_tooltip\'>';
for(key in message){
msg += '<tr class=\'jviews_tooltip_title\'><td>';
msg += key;
msg += '</td><td>' + message[key] + '</td></tr>';
}
msg += '</table>';
return msg;
}
</script>
After creating the JavaScript callback, you can write the following code to invoke it with the tooltip interactor:
<jvf:tooltipInteractor id="tooltipInteractor" template="tooltip_callback" />
Highlight interactor
The highlight interactor allows you to highlight graphic objects when moving the mouse over them. Using Hitmap technology, the highlighting effect can be constructed and displayed on the client side without a round-trip to the server.
JViews provides a JavaServer™ Faces (JSF) component for this interactor. To use the highlight interactor you must first insert the highlight interactor tag into your JSF page.
To define one object, use the following tag:
<%@ taglib uri="http://www.ilog.com/jviews/tlds/jviews-framework-faces.tld" prefix="jvf" %>
<jvf:highlightInteractor id="sheetHighlight" color="#ffff00" />
You can use the interactor as follows:
<%@ taglib uri="http://www.ilog.com/jviews/tlds/jviews-gantt-faces.tld" prefix="jvcf"%>
<jvcf:ganttView id="viewID" sheetInteractorId="sheetHighlight"/>
The highlight effects are visible when you move your mouse over the graphic objects.
Example Gantt chart with highlighting displayed
You might want to have both the scroll interactor and the highlight interactor working at the same time. The interactor group is designed for this purpose.
You can make two interactors work together as follows:
<jvf:highlightInteractor id="sheetHighlight" color="#ffff00" />
<jvgf:sheetScrollInteractor id="sheetScroll" />
<jv:interactorGroup id="sheetGroup"
interactors="sheetHighlight sheetScroll"/>
<jvgf:ganttView id="gantt" chart="#{ganttBean.gantt}"
style="width:800px;height:400px" imageFormat="PNG"
sheetInteractorId="sheetGroup" ... />
Tips for using multiple interactors
You can make some interactors work together at the same time.
The following example shows how to make several interactors work together:
<jvgf:rowExpandCollapseInteractor id="tableExpand" />
<jvgf:rowExpandCollapseInteractor id="sheetExpand" />
<jvgf:sheetScrollInteractor id="sheetScroll" />
<jvgf:tableScrollInteractor id="tableScroll" />
<jvgf:selectInteractor id="sheetSelect" />
<jvgf:selectInteractor id="tableSelect" />
<jv:cursorChangeInteractor id="cursorChange"/>
<jv:cursorChangeInteractor id="cursorChange2"/>
<jvf:tooltipInteractor id="tableTooltip"/>
<jvf:tooltipInteractor id="sheetTooltip"/>
<jvf:highlightInteractor id="tableHighlight" color="#ff8877" />
<jvf:highlightInteractor id="sheetHighlight" color="#ffff00" />
<jvgf:resizeActivityInteractor id="resizeInteractor"/>
<jv:interactorGroup id="tableGroup"
interactors="tableSelect tableHighlight tableScroll tableExpand tableTooltip cursorChange" />
<jv:interactorGroup id="sheetGroup"
interactors="sheetSelect sheetScroll sheetTooltip sheetHighlight sheetExpand resizeInteractor cursorChange2" />
<jvgf:ganttView id="gantt" chart="#{ganttBean.gantt}"
style="width:800px;height:400px" imageFormat="PNG" tableInteractorId="tableGroup" sheetInteractorId="sheetGroup"
messageBoxId="messages" waitingImage="images/wait.gif" resizable="true" editable="true" accessible="true"
sheetHScrollable="true" sheetVScrollable="true" splitterArrowsVisible="true"/>
NOTE You cannot combine certain interactors in this way, because some interactors expect and consume the same event. You can try to change the order of the interactors in the group in order to avoid conflicts. However, this technique has its limitations. You might arrive at a situation where you cannot place some sets of interactors in the same group because of conflicts.
Customizing Hitmap information
You can customize Hitmap information to generate specific information from the server side. For example, to highlight a group element or change the cursor when you move the mouse over a certain type of element..
The server side code will generate Hitmap information in JSON format for the Hitmap request.
On the server side you must do the following:
Your servlet must be a subclass of
IlvGanttServlet or of one of its existing subclasses, for example
IlvFacesGanttServlet.
For JSF, configure the servlet using the servlet attribute in the JSF view component.
//Configure the servlet in the web.xml file.
<servlet>
<servlet-name>GanttEditingServlet</servlet-name>
<servlet-class>demo.editing.GanttEditingServlet</servlet-class>
</servlet>
<servlet-mapping>
<servlet-name>GanttEditingServlet</servlet-name>
<url-pattern>/GanttEditingServlet</url-pattern>
</servlet-mapping>
Set the servlet attribute of JSF view component. For example:
<jvgf:ganttView id="chart" servlet="GanttEditingServlet" ... />
You must extend
IlvHitmapDefinition. For example:
package yourpackage;
public class MyHitmapDefinition extends IlvHitmapDefinition {
}
Then add, for example, the following code in the web.xml file and add the hitmap init-param for your servlet.
<servlet-name>GanttEditingServlet</servlet-name>
<servlet-class>demo.editing.GanttEditingServlet</servlet-class>
<init-param>
<param-name>hitmap</param-name>
<param-value>yourpackage.MyHitmapDefinition</param-value>
</init-param>
</servlet>
Connecting a Gantt chart to a message box
To connect a message box to a ganttView, use the following code:
<jvgf:ganttChartView [...] messageBoxId="messageBox"/>
<jv:messageBox id="messageBox" [...] />
The messages issued are displayed in the message box.
Connecting a chart view to a message box
To connect a message box to a
chartView, use the following code:
<jvcf:chartView [...] messageBoxId="messageBox"/>
<jv:messageBox id="messageBox" [...] />
The messages issued are now displayed in the message box.
Adding a pop-up menu
The pop-up menu component allows you to display a static or contextual menu when the application user right-clicks in the view.
For use of menus in Facelets environments, see also
Supporting Facelets and Trinidad.
Pop-up menu tag in the view tag
Since the pop-up menu is attached to a view, its JSP™ tag must be enclosed in the JSP tag of the view.
The pop-up menu can be contextual or static. The following examples show contextual pop-up menu tags used in the view tag.
The following code is for JViews Gantt.
<jvgf:ganttView [...] >
<jvgf:ganttContextualMenu [...]/>
</jvgf:ganttView>
The following code is for JViews Charts.
<jvcf:chartView [...]>
<jvcf:chartContextualMenu [...]/>
</jvcf:chartView/>
Static pop-up menu
The pop-up menu is static and fully on the client side.
To define a menu and menu items in
JViews Gantt use the
menu,
menuItem, and
menuSeparator tags as in the following example.
<jvgf:ganttContextualMenu>
<jv:menu label="root">
<jv:menuItem label="Zoom ..."
onclick="zoomButton.doClick()"
image="images/zoomrect.gif" />
<jv:menuItem label="Pan ..."
onclick="panButton.doClick()"
image="images/pan.gif"/>
<jv:menuSeparator/>
<jv:menuItem label="Zoom In"
onclick="viewID.zoomIn()"
image="images/zoom.gif" />
<jv:menuItem label="Zoom Out"
onclick="viewID.zoomOut()"
image="images/unzoom.gif"/>
<jv:menuItem label="Zoom to Fit"
onclick="viewID.zoomToFit()"
image="images/zoomfit.gif"/>
<jv:menuSeparator/>
<jv:menuItem label="Select"
actionListener="#{ganttBean.action}"
image="images/arrow.gif"
invocationContext="IMAGE_SERVLET_CONTEXT" />
</jv:menu>
</jvgf:ganttContextualMenu>
To define a menu and menu items in
JViews Charts use the
menu,
menuItem, and
menuSeparator tags as in the following example.
<jvcf:chartContextualMenu>
<jv:menu label="root">
<jv:menuItem label="Zoom ..."
onclick="zoomButton.doClick()"
image="images/zoomrect.gif" />
<jv:menuItem label="Pan ..."
onclick="panButton.doClick()"
image="images/pan.gif"/>
<jv:menuSeparator/>
<jv:menuItem label="Zoom In"
onclick="viewID.zoomInX()"
image="images/zoom.gif" />
<jv:menuItem label="Zoom Out"
onclick="viewID.zoomOutX()"
image="images/unzoom.gif"/>
<jv:menuItem label="Zoom to Fit"
onclick="viewID.zoomToFit()"
image="images/zoomfit.gif"/>
<jv:menuSeparator/>
<jv:menuItem label="Select"
actionListener="#{chartBean.action}"
image="images/arrow.gif"
invocationContext="IMAGE_SERVLET_CONTEXT" />
</jv:menu>
</jvcf:chartContextualMenu>
Contextual pop-up menu
The pop-up menu is dynamically generated on the server side by a menu factory depending on:
The
menuModelId property of the current interactor set on the view.
The object selected when the application user triggers the pop-up menu.
JViews Gantt
To specify the factory use the
factory or the
factoryClass attribute of the contextual pop-up menu tag.
<jvgf:ganttContextualMenu factory="#{bean.factory}" />
<jvgf:ganttContextualMenu factoryClass="com.xyz.demo.DemoFactory" />
JViews Charts
To specify the factory use the
factory or the
factoryClass attribute of the contextual pop-up menu tag.
<jvcf:chartContextualMenu factory="#{bean.factory}" />
<jvcf:chartContextualMenu factoryClass="com.xyz.demo.DemoFactory" />
The factory must implement the
IlvMenuFactory interface.
Styling the pop-up menu
The pop-up menu is stylable by setting the following pop-up menu properties to a CSS class name:
ItemStyleClass: the base CSS class name applied to a menu item.
itemHighlightedStyleClass: the style applied over the base style when the cursor is over the item.
itemDisabledStyleClass: the style applied over the base style when the cursor is disabled.
The following set of code examples shows CSS styling in a pop-up menu.
<html>
[...]
<style>
.menuItem {
background: #21bdbd;
color: black;
font-family: sans-serif;
font-size: 12px;
}
.menuItemHighlighted {
background: #057879;
color: white;
}
.menuItemDisabled {
background: #EEEEEE;
font-style: italic;
color: black;
}
</style>
[...]
Then continue with the code for a specific JViews JSF component.
For JViews Gantt
[...]
<jvgf:ganttContextualMenu itemStyleClass="menuItem"
itemHighlightedStyleClass="menuItemHighlighted"
itemDisabledStyleClass="menuItemDisabled" />
For JViews Charts
[...]
<jvcf:chartContextualMenu itemStyleClass="menuItem"
itemHighlightedStyleClass="menuItemHighlighted"
itemDisabledStyleClass="menuItemDisabled" />
Managing server action listeners
Install listeners to send notifications for actions executed on, the server side, such as when a graphic object is clicked, selected, or deleted.
To implement and configure a server action listener:
1. Create a servlet that extends a subclass of
IlvGanttServlet, or that uses the
IlvGanttServlet class itself. The
actionName attribute is the action type (such as clicked or delete), and the
actionListener attribute is the class of the server action listener.
2. Configure the server-side action listeners either by editing the web.xml file or by using annotations.
Intercept interactors
Install listeners to send notifications for client-side actions, such as when a graphic object is clicked, selected, dragged-and-dropped, zoomed, or deleted.
To implement and configure an intercept interactor:
1. Import the jviews-faces tag library by adding the following line to the JSP page:
<%@ taglib uri="http://www.ilog.com/jviews/tlds/jviews-faces.tld" prefix="jv"%>
2. Script the interceptinteractor. For example, to capture a zooming action, enter these lines in the JSP page:
<jvcf:chartZoomInteractor id="zoom" message="#{bundle.zoomMessage}" menuModelId="zoom" />
<jv:interceptInteractor beforeHandler="beforeZoom" interactor="zoom" eventType="mouseUp" id="zoomIntercept"/>
This adds beforeZoom as a JavaScript function, and calls it before the mouseUp event type of the zoom interactor.
Multipurpose interactors
As only one interactor can be installed in the view component, you can use an interactor group to combine multiple interactors to make them work simultaneously for the view. Not all the interactors, however, can work together. Some of them can work together based on the Hitmap technology. Some of them conflict with each other because they use the same mouse event to perform the operation. The following table shows interactors which conflict which other and therefore cannot be used simultaneously.
Interactors that cannot be used simultaneously |
jvcf:chartPanInteractor | jvcf:chartZoomInteractor | | |
jvf:objectSelectRectInteractor | jvf:panInteractor | jvf:zoomInteractor | jvdf:nodeOrLinkSelectRectInteractor |
You must add code, as shown in the following example, to the JSP page to use interactors for multiple purposes.
<jvf:tooltipInteractor id="tooltipInteractor" />
<jvf:highlightInteractor id="highlightInteractor" color="#0088ee" />
<jv:interactorGroup id="multiInteractors"
interactors="highlightInteractor tooltipInteractor ..." />
<jvf:view id="view" interactorId="multiInteractors" ... />
Managing the session expiration
The user session expires after a certain period of inactivity, usually defined in the Web deployment descriptor.
JViews components are stored in the HTTP user session. For example, after the user session expires, queries to update the image fail.
The beforeSessionExpirationHandler property allows you to add a JavaScript™ handler that is invoked when the user session is about to expire.
For example, to keep the session alive as long as the browser page is open, use the following code:
In JViews Gantt
<jvgf:view [...]
beforeSessionExpirationHandler="view.getTableView().updateImage();" />
In JViews Charts
<jvcf:view [...] beforeSessionExpirationHandler="view.updateImage();" />
This example shows how to query an image and keep the user session alive.
Note the use of view, the implicit object that represents the view JavaScript proxy. The internal timer is reset only by requests issued by Rogue Wave® JViews objects. If the application implements other requests that do not refresh the image, this timer could be inaccurate. To reset the timer manually, use the following JavaScript code:
viewID.getObject().resetSessionExpirationTimer();
where viewID is the value of the id property of your view component.
NOTE The beforeSessionExpirationHandler is called two minutes before the actual session expiration time.
Copyright © 2018, Rogue Wave Software, Inc. All Rights Reserved.