This section explains how to add a node to the network
diagram, available as project file
network1.idpr. -
If you do not still have the Network example open, open it by clicking File > Open and navigating to the
network1.idprfile. -
Switch to the Diagram Editing mode by clicking the middle icon in the vertical toolbar.
-
Click the node icon in the horizontal toolbar
 .
. -
Click the link between the Paris and Singapore nodes.The Designer splits the link and inserts a new node.
-
Move the new node away to show the links.The link data has been modified appropriately by the Designer.
-
Modify the data of the new node as shown in the Data Properties panel to set the correct name (Tokyo).
-
Enable the link layout by clicking Edit > Options in Style Editing mode and checking the corresponding option. Click OK to continue.
 Inserting a node on an existing linkYou can perform a layout operation to improve the appearance.For example, the following figure shows the network diagram in figure Inserting a node on an existing link after a Layout All Nodes operation,
 .
. -
Click File > Save As to save the revised version and enter the name
network2.
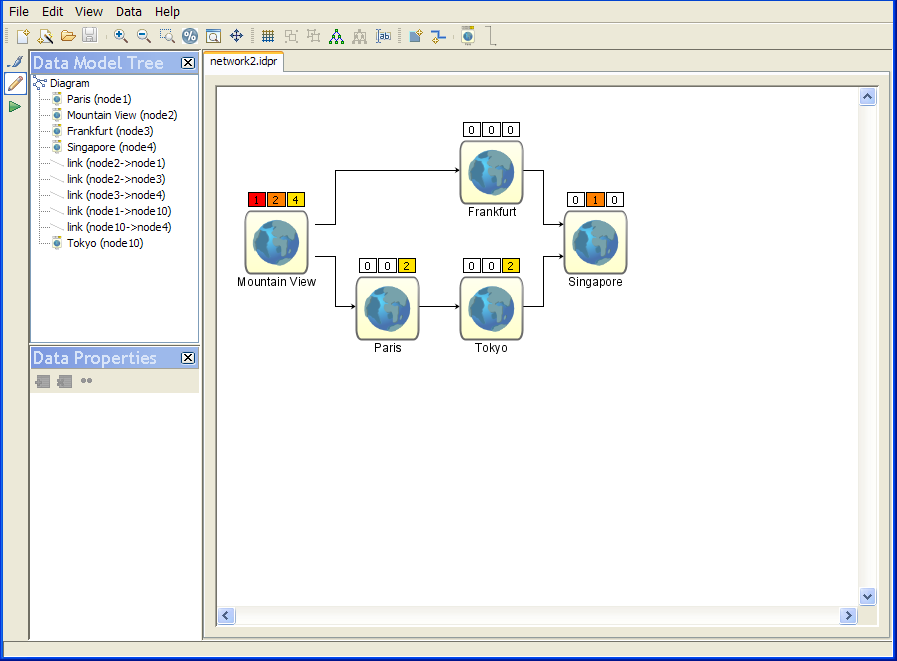
Laying out all nodes after adding a new one