In the Designer, you have the following
printing facilities for the diagram:
- Page setup
- Print preview
- Print (one, all or selected pages)
Print operations
Print operations are available from the File
menu, see the following figure.
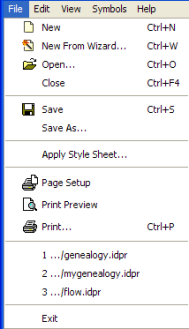
The print options on the File menu of
the Designer
To print the diagram to the default printer from the application,
click the Print button in the Print Preview window or choose File>Print. You can print to a
printer or to file.
Page Setup
The Page Setup window offers extensive
setup facilities, see the following figure.
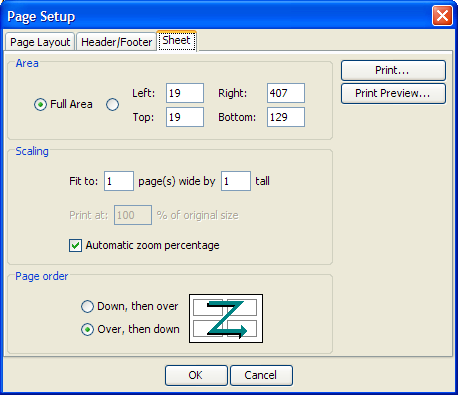
Page Setup facilities
In the Page Layout tab, you can select
Portrait or Landscape and set paper size and margins. The
Designer automatically sets Portrait or Landscape initially
according to the shape of the diagram.
The Headers/Footers tab gives you a choice
of headers and footers and allows you to define a custom Header
and Footer, setting a specific Font, if you want to.
In the Sheet tab, under Scaling, you can split a large diagram
into separate pages for printing, for example, by specifying
Fit to 3 page(s) wide by 2 tall
, to get six pages.
In the Sheet tab, under Page order, you
can specify the order in which the pages are numbered and
printed:
Down, then over: prints top to bottom, so for six pages, it prints 1, 2 down then 3, 4 down then 5, 6 downOver, then down: prints left to right, so for six pages, it prints 1, 2, 3 across and then again 4, 5, 6 across
For each page, under Area, you can print
either the full area or effectively zoom in to print part of the
page by setting left, right, top, and bottom distances from the
edge of the page. These distances are in pixels.
Print Preview
The Print Preview window allows you to
display each page specified in the page setup and view the pages
in the order in which they will be numbered and printed.
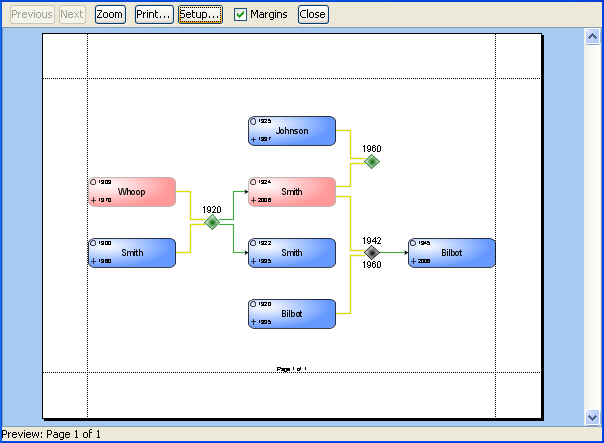
Print Preview: page 1 in a 3x2 setup
with Over Then Down
Note that you will only see the page
numbers if you have specified a header or footer that contains
them.