To enable you to use data sources with other software, you can
export map layers in Shape, GeoTIFF, and KML format to an Oracle® database or to a folder of
your choice.
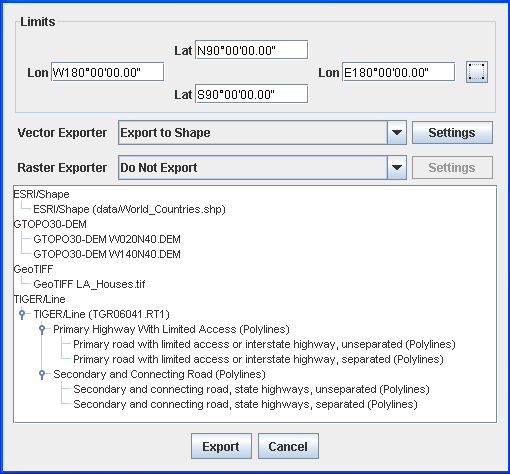
The following figure shows an example of
exporting a map layer in Shape format.
Exporting data sources
To export a data source:
-
Select File>Export to open the Export Map window.
-
Select the area of the map you want to export in the Limits pane. Set the limits manually for the
Lat/Lonproperties or click the button and then
draw a rectangle in the Map View to set the limits.
NoteAll graphical components that intersect with this area will be entirely exported. If an image intersects with the rectangle, the whole image will be exported and will neither be cropped nor resized.
button and then
draw a rectangle in the Map View to set the limits.
NoteAll graphical components that intersect with this area will be entirely exported. If an image intersects with the rectangle, the whole image will be exported and will neither be cropped nor resized. -
Select the Vector Exporter to be used (if any) from the values in the list: Do Not Export, Export to Shape, Export to Oracle, or Export to KML.
-
Select the Raster Exporter to be used (if any) from the values in the list: Do Not Export, Export to GeoTIFF, or Export to KML.
-
The Do Not Export option can be used in the case where you select all the layers in the map window, but want to export only the vector or only the raster data sources.
-
Click the Settings button to open the Choose Shape or GeoTIFF Folder window, or the KML Export File window. Select the folder to which the files must be exported for each of the Exporters and then click Open.The following figure shows an example of the Choose Shape Export Folder window.
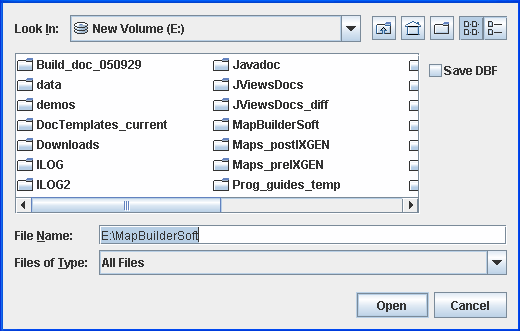 Choose Shape Export Folder windowNoteThe Save DBF check box saves the attributes of each geographic object (for example, those displayed on the map tooltips) in a separate DBF (shape file database) file.
 -
If you select the Export to Oracle option, a message window appears that enables you to connect to the database. Enter the connection parameters, click Connect and then click OK.The following figure shows the message window for connecting to a database.
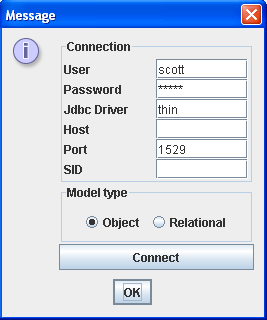 Connecting to the database
 -
Select the layers to export in the Map Layers pane.
-
Click the Export button to export the files to the selected folder(s) or to the database.NoteIf you forget to set the destination folders, the Choose Shape or Choose GeoTIFF export folder window opens up automatically for you to set them. In the case of an Oracle export, the connection dialog box is opened.