Designing for performance
Explains how to improve the performance of data-rich applications by using light symbols.

Gives tips to reduce the memory footprint of symbols.

Shows how to make use of the image list wizard.
Performance guidelines
The applications you have been shown so far in this document are designed for non real-time systems, that is, systems that display a small amount of data which is refreshed infrequently. A Rogue Wave® JViews Dashboard Editor or Rogue Wave JViews Designer application created for this purpose will contain only very few symbols.
Real-time systems deal with massive amounts of data that is updated continually. To handle the data quantity and update frequency, you must create light symbols. Light symbols use the minimum amount of objects, parameters, conditions and interactors necessary to display an understandable message.
Use the following guidelines to create symbols with the smallest memory footprint:

Use as few objects as possible.

Use a static background.

Use light (PNG) images.

Use the visibility option.

Avoid transparency.

Avoid complicated gradients.

Avoid thick lines.

Turn anti-aliasing off.

Turn fraction metrics off.
Rendering operations take up a lot of CPU time. The fastest and lightest symbols are made by changing the visibility setting for a collection of PNG images.
Creating a light alarm symbol using the image list creation wizard
To create an alarm symbol that indicates status:
1. In the Symbol Editor, create a new symbol.
2. Click the Add Image List button.
The Image List Creation wizard opens.
3. 
The Add Image List button
4. Click Next to pass the welcome page.
NOTE Check the Do not show this page next time box so the welcome page is not displayed the next time you use the Image List Creation wizard.
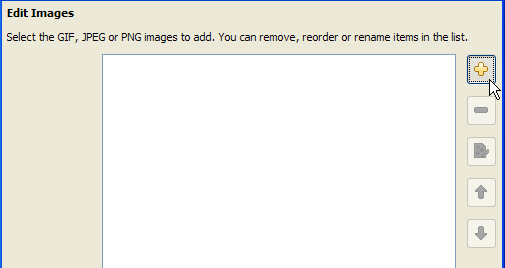
5. In the main dialog, click the plus button to add images.
6. 
Adding images
7. In the Choose Image File browser, navigate to the <installdir>/jviews-diagrammer/bin/symboleditor/data/examples directory.
8. Select the following image files:
 led_circle_green.png
 led_circle_orange.png
 led_circle_red.png
9. Click Open.
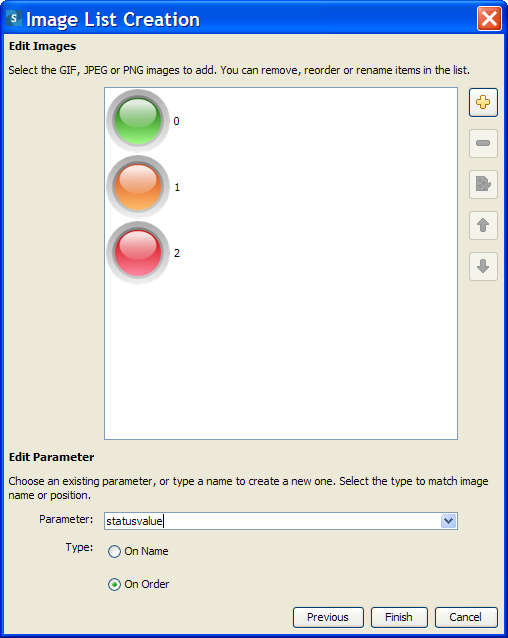
The images are added to the list.
10. Select On order.
11. Create a new parameter by typing statusvalue in the Parameter field.
12. 
Adding a new parameter for the image list
13. Click Finish.
The images, parameter and conditions are added to the symbol.
NOTE The On name option is used to set the visible image using the image name. By default, the image name is the name of the file imported. You can rename each image using the rename button in the Image List Creation wizard.
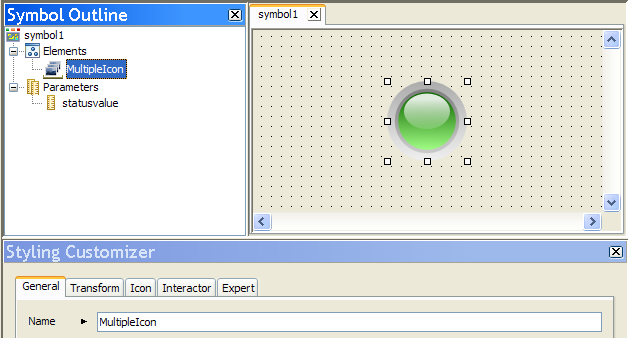
14. Delete the Text and Shape Objects.
The MultipleIcon object is now the base object.
15. 
MultipleIcon as base object
16. Create the following three allowed values on the statusvalue parameter.
Allowed values for the statusvalue parameter
Allowed Value Name | Value |
Good | 0 |
Warning | 1 |
Problem | 2 |
17. Set the default value of statusvalue to good.
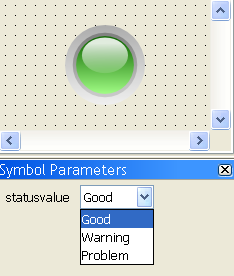
18. Test this symbol by clicking the Preview button.
A light alarm symbol
As the value of statusvalue changes, a different PNG image becomes visible. For example, when statusvalue is equal to Problem, the red image blinks to give an alarm.
Copyright © 2018, Rogue Wave Software, Inc. All Rights Reserved.


