Table widget
Table widgets can display data tables for a Library, IP, IPV, or Saved query. To display a table widget on an object, set an attribute on that object with a specific value.
Creating a table widget in the Widget Editor
The Widget Editor is available on IP and IPV dashboards. It is not available on the Saved query and Library dashboards.
-
Select an IP or IPV, then select Dashboard in the navigation. If this is the first widget, you will see a message about your first widget. If this is not the first widget, select the lock icon to unlock the dashboard. See Widget Editor for more details.
-
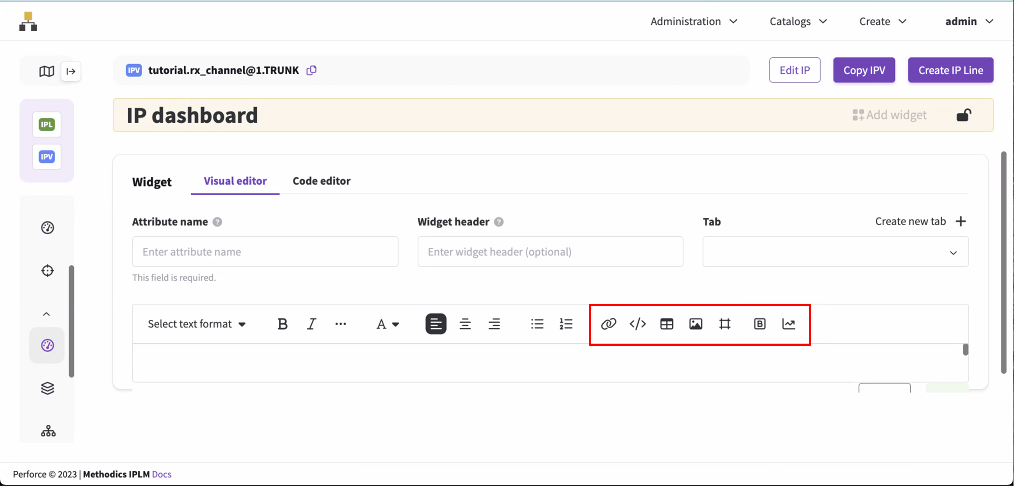
Select Add widget. The visual editor opens.
-
Enter the attribute name. The attribute name stores the widget data in the IPLM database and is not shown on the dashboard. The attribute name is required and cannot be changed after it is created.
.jpg)
-
Optionally, you can enter a widget header. The widget header is shown on the dashboard above the widget in addition to the widget title. You can use markdown formatting to style the widget header. See Using Markdown in text and table widgets.
.jpg)
-
Optionally, you can select an existing tab or create a new tab where the widget will be shown. These custom tabs are displayed across the top of the dashboard.

-
Select the table icon
 above the main text box. The Table Widget Editor opens.
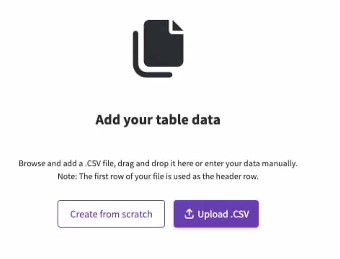
-
Add the table data. You can upload a .CSV file, drag and drop a .CSV file into the editor, or select Create from scratch to enter the data manually.
-
The Create table window opens and shows the data. You can make changes to the data.
-
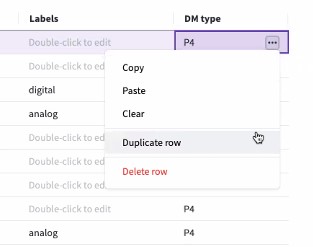
Edit the data by double clicking any cell.
-
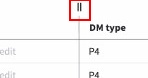
Reorder the columns or rows by dragging and dropping.
-
Insert columns or rows by selecting the insert icon.
-
Copy, Paste, Clear, Duplicate, or Delete the column or row data by using the three dots menu for a column or row.
-
Click and drag to make a selection. Use the three dots menu for the selection to Copy, Paste, Clear, or Delete.

-
-
Select Create table, then select Save.
-
The widget is shown on the dashboard. You can drag the lower right corner of the widget to resize it, or drag and drop the widget to move it. Select the lock icon to lock the dashboard.