Manage users and groups
All users can display lists of users and groups using P4 Admin, but only users with admin or super permissions can make changes.
P4 Server Administration Documentation has details about Access levels required by P4 Server commands and Managing users.
View or edit users and groups
To view all the users and groups that are defined on the P4 Server to which you are connected, select Tools > Administration and click the Users & Groups tab.

To edit a user or group
Right-click the user or group you want to edit and select Edit.
Create a group
Click File > New > Group. In the Group:New dialog box, provide a Description that might be useful in case your organization will have many groups.
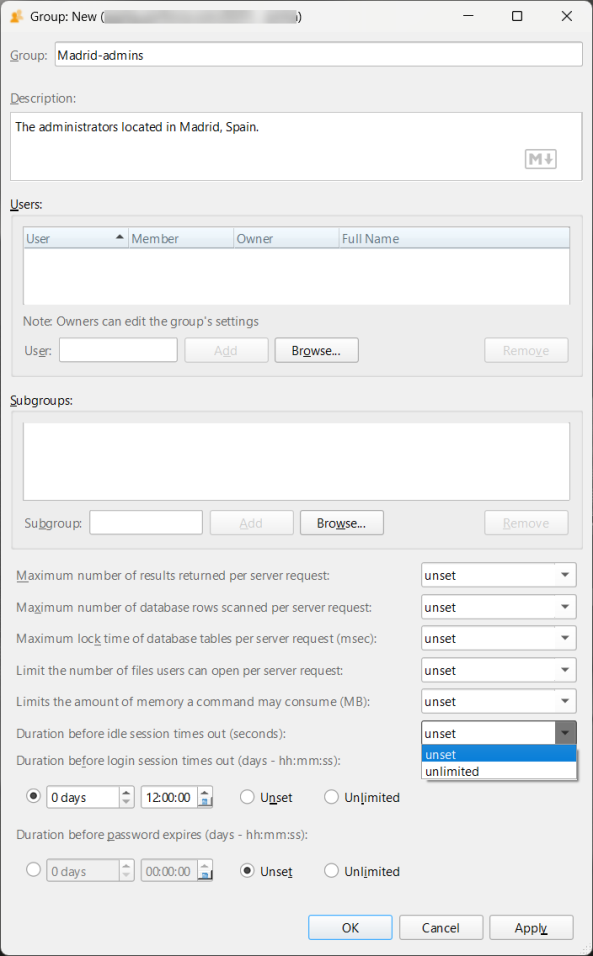
Group settings and limits
You can also set limits on the members of the group, such as how much Server memory a command can use. This limit applies individually to each command issued by each member of the group. For example, if the limit is 1000 MB, any number of users can simultaneously run a command that uses any amount less than 1000 MB, such that in aggregate far more than 1000 MB is used. However, if any member of the group issues a command that exceeds 1000 MB, that particular command is subject to termination. The enforcement depends upon when the Server detects the need to terminate a command, so occasionally a command might temporarily exceed the limit.
If your P4 service is configured for LDAP, you can configure the LDAP fields that appear. When you are done providing values for the new group, click OK.
Idle server timeout
The idle server timeout helps automatically terminate inactive sessions in P4 Admin and P4V, improving server security. The idle server timeout setting specifies the number of seconds after a user's last command before their p4 login ticket expires. Since idle timeout is based on a user’s access time, if the idle timeout value is smaller than the values set for the three server configurables dm.user.accessupdate, dm.user.accessforce, and dm.user.accessmode, the highest value is used to prevent early ticket expiration.
To set the idle server timeout in P4 Admin:
-
Create or edit a group.
-
Set the Duration before idle session times out (seconds): field.
This value determines how long a session can remain idle before it is terminated.
-
Click OK to save your changes.
P4 Admin and P4V send background refresh commands to the P4 Server every 5 minutes by default. At first glance, this might suggest that the server would never consider the session idle.
However:
-
P4 Admin and P4V have their own application-level idle timeout.
-
If there is no user activity (mouse, keyboard, clicks) in the application window:
-
The application stops sending refresh requests after two refresh cycles (10 minutes by default).
-
Once this happens, the server will recognize the session as idle and apply the configured timeout.
-
For example, if the group’s idle timeout is set to 900 seconds (15 minutes), and there's no interaction for 10 minutes, the next 5 minutes of server inactivity will trigger the timeout.
Create a user
- In P4V, select Tools > Administration. P4 Admin opens.
-
Choose File > New > User.
The User dialog box opens.
-
Enter user information as follows. Click OK after making your entries.
User
The P4 Server user name.
Password
The password (if any) required for the user to connect to the server.
Email
The user’s email address.
Full name
The user’s real name.
Job view
(Optional) Criteria specifying which jobs are automatically included on any new changelists created by the user
Example:
User=bruno Status=openFor details, refer to the description of the
p4 jobs-eoption in the P4 CLI Reference.Reviews
Files of interest to the user, specified using depot syntax
When changelists that affect the file are submitted, the user receives email notification of the change. Note that you can also specify files of interest by clicking the Reviews tab.
Groups
Groups to which the user belongs
To add the user to a group, enter the name of the group in the Group field and click Add, or click Browse, select the group, and click OK.
Manage a user or group
Display details about a user
Click that user specification. The details about that user are displayed at the bottom of the Users tab.
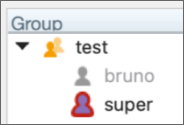
Display a user's group memberships
Expand the user in the Users pane. To display the users in a group, expand the group in the Groups pane.
Add a user to a group
Drag the user from the Users pane to the desired group.
Change a user's password
Right-click the user name and choose Change Password...
Edit a user's group memberships
-
Right-click the user and select Edit User.
The User dialog box is displayed.
- Edit the list displayed in the Group membership field.
See what a user or group can access
To see which areas of the depot tree a user or group can access, right-click the user or group and select Show Permissions. The Permissions tab lets you View permissions for that user or group, and make edits.
To remove a user from a group
Right-click the user in the group and choose Remove From Group.
|
If the user name is dimmed, the user has been removed outside of P4 Admin by using the P4 command line, but the user name has not yet been removed from the group. If you have a subscription to P4 Cloud, the dimmed icon of a user is also used to represent the cloud administrator of that service. See User licenses at About the P4 Admin Home page. |
|
Delete a user
Right-click the user and select Delete User. The dialog box informs you that the user's pending changelists will be reverted and the user's workspace specification will be deleted. You can choose to have the user's shelved files also be deleted.
Search and filter
You can filter users and groups by combining properties, operators, and search strings, or by specifying a date. Filtering on the "Groups" will only affect the top-level items in the hierarchy. All items beneath those will remain unprocessed.
To filter users and groups:
-
In the Users & Groups tab, click the Filter disclosure triangle
 to expand the filter pane.
 -
Select a property from the first drop-down list, depending on whether you're filtering users or groups.
-
From the second drop-down list, choose an operator to define how the filter behaves.
- Enter a string, a comma-separated list of user names, or click Browse... to search for a user. For Date Modified and Date Accessed properties, select a date.
The search results are auto-populated in the bottom pane.
You can add multiple filter rows. Use the following buttons to add or delete filter rows:
- To add filter rows, click the plus
 button.
 - To remove filter rows, click the minus
 button.
Example usage
To search for a user with the name 'anna':
-
Select User from the drop-down.
-
Select the operator contains.
-
Enter the string 'anna'.
The search results will match all users whose names contain Anna, Hannah, and Joanna.