Designing the Dialog Box Using Views Studio
-
Launch Views Studio. For more information on Views Studio, see the Views Studio User’s Manual.
-
Select File > New > Gadget. This will create an empty gadget buffer.
-
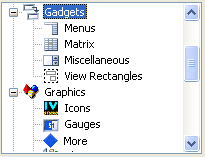
Select the Gadgets item in the Drag and Drop palette:
-
Drag an IlvFrame from the objects palette and drop it into the gadget buffer.
-
Drag an IlvNumberField and set its name to Width. Inspect it and change its default value to 128.
-
Drag another IlvNumberField and set its name to Height. Inspect it and change its default value to 128.
-
Drag two IlvMessageLabel and change their labels; one to Width and the other to Height.
-
Drag an IlvButton and change its label to OK. Also change its callback to apply. This callback is a predefined callback for subclasses of IlvDialog objects. See IlvDialog::apply for more information.
-
Drag an IlvReliefLine to separate the button from the number fields.
-
Arrange the objects as shown in The Sample Dialog Box.
-
Save the file as bmpsize.ilv in the data directory of the Bitmap Editor application.
-
Select File > New > Make Default Application. This is needed to generate the C++ code.
-
Select Code > Panel Class Inspector.
-
Change the class name to BitmapSizeDialog.
-
Change the base class to IlvDialog.
-
Change the directory headers and sources to match the directories of your Bitmap Editor application.
-
Click Apply.
-
Select Code > Generate Panel Class to generate the code.
Two files have been generated: a header file (include/bmpsize.h) and a source file (src/bmpsize.cpp).
-
Quit Views Studio.