Internal Components
This section introduces the three internal components of Data Access:
Palettes Panel
The Palettes panel contains the Data Access gadgets especially designed for Data Access applications and is entirely integrated into Views. When you launch Data Access with dbstudio or dynamic launching via ivfstudio, the Palettes panel appears with the Main window. The command Palettes in the Tools menu opens the Palettes panel if it is closed.
You can also access the Views gadgets from the Palettes panel. These gadgets—such as buttons, text fields, notebook pages, and many more—while not specific to database applications, can also be used in your interface panels.
You can also use the graphics capabilities of Views Studio to enhance your application. All the functionality of Data Access can be accessed from the gadgets in the Palettes panel (except the Data Access SQL Schema Editor). For a description of these palettes, see Palettes Panel.
Data Source
Data Access makes use of a data source, which defines how values are taken from the database, how the database is updated, and how values are to be displayed using Data Access gadgets. The data source uses a data cache to store data in local memory as a data source table. A distinction should be made among:
The following diagram shows how the data source is related to both the database tables and the table gadgets:
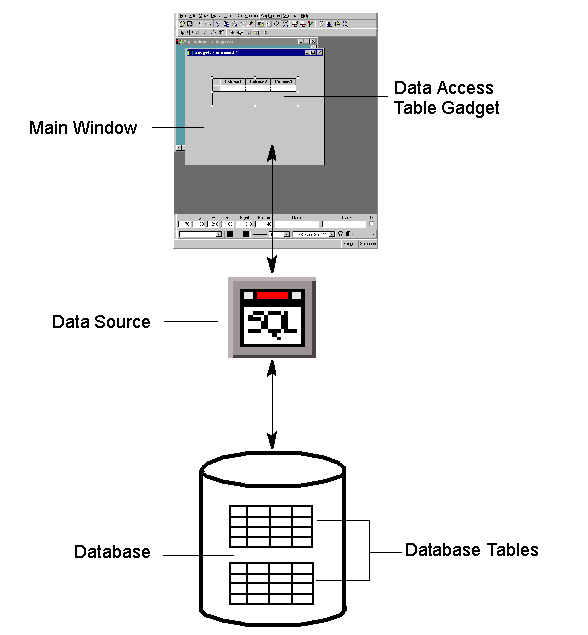
Data Source Functionality
When you drag a SQL Data Source gadget from the Palettes panel to the Main window the SQL Data Source icon appears on the work space of the Main Window:
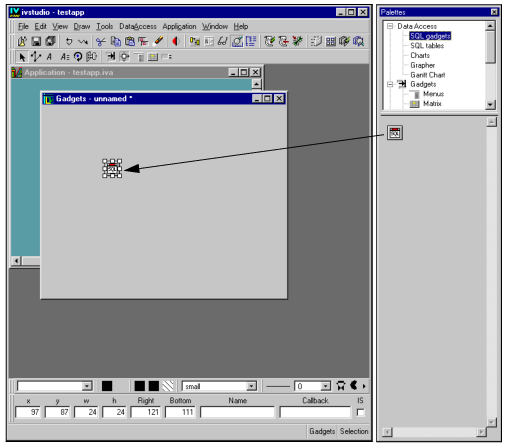
Accessing the Data Source
By double-clicking the icon on the work space, the SQL Data Source inspector panel appears:
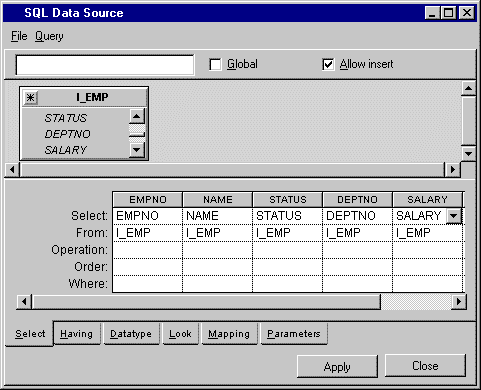
SQL Data Source Inspector Panel
This panel has two main sections:
You use four basic steps to create a table in the SQL data source inspector panel:
1. Add the desired database tables to the FROM section.
2. Select the columns to be used from the database tables by dragging a line from a desired table column in the FROM section to a desired position in the SELECT section.
3. Apply selection criteria in the SELECT section to specify the data that will be placed in the table rows.
4. Define in the SELECT section how the data source tables will be displayed.
You will be doing all these procedures in the tutorial chapter that follows.
SQL Schema Editor
The Data Access SQL Schema Editor, which is provided to help you get started with the examples, allows you to create and edit the schema (the structure of tables) in which the data is stored in the database itself. It also enables you to edit the data within a table or delete a table from the database. This editor is described in Appendix C: SQL Schema Editor.
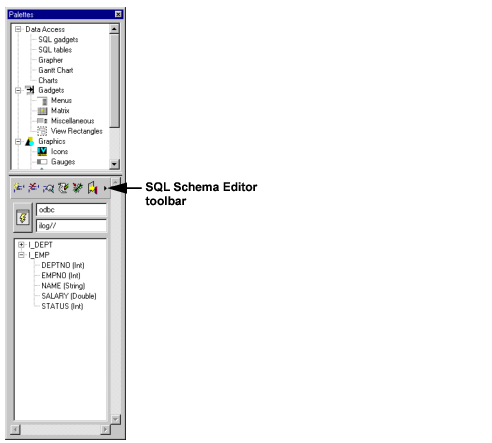
SQL Schema Editor
Published date: 05/24/2022
Last modified date: 02/24/2022


