Implementing the BitmapView
In Step 1, the C++ code of a view called
BitmapView that inherits from
IlvDvFormView was generated. The code for this view will now be written. The
BitmapView class implements a view in a
BitmapDocument object. Its purpose is to display the bitmap and to provide editing capabilities, such as changing the color of a pixel.
The requirements of the view to be implemented are:

Allow scrolling
There are several ways of displaying
IlvBitmap objects in Rogue Wave Views. The
IlvZoomableIcon class is used to do so in this tutorial.
All graphic objects must be placed in a container in order to be displayed. Since scrolling capabilities are also needed,
IlvSCGadgetContainerRectangle will be used (this class owns a container and provides scrolling capabilities).
Now that the decision of how to display the bitmap has been taken, the object must be inserted in the BitmapView class. As a subclass of IlvDvFormView, BitmapView can read a Rogue Wave Views (.ilv) file, using the IlvDvFormView::setFileName method. This file describes the graphic objects that will display the elements of the document.
The
.ilv file is now created using Rogue Wave Views Studio. This
.ilv file will contain an
IlvSCGadgetContainerRectangle (a view that scrolls) into which an
IlvZoomableIcon, which handles the bitmap, will be placed.
1. Launch ivfstudio.
2. Select File > New > Gadgets.
3. Select View Rectangles in the Gadgets palette.
5. Click the Attachments mode icon.
7. Set the vertical and horizontal guides.
8. Double-click guides.
9. Set to zero all the distances and then click Apply.
10. Select File > Save As and specify <WORKDIR>/data/bitmapview.ilv.
The bitmapview.ilv file will now be integrated into the BitmapView class. The initialization of a view is performed upon the BitmapDocument object instantiation through the BitmapView::initializeView method. The code for this method reads the .ilv file and connects the graphics objects to the document. The code for the BitmapView class is defined in the BitmapView.cpp file.
void
BitmapView::initializeView()
{
IlvDvFormView::initializeView();
BitmapDocument* document = getBitmapDocument();
if (document->getBitmap()) {
// Load the file
setFilename("bitmapview.ilv");
// Retrieve the IlvSCGadgetContainerRectangle
IlvSCGadgetContainerRectangle* rectangle =
(IlvSCGadgetContainerRectangle*)getContainer()->
getObject((IlvUInt)0);
// Change the color of the clip view to 'black'
IlvColor* color = getDisplay()->getColor("black");
rectangle->getScrolledView()->getClipView()->setBackground(color);
// Add the zoomable icon
IlvContainer* container = rectangle->getContainer();
_icon = new IlvZoomableIcon(getDisplay(),
IlvPoint(0, 0),
document->getBitmap(),
document->getPalette());
container->addObject("Icon", _icon);
container->fitToContents();
}
}
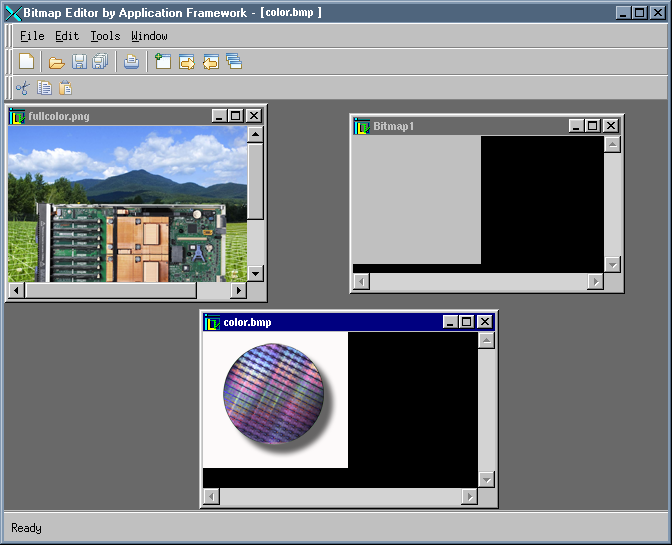
Now that BitmapDocument and BitmapView are implemented, you can compile and launch the Bitmap Editor application. You will be able to:

Open one or several PNG, BMP, or JPG files.

Have simultaneous views on a bitmap.

Create a new bitmap (although the bitmap is empty for the moment).
The Bitmap Editor application at the end of Step 2 is shown in
figure 1.2:
Figure 1.2 The Bitmap Editor Application After Step 2
Version 6.0
Copyright © 2015, Rogue Wave Software, Inc. All Rights Reserved.
