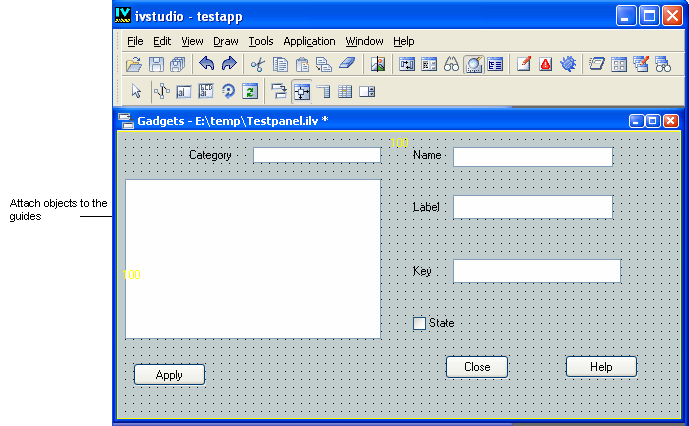
Setting the Guides
When you first click the Attachments icon, guides appear on the top and left borders with numbers next to them. These numbers refer to the weight corresponding to the guides (see below).
Figure 2.8 Attachment Guides
1. Select a guide by clicking on it or its weight number.
2. Create a guide by selecting one of the initial guides at the top or left borders and dragging the new guide created—with the mouse button pressed—to any position you want, then releasing the mouse button.
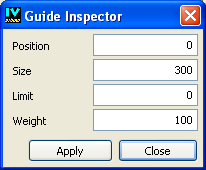
A guide is defined by four elements that can be edited in the Guide Inspector panel. To open this panel, double-click the guide or its weight number:
Figure 2.9 Guide Inspector Panel
The Guide Inspector panel contains the following fields:
 Position
 For horizontal guides, the number of pixels from the top border. For vertical guides, the number of pixels from the left border.
Size For horizontal guides, the number of pixels to the next guide below. For vertical guides, the number of pixels to the next guide to the right.
Limit The minimal size of the section set off by the guide when the window is resized (see “Size”).
Weight The amount of the window to be allocated to a section (delimited by a guide) relative to other sections when the window is resized. The following formula applies to each section when a window is resized, where Delta equals the new size of the window less its initial size:
Version 5.8
Copyright © 2014, Rogue Wave Software, Inc. All Rights Reserved.