Printing
Describes the printing facilities available in the Designer.

Lists the printing facilities for a Gantt chart.
Describes the different configurations available through the Page Setup window.
Explains how to use the Print Preview window.
Explains how to print one or several pages using the Designer.
Overview
In the Designer, you have the following printing facilities for a Gantt chart:
Print operations are available from the File menu.
Page setup
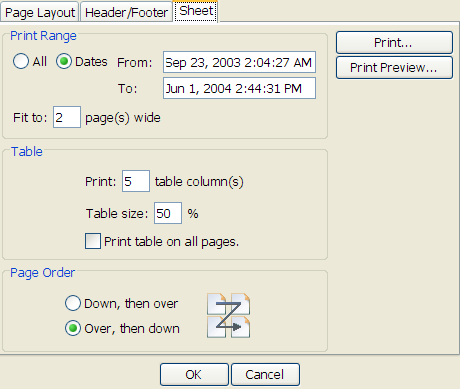
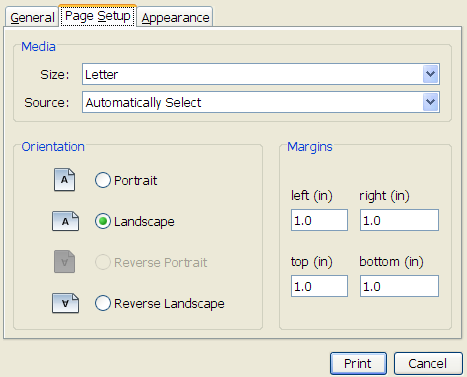
You can access Page Setup by choosing File > Page Setup or by selecting the Setup tab in Print Preview. The Page Setup window offers extensive setup facilities.
The following figure shows the Page setup property sheet.
Page layout
In the Page Layout tab, you can select Portrait or Landscape and set paper size and margins. The Designer automatically sets Portrait or Landscape initially according to the shape of the chart.
Header/footer
The Header/Footer tab gives you a selection of headers and footers to choose from and displays a preview of your selection. You can define a custom header and footer. A custom header or footer allows you to set a specific font and to insert and position page numbers, date, time, and file name.
Sheet
The fields in the Sheet tab allow you to control the print range, the way the table is processed, and the order in which pages are printed.
The following table describes the fields that you can set to control the way a Gantt chart is printed. The values in these fields determine the printed data window, which part of the Gantt chart is printed, how the Gantt chart fits on the page, and so on.
The following table lists the fields used to control Page Setup.
Field | Default Value | Description |
Print Range, Dates, From | The chart visible time | The start date of the first printed page. This defines the beginning of the printed data. |
Print Range, Dates, To | The chart visible time + the chart visible duration | The end date for the last printed page in a band. This defines the end of the printed data. |
Print Range, Fit to | 2 | The JViews Gantt printing framework provides support for multipage printing through the “pages per band” property. This represents the number of pages you want printed between the start and the end date. |
Table, Print <n> table column(s) | The chart table column count | Indicates the number of table columns to be printed. |
Table, Table size | 0.5 | Defines the position on the page that separates the table and the Gantt sheet (the value must be between 0 and 1). |
Table, Print table on all pages | False | Indicates whether the table should be printed repeatedly on every page. |
Table
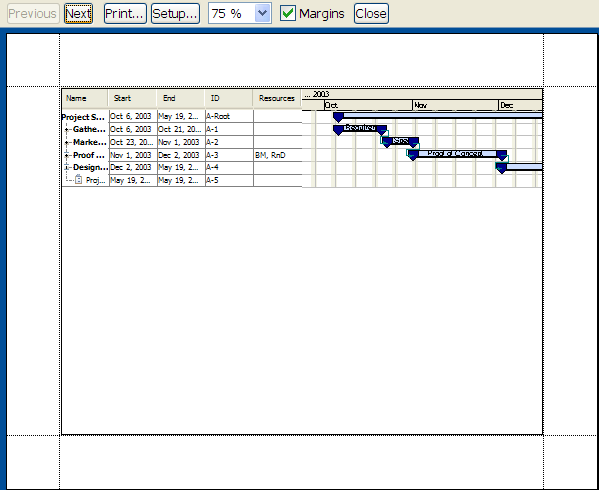
The table parameters require some further explanation. The Zoom applied to the table is a physical zoom. What is printed, depends on the way the content is displayed on the screen, so you need to prepare the Gantt chart for printing. Take the project projecttasks.igpr, which is located in:
<installdir>/jviews-gantt/bin/designer/data/examples
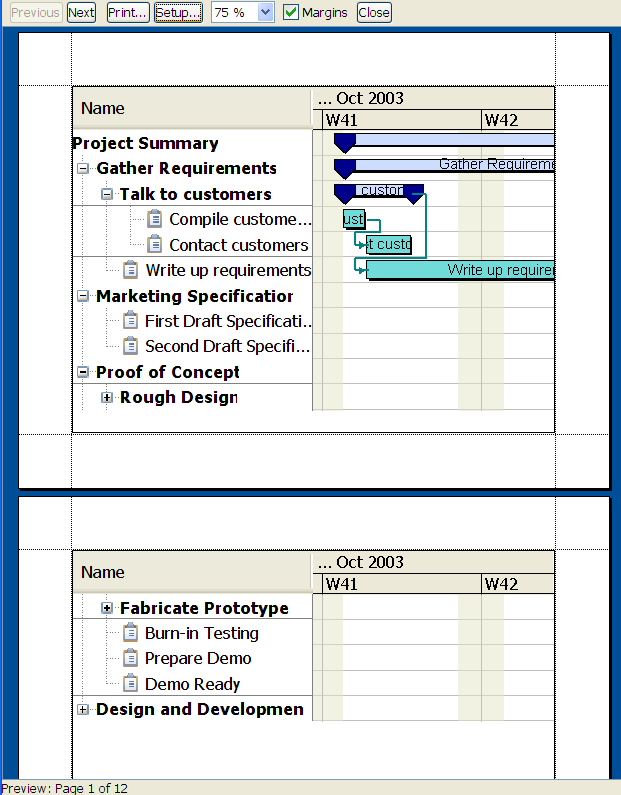
Make sure that the five table columns are displayed in Editing Mode. Reduce the margins to 0.0 in the Page Layout of Page Setup, but leave the default values for all the other print settings. The following figure shows the Print Preview. The chart will be printed over two pages.
Experiment by reducing the number of table columns to be printed.
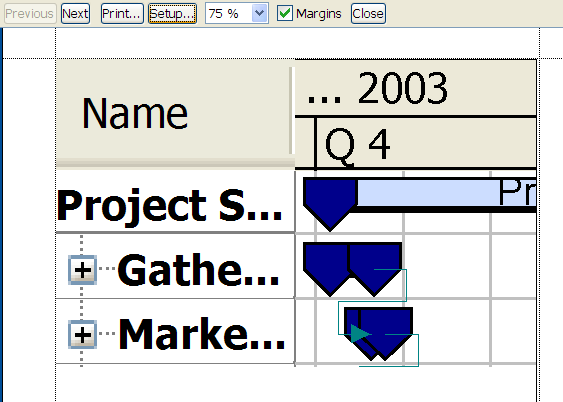
1. Click the Setup tab in Print Preview.
2. Click the Sheet tab.
3. Set Print 1 table column(s).
4. Leave the other settings at the default values.
Note that the table size is set at 50%.
5. Click OK.
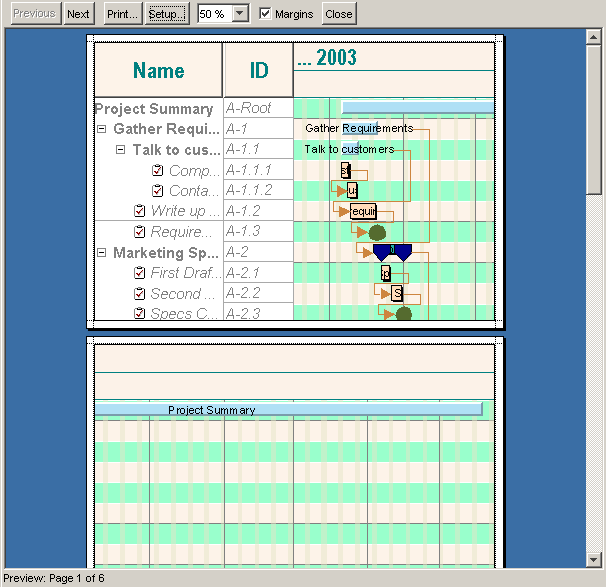
The following figure shows the Print Preview. Note that the column and the portion of the sheet printed on the page are enlarged several times both widthways and in height, but the column to be printed displays only the content that could be seen in the chart. The ellipses for incomplete words are still visible; the words are not filled in. The chart will be printed over six pages.
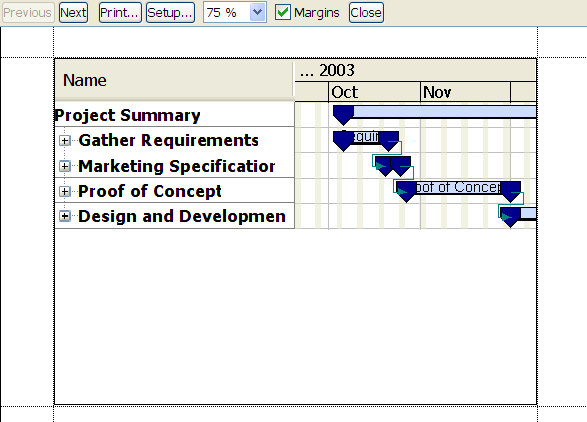
Now, adjust the table so that only one column is displayed in the Gantt chart in Editing Mode and you can see the words in full. Leave the print settings as they were in the previous example. Select Print Preview.
The following figure shows the Print Preview of a one-column table display after preparation of the display in the chart. The chart will be printed over two pages.
The lesson to be learned is:
Always preview the results of the print settings before printing.
Prepare your chart display in Editing Mode before printing.
Be wary of the effects of the physical zoom on the table.
Print range
If you now set the Print Range to Fit to: 4 page(s) wide, you obtain more space for time in the sheet. The zoom is intelligent and extends the activity bars to be printed over the four pages. However, the physical zoom on the table does not cause the column or columns to be enlarged. On pages 2 to 4, no table is printed, but only the time scale and the extended activity bars in the Gantt sheet. The following figure shows the Print Preview of the final page of the four pages with this setting.
Page order
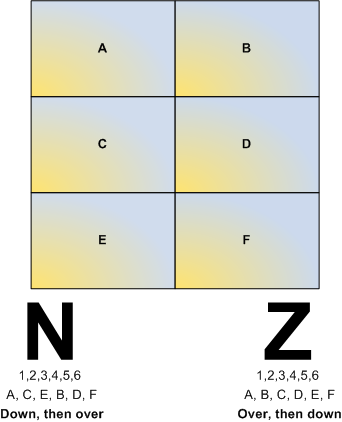
You can also specify the order in which pages are numbered and printed.
Down, then over: prints top to bottom; the pages are printed in the vertical plane, so that the leftmost pages are printed first.
Over, then down: prints left to right; the pages are printed in the horizontal plane, so that printing spans right across the chart and then proceeds to the next horizontal span of pages below, and so on.
The printing order is different, but the page-numbering is the same, whichever option you select.
The following figure shows the graphical reference for the page-printing order of a six-page document. The sequence of pages is shown as running from A to F, which corresponds to page-numbering from 1 to 6 and the printing order Down, then over and Over, then down as shown in the following graphic.
Printing top to bottom
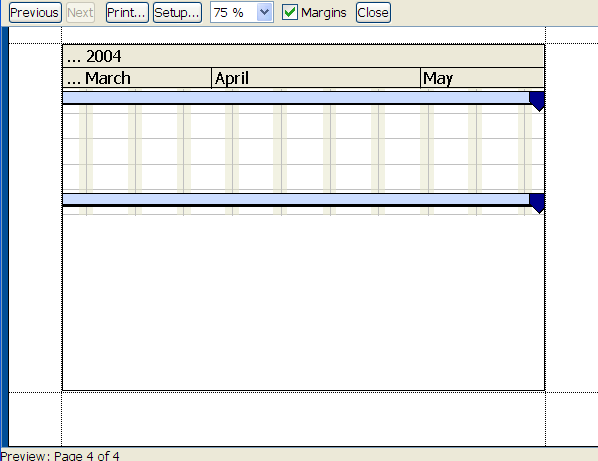
Print the Gantt chart developed in this Getting Started example with the Down, then over option set, with the chart printed on six pages. The following figure shows the page-printing order by way of the print preview of the first two pages. You can see that it prints all the way down the leftmost part of the Gantt chart, before working its way across the next horizontal span of the chart. You can see that it prints all the way down the leftmost part of the Gantt chart, before working its way across the next horizontal span of the chart.
Printing left to right
Print the Gantt chart developed in this Getting Started example with the Over, then down option set, with the chart printed on six pages. The following figure shows the page-printing order by way of the print preview of the first two pages. You can see that it prints all the way across the first part of the Gantt chart in the horizontal plane, before working its way down to the next horizontal span of the chart.
Print preview
The Print Preview window allows you to display each page specified in the page setup and view the pages in the order in which they will be numbered and printed. See
Printing top to bottom and
Printing left to right for more information about the Print Preview facility.
To open the Print Preview window:
Choose one of the following options:
Click
File > Print Preview.
Click
Print Preview in the Page Setup window.
Print
You can print one page, all the pages, or selected pages. You can directly control the Page Layout characteristics. You can also specify the printed appearance, by setting features such as color printing and double-sided printing or number of pages per side of paper.
The following figure shows how to set the printing parameters.
To print a Gantt chart to the default printer from the application:
1. Choose one of the following options:
Select
File > Print.
Type
Ctrl-P.
Select
File > Print Preview to open the Print Preview window.
Select
File > Page Setup to open the Page Setup window.
2. Click Print.
Copyright © 2018, Rogue Wave Software, Inc. All Rights Reserved.