Transforming symbols using parameters
Explains how to use parameters to convey some behavior to symbols.

Explains how to create a parameter to be bound to a symbol property.
Explains how to bind a parameter to a symbol to make the symbol change.
Explains how to add more flexibility to symbols.
Creating a new parameter
Parameters are used to control object transformation. That is, they control the position, size, color, or rotation of the object. You transform an object by binding one or more of its properties to parameters.
A symbol parameter can have one of the following types:
String
Integer
Boolean
Float
Double
Color
Paint
Changes to the value of the parameter result in changes to the aspect of the object to which it is bound. For example, the width of the basicprogressbar will expand to the right as the parameter to which it is bound increases. In this way, parameters give intelligence to symbols.
To create a new parameter for the basicprogressbar symbol:
1. Open the basicprogressbar symbol.
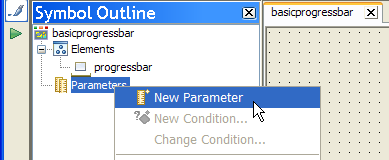
2. In the Symbol Outline pane, right-click the Parameters icon.
3. In the pop-up menu, select New Parameter.
Adding a new parameter
4. Type progress in the Name field of the Styling Customizer.
5. Press Enter.
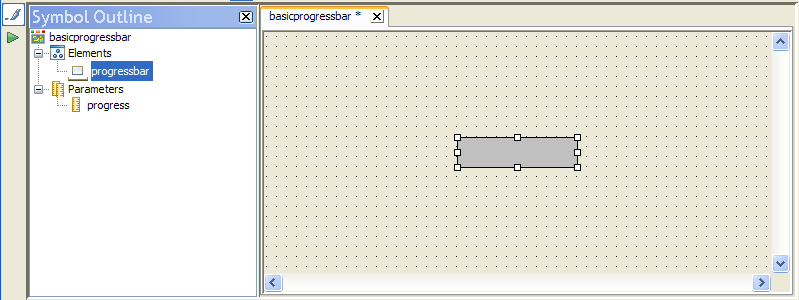
The progress parameter is listed in the Symbol Outline pane.
6. From the Type list, select Integer.
7. Leave the Default Value field as 0 (zero).
Transforming an object
Transformation occurs when an object changes aspect. This change is done by binding a parameter to one or more of the object properties. As the parameter changes value, so the object changes appearance. Parameters can be bound to one or more objects in a symbol. An object can have one or more parameters bound to the properties in the Position, Size or Rotation transformation property groups.
NOTE A base element can only change its width and height properties.
To bind the progress parameter to the basicprogressbar symbol:
1. Open the basicprogressbar symbol, if it is not yet open.
2. Select the progressbar element in the Symbol Outline pane.
The progressbar element
3. Click the Transform tab in the Styling Customizer.
4. Click the Bind button next to the Width field.
The Transform Element Using Parameter dialog box opens.
5. From the Parameter list, select progress.
6. Select the Compute the transformation according to the following min/max values check box.
7. In the Value Max field, type 120.
This is the width in pixels that the progressbar object will attain when the progress parameter equals the value shown in the Parameter Max field. That is, when progress equals 100, the progressbar will be 120 pixels wide, and when progress equals 50, the progressbar will be 60 pixels wide.
8. Click OK.
The width of the base rectangle is now bound to the progress parameter.
NOTE The width of the rectangle is now set to 0, the default value of the progress parameter.
Adding flexibility using parameters
By default, an object uses static values to control its size. For example, the progressbar object created in
Working with symbols has a minimum width of 0 and a maximum width of 120. The transformation added in
Transforming an object still leaves the maximum at 100. To create reusable symbols, use parameters to control size. This way, the size of a symbol can be easily adjusted for inclusion in a symbol with different dimensions.
To add flexibility to the basicprogressbar symbol:
1. Open the basicprogressbar symbol.
2. Create a new Integer parameter, maxwidth, with a default value of 100.
3. Create a new Integer parameter, minwidth, with a default value of 0.
4. Select the progressbar element in the Symbol Outline pane.
5. Click the Transform tab in the Styling Customizer.
In the previous step, you bound the width of the progressbar object to the progress parameter. Now you want to bind this width to the new parameters, minwidth and maxwidth. To do so, you have to unset the previous binding.
6. Click the small triangle next to the Width field in the Transform tab.
The Bind button is available again.
7. Click the Bind button next to the Width field.
The Transform Element Using Parameter dialog box opens.
8. From the Parameter list, select progress
9. Select the Compute the transformation according to the following min/max values check box.
10. From the Parameter Max list, select maxwidth.
11. In the Value Max field, type 120
12. From the Parameter Min list, select minwidth.
Binding a transformation to parameters
13. Click OK.
NOTE The width of a transformed object is calculated in function of the Parameter Max, Parameter Min, Value Max, and Value Min parameter values set in the Transform Element Using Parameter dialog box. If you take the value of Parameter Max to represent 100% of Value Max, the basicprogressbar symbol will expand to the width Value Max in function of the value of Parameter Max. That is, when the progress parameter has a value of 100, the basicprogressbar will be 120 pixels wide.
You can now set the maximum width for this object by changing either the default or the dynamic value of the maxwidth parameter.
Copyright © 2018, Rogue Wave Software, Inc. All Rights Reserved.