Using subgraphs
Explains how to create a group, which is a node that contains a subgraph of other nodes.

Explains how to create a subgraph.
Explains how to customize the names of the subgraphs.
Creating subgraphs by grouping objects
Subgraphs are useful to represent different levels of a hierarchy in a single diagram and to view each level separately. As an example, you can have the following levels in a network diagram: regions, nodes, and equipment.
To create subgraphs:
1. Open the network example which you laid out in the previous section by clicking File > Open and selecting the project file network2.idpr if it is not still open.
In this example, there is only the node level. To show the use of subgraphs, you can create a regional level.
2. Enable subgraphs by clicking Edit > Options in Style Editing Mode and checking Subgraphs.
3. Switch to Diagram Editing mode by clicking the middle icon in the vertical toolbar.
4. Move the nodes so that Frankfurt is vertically above Paris.
5. Drag the mouse around these two nodes and click the Group Selection icon in the toolbar
6. 
7. .
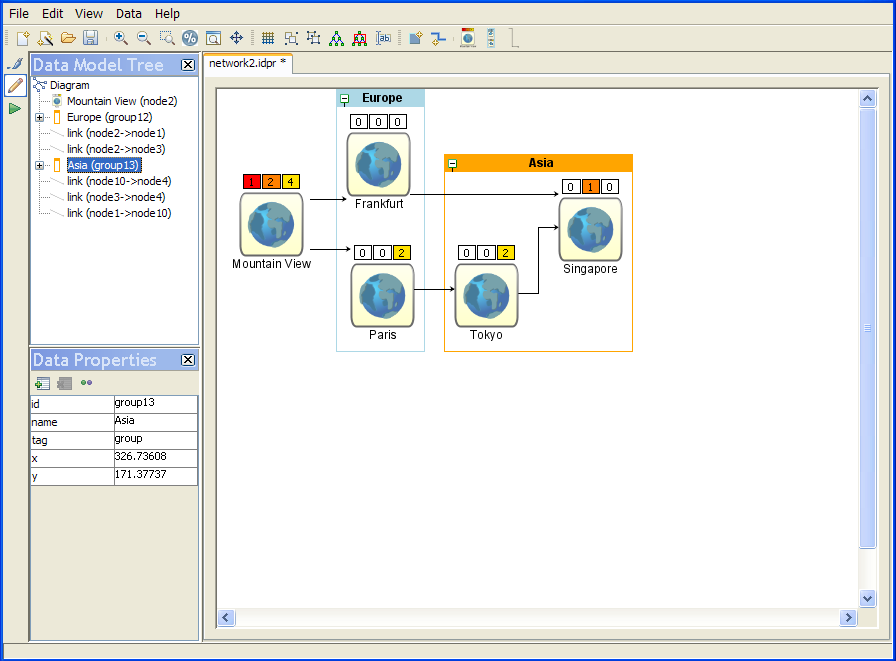
This creates a subgraph containing the group of nodes. On creation, the subgraph is selected and expanded, see the following figure.
8. 
An expanded group containing nodes
9. Select Singapore.
10. Press Shift and click Tokyo to add it to the selection.
Do not drag to select this time because that would include the link between these two nodes in the selection.
11. Click the Group Selection icon in the toolbar to create a second subgraph.
Styling subgraphs
Now you will give the two groups meaningful names to identify them.
To identify the two groups of nodes:
1. Select the first group.
a. Under Data Properties, click the New Property icon.
b. Enter name.
c. Set the value of name to Europe.
d. Press Enter.
2. Select the second group.
a. Under Data Properties, click the New Property icon.
b. Enter name.
c. Set the value of name to Asia.
d. Press Enter.
e. Go back to Style Editing mode by clicking the top icon in the vertical toolbar.
f. Select the node style rule node:expanded.
g. In the Styling Customizer, set the value of the Title parameter to @name.
h. Press Enter.
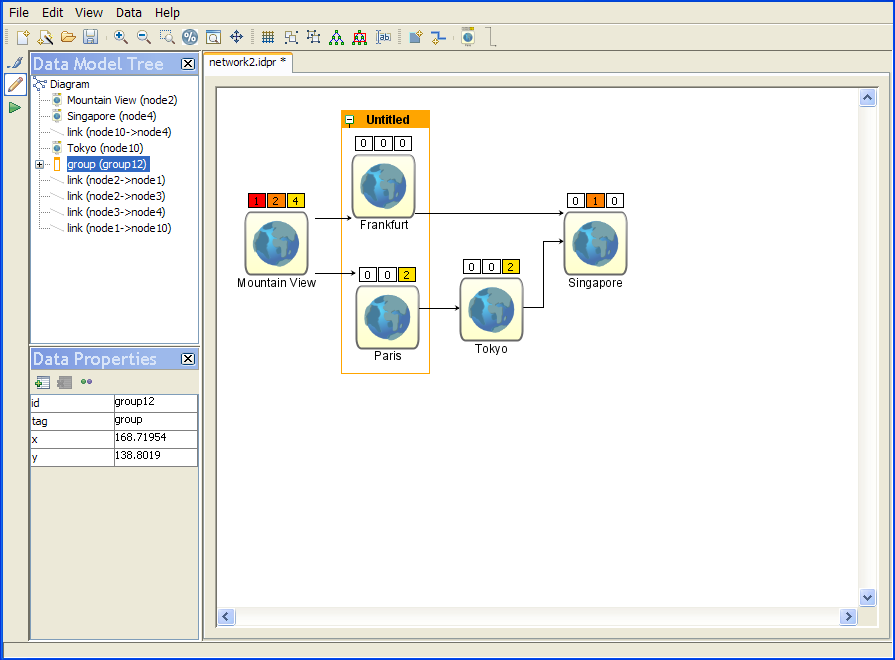
The group names change to the values you defined in Diagram Editing mode.
A new property for the group title
The result is to set the title of the group to the value of name instead of Untitled.
To style the representation of the subgraphs:
Switch to Style Editing Mode by clicking the top icon in the vertical toolbar.
For further customization purposes, note that the user-defined type ( tag property) of a group is group and that the state of a group can be expanded or collapsed as well as selected or legend.
Copyright © 2018, Rogue Wave Software, Inc. All Rights Reserved.