Handling symbols
Specialized NATO symbols conforming to the
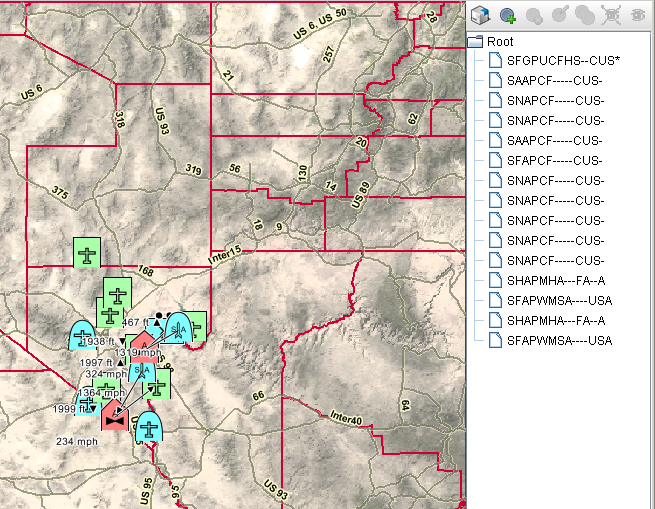
APP-6a standard are available in the Map Builder and through the Java™ API. The following figure shows a frozen frame from the APP-6a sample included in the distribution at:
APP-6a Symbols are a specialized use of JViews Diagrammer capabilities. The coding of the APP-6a standard in a set of java classes provides even greater performance than the (more flexible) output of the Symbol Editor.
Battle Simulation with APP-6a Symbols
You can also save APP-6a symbols created with the Map Builder, but this feature is usually only for demonstration purposes and prototyping.
You can also create symbols for display on a map using the new dedicated Symbol Editor.
The symbols are stored in a palette and then reused in the Designer for
JViews Diagrammer or any other end-user application. The dedicated Symbol Editor can be used for configuring the symbols you have chosen to represent your nodes. See
Symbols in
Using the Designer for
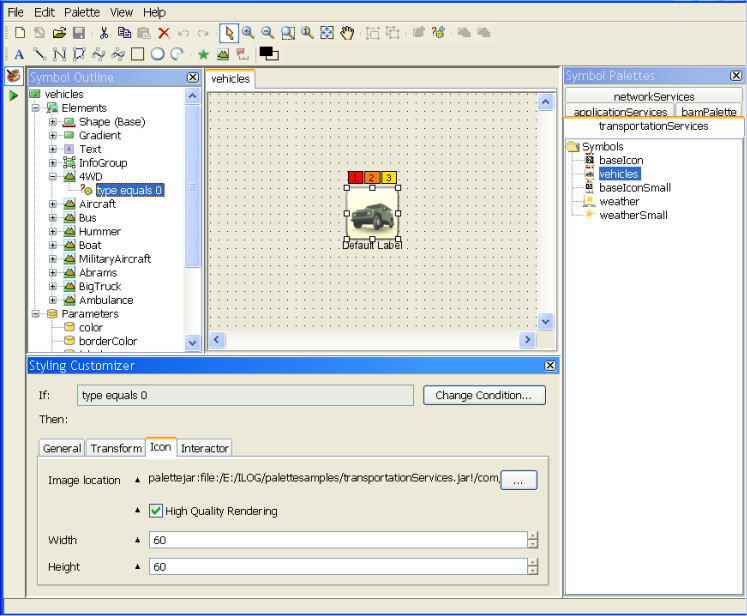
JViews Diagrammer for more about using symbols. The following figure shows an example of symbol creation using the Symbol Editor.
Creating a Symbol with the Symbol Editor
You can add symbols on a map with the Map Builder, but this feature is usually for demonstration purposes and prototyping only. You can load a map developed with the Map Builder or directly in the API as a background for an application developed with JViews Diagrammer. The easiest way to do this is to use the Symbol Editor and the Designer for JViews Diagrammer.
To load a map developed with the Map Builder or directly in the API as a background for an application developed with JViews Diagrammer:
1. Edit the map with the Map Builder and then save it.
2. Create your symbols and assemble them with existing ones to create palettes. You can then prototype your application in the Designer. For more information, see Using the Designer.
3. Open Designer, use the map as the backdrop, add nodes or links to the model, design them, and then save the whole as a diagrammer project.
4. Load the diagrammer project in your application.
Copyright © 2018, Rogue Wave Software, Inc. All Rights Reserved.

