Testing the JWAVE Server Installation
warning | JWAVE uses an insecure protocol without authentication. This makes JWAVE insecure to use in an Internet facing configuration and would allow an attacker to execute arbitrary code on the server. If you choose to implement JWAVE in this way, you are responsible for the security of those applications that leverage JWAVE. |
The following directory contains Java programs you can run to test the JWAVE server installation:
(UNIX) RW_DIR/classes/jwave_demos/tests
(WIN) RW_DIR\classes\jwave_demos\tests
where RW_DIR is the main Rogue Wave installation directory.
note | JWAVE requires PV-WAVE, if you are having trouble running these tests, please make sure that you can start PV-WAVE before running JWAVE. |
To run the following tests:
(UNIX) RW_DIR/classes/JWaveConnectInfo.jar
RW_DIR/classes/JWave.jar
RW_DIR/classes/jwave_demos/tests
RW_DIR/classes/JWave.jar
RW_DIR/classes/jwave_demos/tests
(WIN) RW_DIR\classes\JWaveConnectInfo.jar
RW_DIR\classes\JWave.jar
RW_DIR\classes\jwave_demos\tests
RW_DIR\classes\JWave.jar
RW_DIR\classes\jwave_demos\tests
where RW_DIR is the main Rogue Wave installation directory.
Start each test in your shell or command window by typing:
java <test_name>You may need to add the directory containing your Java executable to your PATH environment variable.
Scalar Data Test
ScalarDataTest sends scalar data to PV‑WAVE and back.
Array Data Test
ScalarArrayTest sends array data to PV‑WAVE and back.
Return Mode Test
ReturnModeTest sends scalar data to PV‑WAVE and asks that some of it be stored in the Data Manager, then calls PV‑WAVE again to use the stored data.
View Test
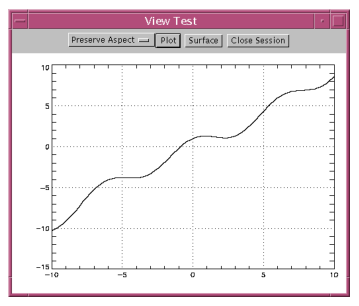
ViewTest tests the JWaveView class. JWaveView displays a window, shown in Figure 8-6: View Test Window, with a view area and Plot, Surface, and Close Session buttons.
 |
Try the following in the View Test window (Figure 8-6: View Test Window):


