Creating new IPs
This section describes how to create and configure IPs.
IPs are differentiated primarily according to how (or if) they manage design files in a DM system. Different DM systems use different methods to store and recreate design states in releases. IPs abstract out these differences and provide a common, simplified, and centralized interface to access design information. IPs with different DM types can be mixed and matched as needed in an IP Hierarchy, according to the requirements of the underlying design.
IP configuration fields
When adding a new IP into the Perforce IPLM platform, the following fields are available to configure the new IP:
| Field | Definition |
|---|---|
|
|
IPs |
|
name |
The name of the IP to be created, IP naming has the following restrictions:
|
|
library |
The name of the IP Library in which the IP will be created (the Library must already exist) See Managing IP Libraries for more information. |
|
dm_type |
The DM type can be one of several types: You can mix and match IPs with different dm_types in a single IP Hierarchy.
You can integrate additional DM types into IPLM using the DM Handler capability. See Administering DM Handlers. DM type IPs (P4/ |
|
host |
The host field is used to map an IP to an alternate Perforce server (it is not used for other DM types). In most cases an organization would have a single Perforce server to manage all of their file level assets (with edge servers replicating the data to remote sites). Perforce is highly scalable and is capable of delivering massive quantities of data very quickly. In some cases it is desirable to have multiple Perforce servers, typical use cases for this include export control (eg ITAR), design collaboration with external parties, and in extreme cases with very large organizations, capacity management. Customers find that in use models with security and export control management and auditing are simplified if the sensitive data is stored on separate, perhaps air-gapped Perforce servers. If the IP's data is stored on the main Perforce server the host field should be left blank, the IP will get its Perforce server configuration from the $P4PORT variable. IPs referencing alternate Perforce servers would have that server specified in their host field. The host field can be used with both P4 and P4Streams type IPs. |
|
description |
A text field describing the IP, this gets displayed when the IP is listed or viewed in the CLI or IPLM Web. |
|
icon (IP) |
The icon to use with the IP in IPLM Web. See for more information on configuring icons. (currently only the IP Icon is used) |
|
hooks |
Hooks are scripts tied to events in the lifecycle of the IP, these scripts are used for a variety of purposes, often including automatic characterization and documentation at the time of release, compilation at the time of release or workspace construction, pre-or post integrate actions, amongst many other automation functions. The HOOKS section of the template is where these scripts are associated with a particular IP. Note the scripts can also be associated at the IP Library level, in which case they will apply to all IPs in the Library. Client side hooks are run only from the workspace, not for server side releases, see Server Side Hooks and Events as alternative methods of automation.
|
|
|
Lines |
|
line |
The line of the new IP. For a newly created IP this must be TRUNK. Additional lines can be created via copying an existing TRUNK line. See IP Lines (Branches) for more information. |
|
description |
A text field describing the Line, this is displayed in the IPLM Web line view and can optionally be displayed on PiCLI (see Client Configuration) |
|
icon (line) |
The icon to use with the IP Line in IPLM Web. See IPLM Web for more information on configuring icons. (currently only the IP Icon is used) |
|
|
IP Versions (IPVs) |
|
repo_path |
The repo_path is the pointer to the location in the DM system (Perforce, <dm_server_address>/<organizational_levels_of_hierarchy>/<library_name>/<ip_name>/<line_name> In the case of a Perforce repo path it might look like: //mdx_test/projects/analog/mylibrary/chip_top/TRUNK
Perforce IPLM supports any arbitrary repository path, but it is almost always a good idea to implement a structured approach that ends in /<library_name>/<ip_name>/<line_name> to prevent overlap. For some DM types (ie git) where an entire repository is equivalent to one IP this may not be as applicable. By default the repo-path of one IP is not allowed to overlap with the repo-path of any other IP in the system. The repo_path field is left empty for Container type IPs. |
|
version_message |
Text describing this particular release of the IP, this will be displayed in IPV contexts on IPLM Web and IPLM CLI |
|
icon (ipv) |
The icon to use with the IP Version in IPLM Web (currently only the IP Icon is used) |
|
resources |
The resources field is where child IPs (resources) are associated with a given IP. The IP Hierarchy (CIPB) is built up one level at a time by defining the immediate resources of an IP, one per line in the resources field. Each resource IP may have additional Resource IPs set in their own resources field. The 'pi ip tree' command (CLI) or IPV details tab (IPLM Web) can be used to show the overall hierarchy of an IPV. More information on configuring the IP Hierarchy can be found in the IP Hierarchy section. |
|
IPVs entered into the private_resources field behave the same as regular resources, with the exception that they are only loaded into the workspace if their immediate parent is the top level IPV in the workspace. Private resources are useful for including test benches that only make sense at a lower level of hierarchy, or as a part of a build/deliver flow. |
|
|
project_props |
Project Properties are used to configure how the workspace constructed. Project Property fields include:
Project properties are specified in the form <IP> --<setting> <value>: Project Properties
LIB.IP --path blocks/$IP The <IP> field supports wildcards and partial matching, and the <value> field supports the wildcards $IP and $LIB which are filled in with the Library and IP names of the IP. More details on project properties can be found in the Workspace Configuration section. |
Permissions and IPs
To create a new IP in a Library, a user must have Write permission on that Library. For example, creation of a new Line on an IP requires write access to the IP.| Permission | Allows | Implies |
|---|---|---|
| Read (r) | List the IP (not its lines). View the IP's metadata including permissions. If a user has read permissions on an IP, but no read permissions on any line of the IP, the user cannot load that IP into a workspace (only IPVs can be loaded into a workspace). This is equivalent to a 'View' permission on the IP. Applying Read (r) permission to an IP also propagates Read (r) permission to the TRUNK line of that IP. The permission auto-applied to the TRUNK line can subsequently be independently removed. Deleting a permission from the IP also propagates, deleting the same permission from the IP@.TRUNK | Library Read (r) |
| Write (w) | Edit an IP's fields (the [IP] and [Hooks] blocks) (excluding permissions)Create new lines of the IP Applying Write (w) permission to an IP also propagates Write (w) permission to the TRUNK line of that IP. The permission auto-applied to theTRUNK line can subsequently be independently removed. Deleting a permission from the IP also propagates, deleting the same permission from the IP@.TRUNK | Library Read (r)IP Read (r) |
| Owner (o) | Edit IP Permissions Applying Owner (o) permission to an IP also propagates Owner (o) permission to the TRUNK line of that IP. The permission auto-applied to the TRUNK line cansubsequently be independently removed. Deleting a permission from the IP also propagates, deleting the same permission from the IP@.TRUNK | Library Read (r)IP Read (r) |
See the Permissions Management page for a full discussion of object permissions.
IP Name restrictions
The length of IP Name is restricted to 255 characters.
| Forbidden Characters | Reason for restriction |
|---|---|
| ' / ' | UNIX filename separator |
| '\', '?', or '*' | UNIX Special Characters |
| No Whitespace | Command parsing |
| '@', '#', '.' (dot), or colon ':' | Perforce IPLM Special Characters |
Creating IPs in IPLM Web
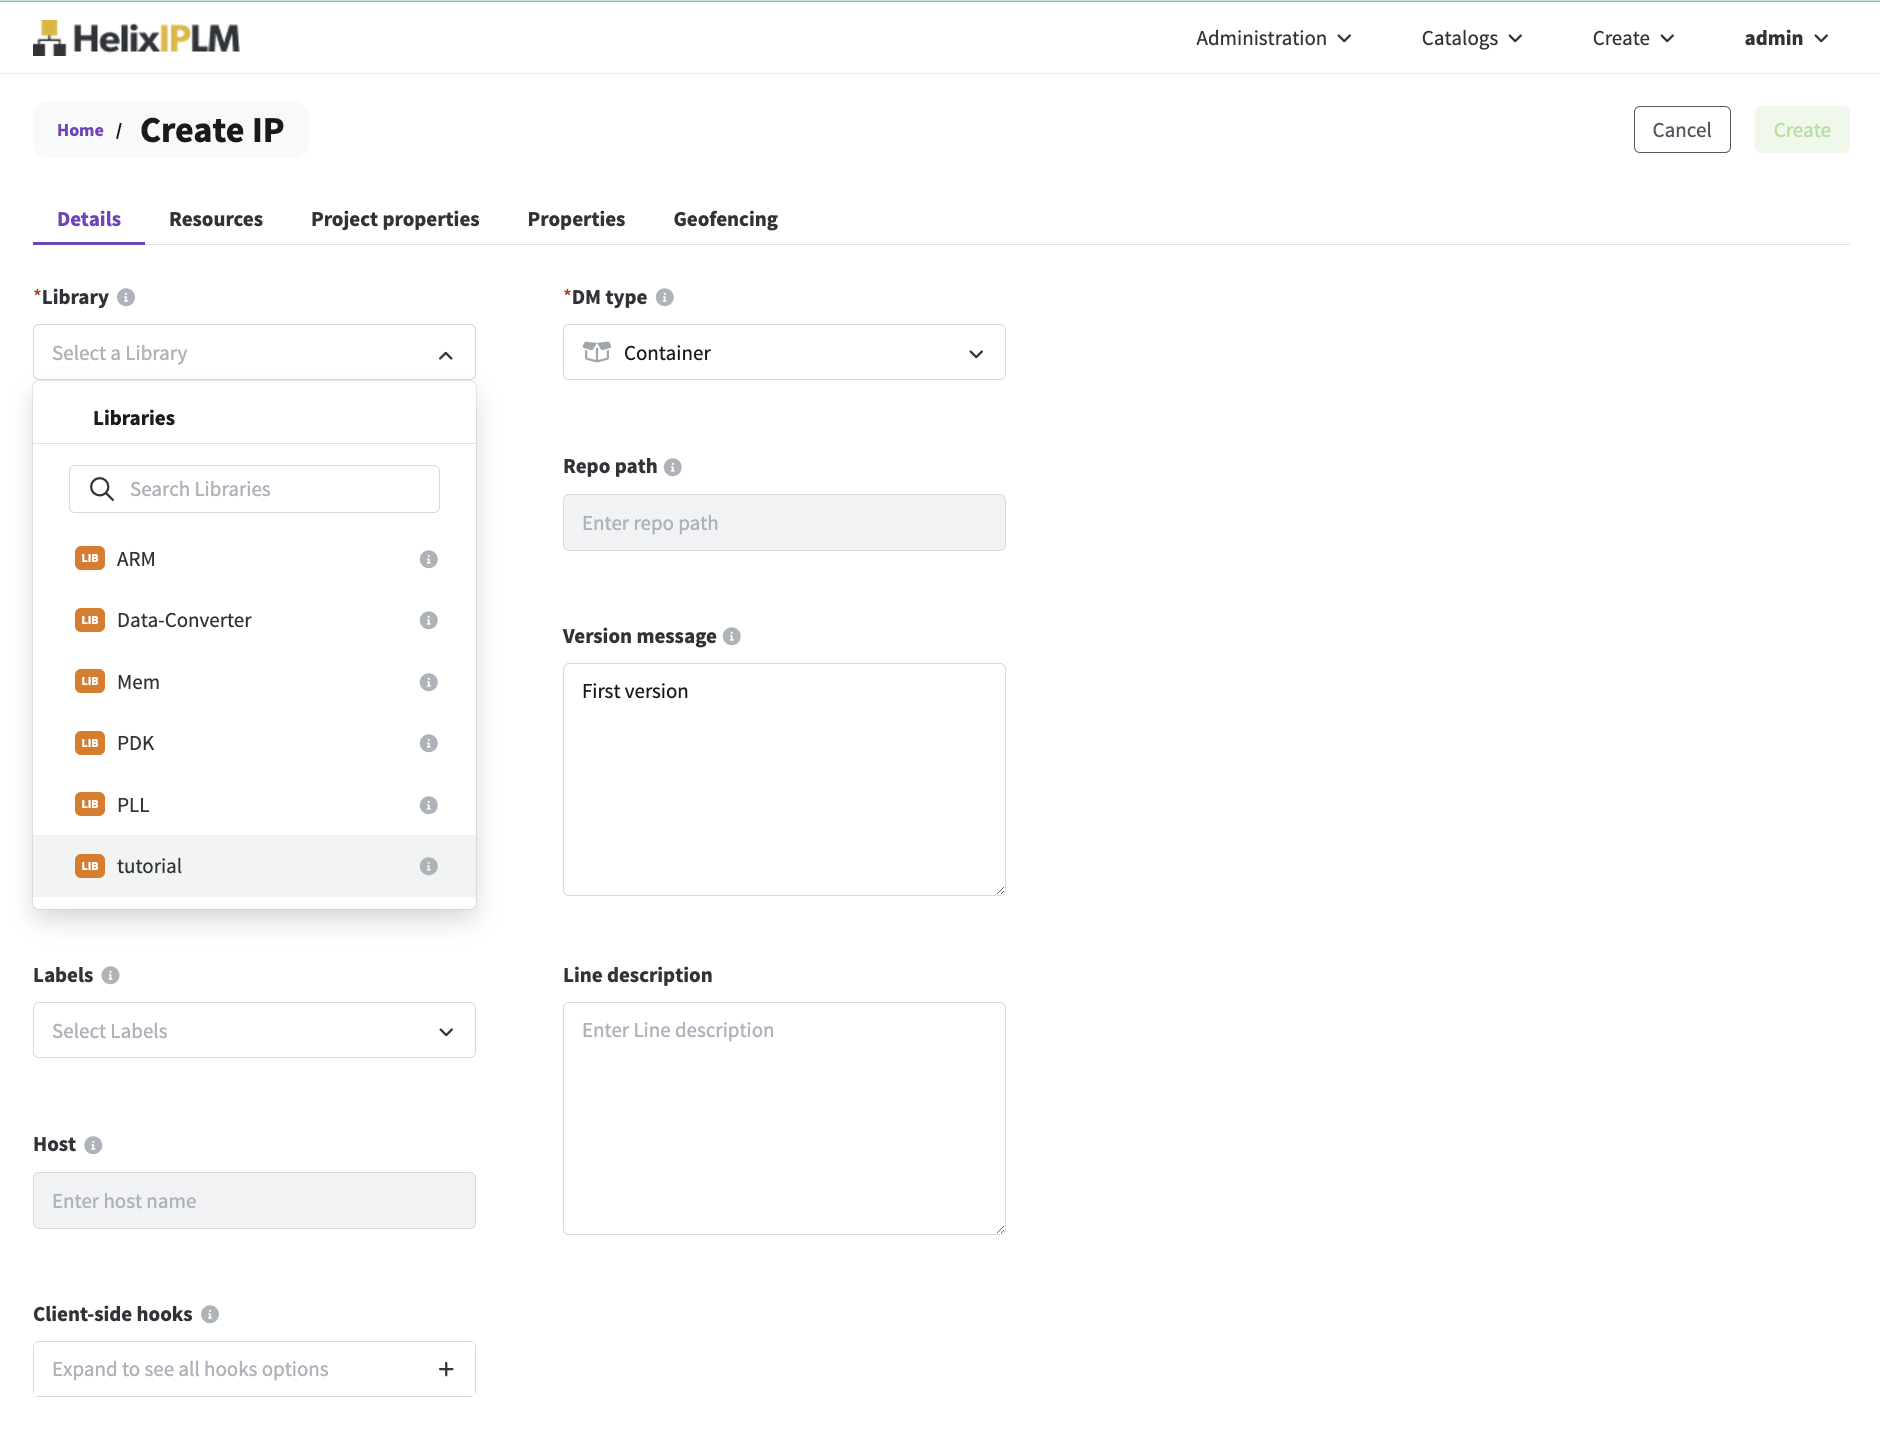
Descriptions of the available IP configuration fields are available above. Open the Create IP Page in Create->New IP. IPs can be created from PiCLI and the Perforce IPLM API as well.
Select a Library for the New IP from the Library dropdown menu. The Library must be created prior to adding an IP.
Enter the name, select the DM type, and enter other details for the Library.
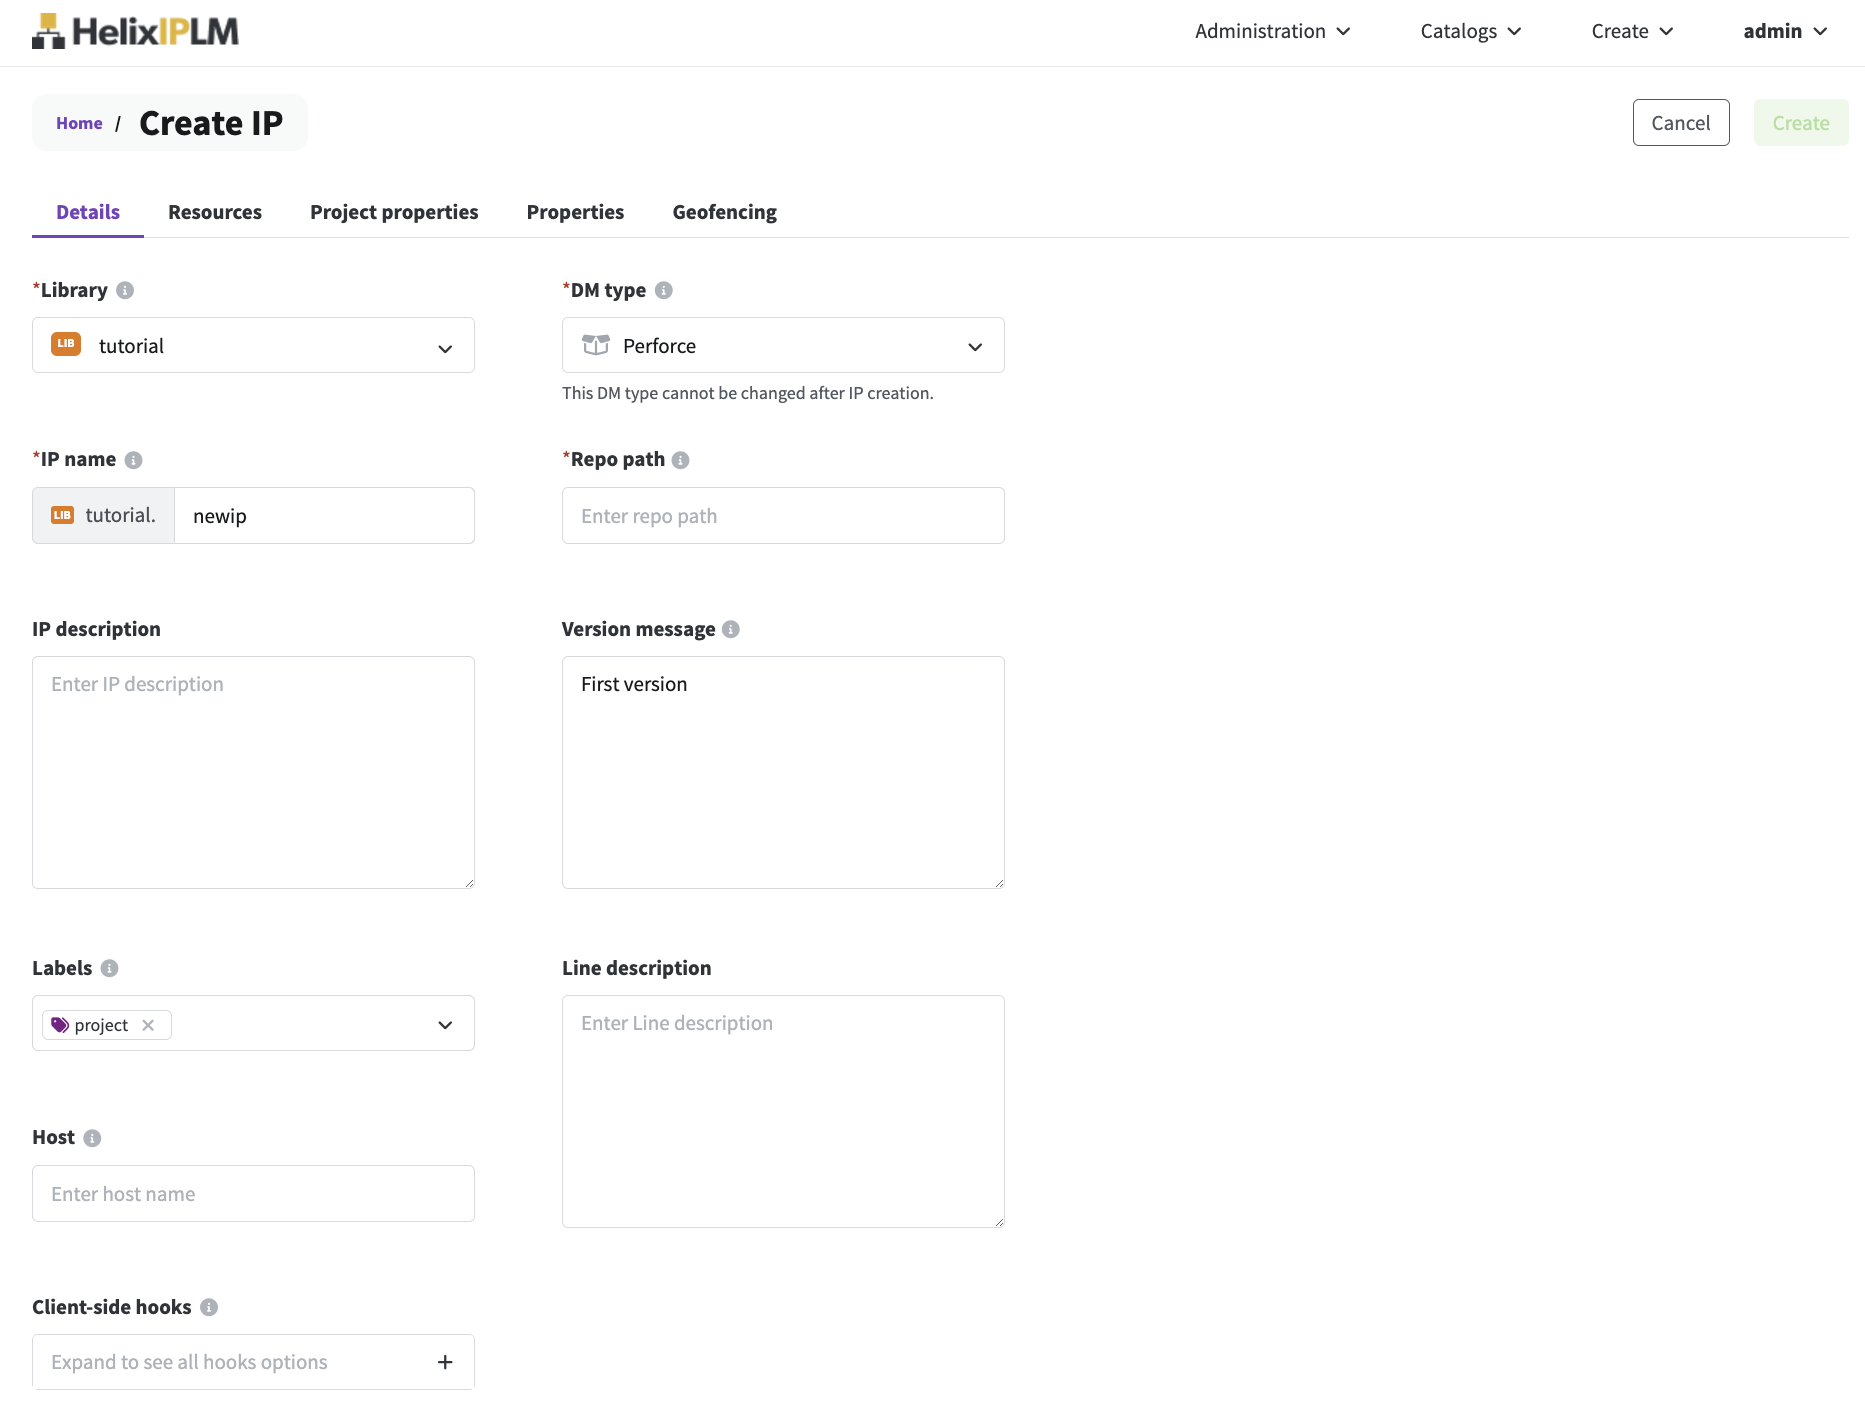
Configure the IP details section
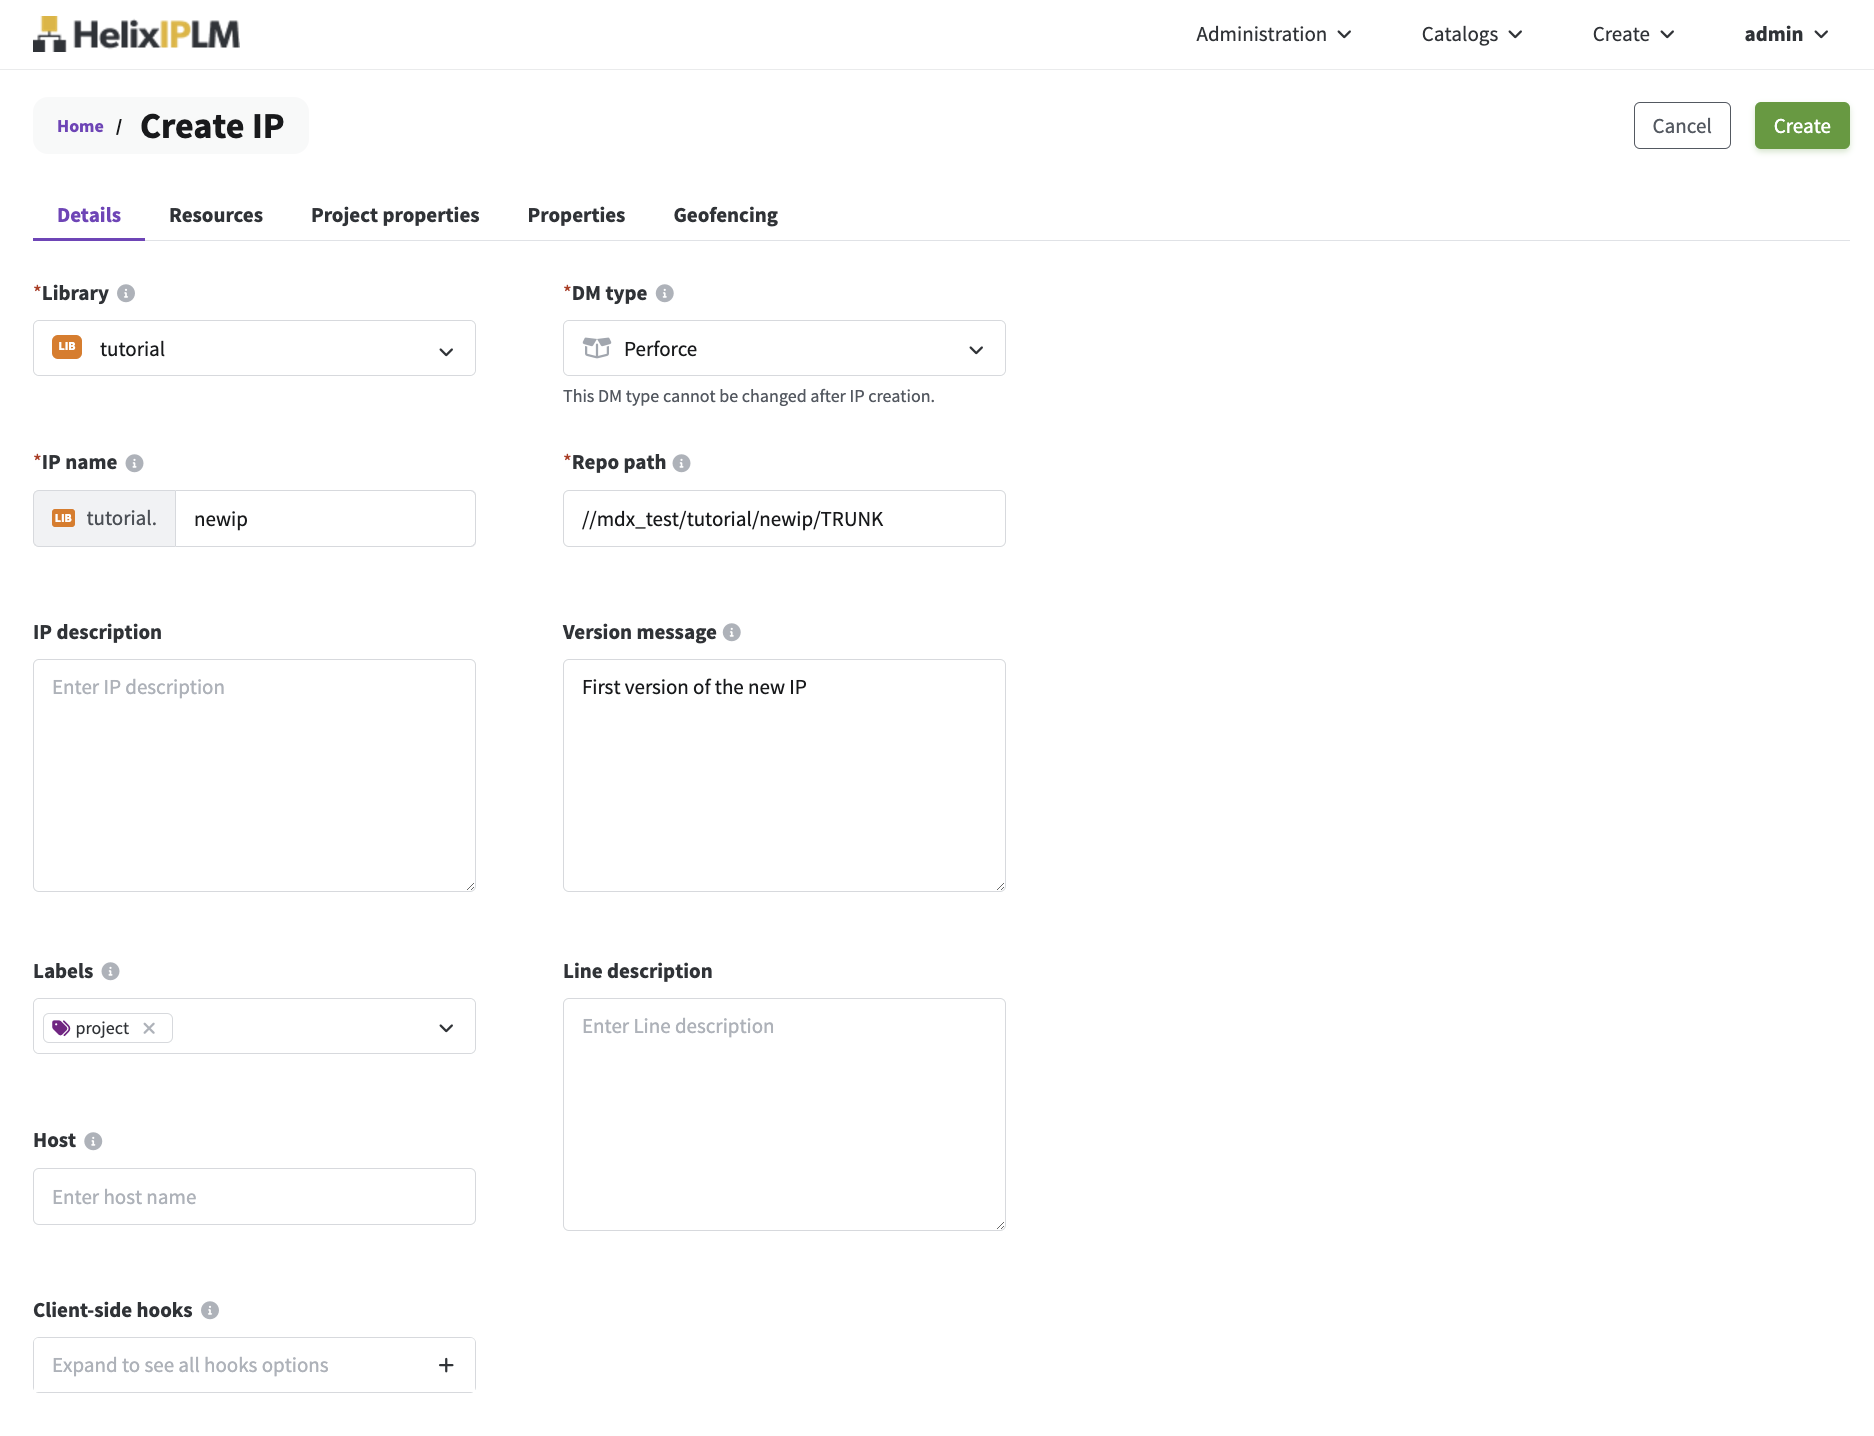
Enter a repo path if your IP DM Type requires it. For example, Perforce, SVN, git, or dms all require a repo path value. If your IP is a File System IP, then enter a file path for the first release of the IP. The repo path field can be left empty for Container IP type. Add a version message for your first release of the IP.
Configure the Project Properties section
Select the Project Properties tab. Enter a value for Scope and any other properties you want to set. Click Add to add the Project Property. See the Workspace Configuration section for more information on workspace configuration with Project Properties.
Configure the Properties section
Select the Properties tab. Choose from the existing Property sets in the drop-down menu. Once the required Property sets are selected, enter values for all the properties you wish to set. See the Properties page for more information on Properties, and the IP, IPV, and IP Line Metadata page for more information on applying metadata to IPs.
.jpg)
Add Resource IPs to the new IP in IPLM Web
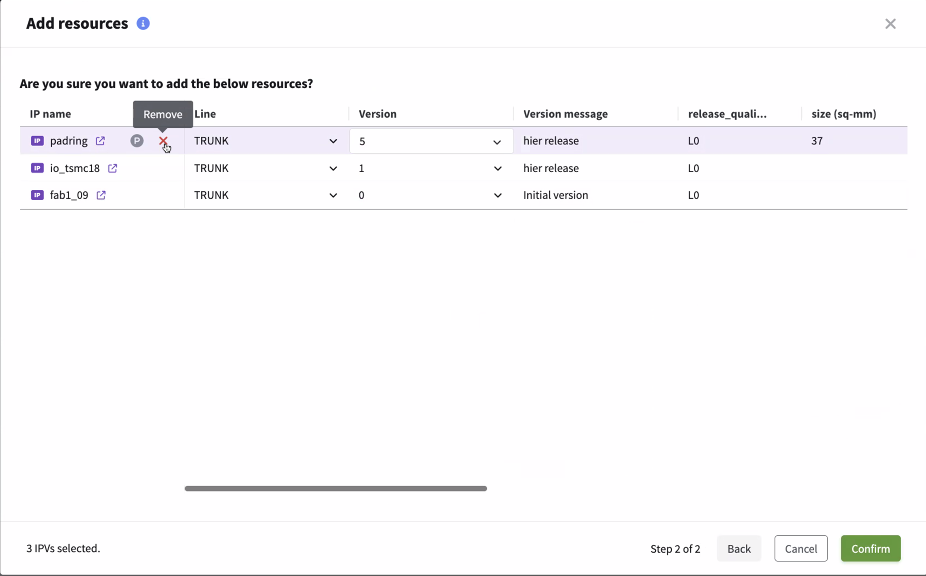
Select Add or Add resource to open the Add resources window.
.jpg)
Filter the catalog by IP Library, Label, and Quick filters. Select one or more Labels to filter the catalog down to IPs that have all of the selected labels applied. Then, select the checkbox by the IP name, select the Line, and select the Version of the IP to include as a resource. The selection defaults to the latest fixed version on the selected line. For the version, you can select a fixed IP Version or an aliased IP Version.
Optionally, select the P icon to Add as a private resource. See private_resources on this page for information on resources and private resources.
.jpg)
Select Next to view the selected IP resources. You can edit the selections from the summary page. Click Confirm. More information on creating an IP Hierarchy using the resources field can be found on the IP Hierarchy page.
Click Save. Once added, the IP resource will appear in the Resource summary field on the right of the form.
.jpg)
Repeat the process of adding resource IPs as many times as desired. Once saved, the new IP will be available for use in the system.
.jpg)
Creating new IPs using IPLM CLI
IPs can be created on the command line using the 'pi ip add' command. Note that IPs can be created from IPLM Weband the Perforce IPLM API as well. A description of the fields in the IP creation template is shown at the top of the page.
The format of the 'pi ip add' command is:
Usage: pi ip add [-h] [--template TEMPLATE | identifier]
IPs can be created by directly editing the template that comes up when the command is run by default, or a template can be submitted via the --template option at the time of IP creation.
If an IP name is provided to the pi ip add command, the IP name will be pre-filled in the IP template, similarly if a Library name is proved this too will be pre-filled in the template.
Example:
> pi ip add mylib.newip
Successfully created IPV 'mylib.newip@0.TRUNK'.
A description of the template option:
 --template TEMPLATE, -t TEMPLATE
                        Use the specified template to add the IP. The template
                        is an ASCII file that defines the IP. This can be used
                        to add IP with a script and avoid the interactive
                        editor. To read the template from STDIN, set
                        TEMPLATE='-'.
The template format can be found via a 'pi ip list --format=template' command on an existing IP.