Install the P4 for MATLAB and Simulink
P4 for MATLAB and Simulink is a MATLAB toolbox that integrates P4 version control directly into the Simulink environment. P4 for MATLAB and Simulink uses P4 API for Java to communicate with P4 Servers and supports workflows such as check-in/check-out, diffing, and branching, all from within Simulink.
Prerequisites
Before installing P4 for MATLAB and Simulink, ensure your environment meets the following requirements:
-
MATLAB Compatibility - P4 for MATLAB and Simulink is compatible with MATLAB versions R2023b through R2024b.
-
P4 API for Java Compatibility - P4 for MATLAB and Simulink supports P4 API for Java version 2025.2.
-
Java Requirements:P4 for MATLAB and Simulink requires Java 11 or newer. However, MATLAB may default to Java 8, especially in older installations. For more information on upgrading Java within MATLAB, see Configure MATLAB to use Java 17 for P4 for MATLAB and Simulink compatibility.
-
Uninstall Previous Versions of P4 for MATLAB and Simulink - If you previously installed P4 for MATLAB and Simulink using a
.jarfile, you must remove it before installing the.mltbxversion. This is to prevent classpath conflicts, integration issues and Java version mismatches. For uninstalling instructions, see Uninstall the P4 for MATLAB and Simulink jar file.
Installation Steps
Follow these steps to add P4 for MATLAB and Simulink to MATLAB.
- Download the P4 for MATLAB and Simulink MATLAB toolbox file from the Perforce website
- (Optional) We recommend moving this out of your Downloads folder and into a separate folder on your drive. For example:
c:\p4sl-mltbx -
Start MATLAB.
-
Click Open > Open... and select the downloaded .mltbx file.
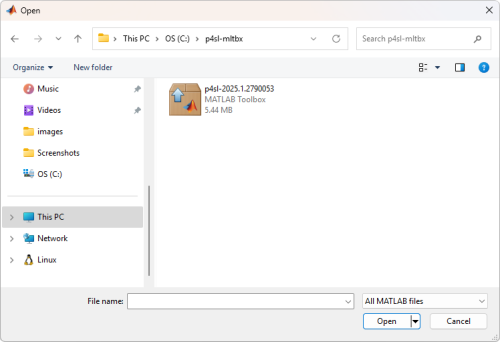
-
Click Open to begin installation. When the install is complete, you will see a dialogue box that says Installation Complete.
-
Click Finish to open the Add-On Manager where you will see P4 for MATLAB and Simulink.

- Close the Add-On Manager and restart MATLAB.
Verify Installation
This is an optional set of steps to check if P4 for MATLAB and Simulink has been installed.
-
Open MATLAB
-
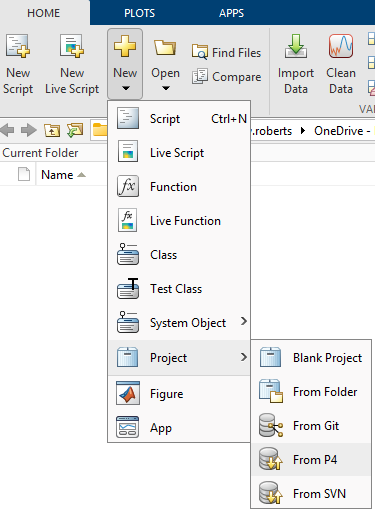
Go to Home > New > Projects > From Source Control.
-
Ensure P4 appears in the source control integration dropdown.
Configure MATLAB to use Java 17 for P4 for MATLAB and Simulink compatibility
P4 for MATLAB and Simulink requires Java 11 or newer, but MATLAB may default to Java 8, causing compatibility errors. To manually configure MATLAB to use Java 17, follow these steps:
-
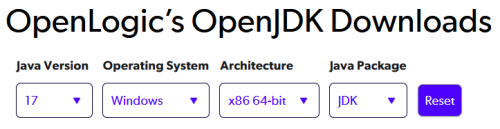
Download OpenJDK 17 from the Perforce website. Use the filters on the page to help you find the right Java package for your device.
-
Move this file to a new location on your drive, for example:
C:\jdk-17 -
Set the
MATLAB_JAVAenvironment variable.-
Open System Properties. Press Win + S, search for "Environment Variables", and open it.
-
Under System variables, click New.
-
Enter the following values into the fields:
-
Variable name:
MATLAB_JAVA -
Variable value:
C:\jdk-17
-
-
-
Click OK to save and close all dialogs.
-
Restart MATLAB
-
To verify the Java version, enter the following into the command line:
version -java -
You should see something like:
Java 17.x.x from C:\jdk-17