The following information can help you troubleshoot when errors occur in the integration.
To find information for troubleshooting integration issues, look in the following areas.
Integration logs
Log files for the integration are in the Log directory in the integration installation directory (e.g., C:\Program files (x86)\P4 Plan\Jira Integration\Log). Check the log first when troubleshooting.
Integration status dialog box
P4 Plan has a status dialog box you can use to troubleshoot syncing errors between P4 Plan and Jira. You can look at the status in any project the integration is enabled for.
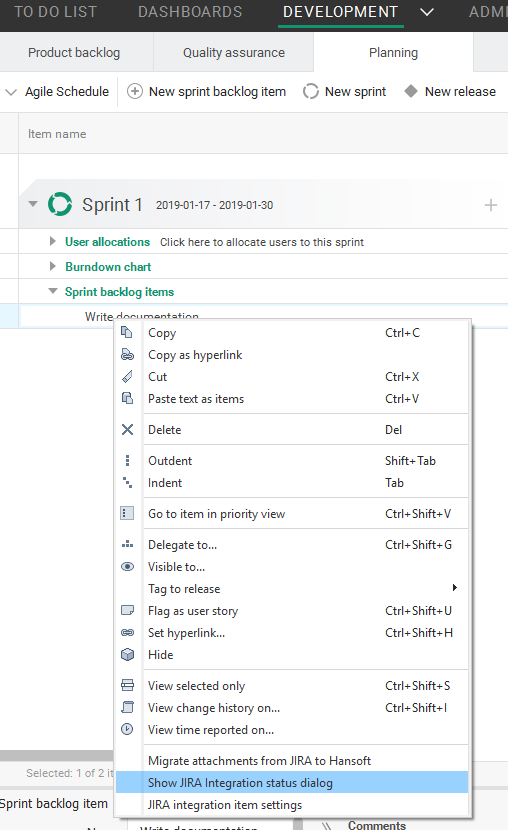
1. In the P4 Plan section integrated with Jira, right-click an item and choose Show Jira integration status dialog.

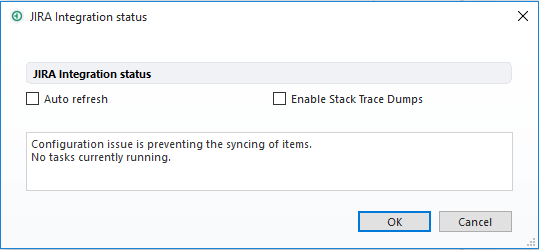
The Jira Integration Status dialog box opens. It shows any errors that are preventing syncing and any current syncing tasks.

2. Select Auto refresh to automatically refresh the information displayed in the dialog box. If this option is selected, new trace dumps are continuously generated.
3. Select Enable stack trace dumps to write out a full thread dump from the integration.
4. Click OK when you finish.
Project integration settings status
1. In Hansoft, go to the section integrated with Jira.
2. Click More and choose Customize integration settings.
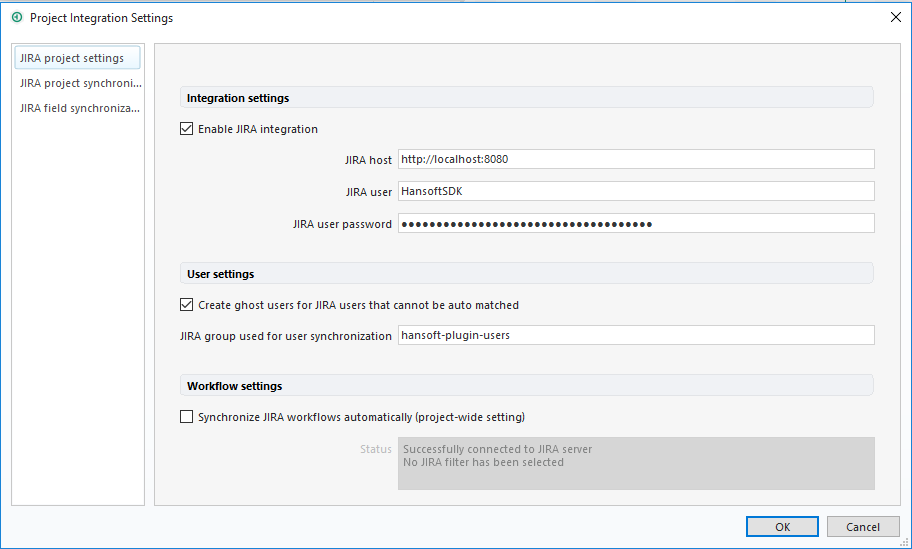
The Project Integration Settings dialog box opens.

3. Look at the Status field for error information.
When the integration is installed, you can enable P4 Plan integration logging in Jira. Add the following lines to the atlassian-jira\WEB-INF\classes\log4j.properties file and then restart the Jira server.
---------------------------------------------------------------------------------
############################################################
#   integration LOGGING LEVELS
# Writing INFO or DEBUG sets the level of detail in logging
############################################################

log4j.logger.se.hansoft = INFO, console, filelog
log4j.additivity.se.hansoft = false
---------------------------------------------------------------------------------You can configure the integration to send email notifications about errors. Configure notifications in the integration settings file. See Editing the integration settings file.
All integration configuration errors are sent to the admin email address specified in the settings file.
For user-level errors, such as rejected updates, the integration checks for an email address for the user responsible for the update and emails them. The integration checks P4 Plan first for an address and if one is not found, it checks the linked user in Jira. If the integration is not enabled for the user, the email is sent to the admin email address specified in the settings file.
To prevent deadlock scenarios when the integration is syncing, we recommend increasing the database connection pool size to at least 32 in the Jira configuration tool. See the Jira help for more information.
When hosting Jira on a Linux server, the Java virtual machine may run out of file handles. The limit is typically set to 2048 files per process. If this limit is reached, the integration starts reporting exceptions when syncing issues. Contact Jira support for help.
A 'CERTIFICATE_VERIFY_FAILED' error may be returned when configuring the integration and SSL is required to communicate with the Jira server. The message is displayed in the log file and in the Status area in the Project Integration Settings dialog box.
The steps to fix this issue are different for self-signed certificates and certificates signed by a certificate authority (CA).
Self-signed certificate
Perform the following steps to use the P4 Plan Jira integration with a Jira server configured with a self-signed certificate for SSL.
1. Export the key pair from your server's keystore to a PEM file named cacert.pem. You can use Java Keystore or Portecle to do this. In Portecle, right-click the key pair and choose Export.
2. Save the cacert.pem file in the Jira integration installation directory. The default location is C:\Program Files (x86)\P4 Plan\Jira Integration.
3. Restart the integration service.
Certificate authority
Perform the following steps to use the P4 Plan Jira integration with a certificate signed by a certificate authority.
1. Locate the certificate authority that signed your Jira server. Log in to Jira in a browser and click the lock icon in the address bar.
2. Export the certificate as a Base-64 X-509 file with cacert.pem as the name.
3. Save the cacert.pem file in the Jira integration installation directory. The default location is C:\Program Files (x86)\P4 Plan\Jira Integration.
4. Restart the integration service.
A ‘Could not connect to notification host’ error is returned when the P4 Plan integration plugin on the Jira side cannot connect to the host server running the Jira integration. Make sure that a connection between your Jira server and the server hosting the integration is allowed on your network.
If a 'Timeout waiting for connection' error is displayed in the Status field in the Jira settings category in the Project Integration Settings dialog box, the integration was able to connect to P4 Plan, but could not establish a connection to or from Jira. Check the following:
- The host and port in the Jira host field are correct (in the same dialog box).
- The NotificationHost and NotificationPort values are correct in the integration settings file. These values are in the Plugin Configuration section. These are the host and port for the P4 Plan Jira integration service.
- Any firewall between the computer hosting the P4 Plan Jira integration executable and the computer hosting the Jira server is open for incoming and outgoing traffic:
- The computer running the P4 Plan Jira integration must be able to connect to the port where the Jira server runs.
- The computer running Jira must be able to connect to the port and host where the P4 Plan Jira integration runs.
- On the same computer the P4 Plan Jira integration is installed on, try logging in from a web browser to Jira directly as the user configured for the integration. If you cannot log in, you must resolve that issue before resolving any integration issues.
The integration must be enabled for each user who needs access to it. See Mapping P4 Plan users to Jira users. If 'No mapping for this Jira server' is displayed in the list to select a Jira user to map the P4 Plan user to, make sure that:
- The name of the Jira group created for the integration is correct in the Jira group used for user synchronization field in the Jira settings category in the Project Integration Settings dialog box (e.g., hansoft-plugin-users). See Configuring the Jira user in P4 Plan.
- The user in the group specified in the project integration settings is in a Jira group that allows access to P4 Plan.
- The email address for the Jira user is the same address as the P4 Plan user.
If a Jira filter is not available in the Filter for issues to replicate from Jira to P4 Plan field when configuring sync settings in P4 Plan, make sure that:
- The filter exists in Jira.
- The filter name matches the search string set in the integration settings file. The default value is 'hansoft', which will match all reports starting with the string 'hansoft', such as 'hansoft_bugs'. This value may need to be changed.
- The integration user in Jira has access to this filter.
If fields in the Jira synchronization category in the Project Integration Settings dialog box are disabled and the Status field does not show a message, it may indicate that the Jira user specified in the Jira settings category cannot log in to Jira. This typically happens if the Jira user exceeds the maximum unsuccessful logins and login via Captcha is required in Jira.
5. Log in to Jira as the user specified in the Jira settings in P4 Plan. This should be the user you created for the integration. Complete the Captcha information to successfully log in.
6. Go to Hansoft and check if the Jira synchronization fields are now available. Look at the status field for additional troubleshooting information.
If the integration plugin is shown as incompatible in the Administration area in Jira, the integration should still work as expected.