Creating the Layer in the Database
In this section, you are going to create a database for use with this example. You will use the Oracle Sample to create the database.
If your Oracle Sample is not compiled, follow the instructions in <installdir>/samples/maps/oracle/index.html to compile it.
To create a sample database:
1. Run the Oracle Sample application.
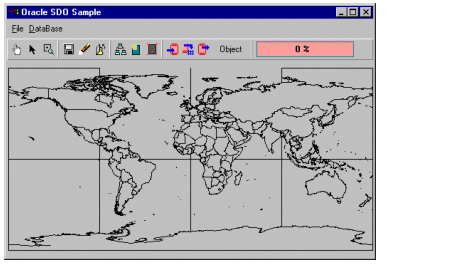
2. Choose Load a map file from the File menu.
3. Type the name of your data file in the text field that appears. This example uses the Shapefile data: <shapedir>/world.shp.
SDO Sample with Shapefile Loaded
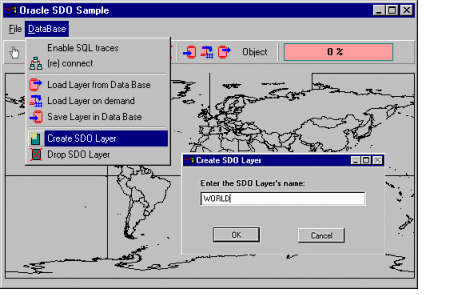
4. To create a layer in the database, check that the database mode toggle displays “Object” in the toolbar of the sample. Then, select Create Layer in the Database menu. If you are not connected to the database, a default connection panel appears to request the connection parameters:
Default Database Connection Panel
Because you want to use the Object relational model, you can use either the oracle81 or the oracle8 driver in the DBLink Driver combo box.
The other possible choice (oracle73) is only valid for the Relational Model.
For your database account and SID, contact your database Administrator.
5. Once connected to the database, type the name of the layer you want to create. For this sample, the layer name is WORLD.
6. Click OK.
Creating an SDO Layer
7. Save the data in this layer by choosing the Save Layer in Database option from the DataBase menu. Choose the WORLD.GEOMETRY layer from the list and then confirm.
8. After data is written, a dialog box appears requesting the tiling level. Enter 8, which is sufficient for this sample. This value is an Oracle Spatial variable that controls the way the tiling of data is performed. For more information, refer to the Oracle Spatial documentation.
You can now use the data in the exercises in the reminder of this chapter.
Version 6.3
Copyright © 2018, Rogue Wave Software, Inc. All Rights Reserved.


