Context-Sensitive Model Pop-up Menu
This section describes the commands that can appear in the context-sensitive pop-up menus in the model pane. To choose an item from a context-sensitive pop-up menu, click with the right mouse button on a class icon to open the Class pop-up menu or on a relation icon to open the Relation pop-up menu.
Class Pop-up Menu
Depending on the context of the class, the following commands can appear in the pop-up menu for a class icon.
1. Set Origin
This command can be used to set the origin of the view manually. Normally, this command is not needed since the origin is set automatically when you create a table representation.
Note that once you have defined an origin and created a table representation, this command is no longer available because this representation may reference the origin. Changing the origin would cause the representation to fail at runtime.
2. Remove Origin
This command can be used to remove the origin manually. It is normally not used.
3. Set View Class
If your model contains a class that implements a view type by deriving from IlsMvView, use this command to specify that this class should be used as the view type for the current view.
In this case, when the view is created, an instance of this class rather than an instance of IlsMvView will be created. This mechanism allows you to add new functionality to a view if necessary.
Note: When you set the view type, the relation view changes in the model to point to the new class. This mechanism allows you to access view-type specific attributes via the relation view within the model. |
4. Unset View Class
This command can be used to set the view type back to the default, namely IlsMvView.
5. Hide Class
This command can be used to hide classes that are not needed during the construction of the current view. The command Show all classes in the File menu can be used to make the classes reappear.
Relation Pop-up Menu
Depending on the context of the relation, the following commands can appear in the pop-up menu for a relation icon.
1. Propagate
This command can be used to propagate a relation manually, or to change a relation that was marked as “Propagate Before” to propagate after.
2. Propagate Before
This command can be used to mark a relation as “Propagate Before”. This means that the relation must be propagated before the representations for the class are created. This is necessary when the creation of the representation needs an object for its construction and this object will be created as the result of the propagation of the relation.
3. Don’t Propagate
This command can be used to remove the propagation of a relation manually.
4. Move Down
This command is the equivalent of selecting the relation and pressing the Down arrow key. See the command Move Up.
5. Move Up
This command can be used to change the order of relations in a class. It is equivalent to selecting the relation and pressing the Up arrow key.
By default, relations are propagated in the order they appear in the model pane, working from the top downwards. Therefore, you will use this command when the order of propagation is important for your application.
For example, if your class has two relations, nodes and links, and both of these relations are propagated, links will be normally propagated before nodes because it appears first in the list of relations. If your view requires that nodes be propagated before links, you will need to move nodes up in the order of the relations until it appears above links.
Conversely, the command Move Down can be used to move the relation down in the ordering.
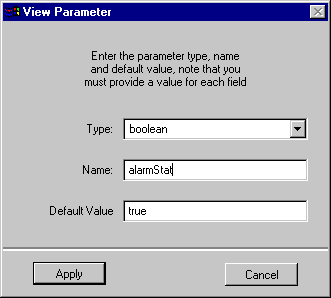
6. Add View Parameter
If the relation is the special view relation, this command is available. You can add view parameters to your view and map them in the component via the Properties table.
View Parameter Dialog Box
Version 6.3
Copyright © 2018, Rogue Wave Software, Inc. All Rights Reserved.

