Hyper-References
A hyper-reference is a value that lets you access another object when you double-click it.
It can be thought of as a pointer to an object. Hyper-references can be used individually or in tables.
To see how hyper-references work:
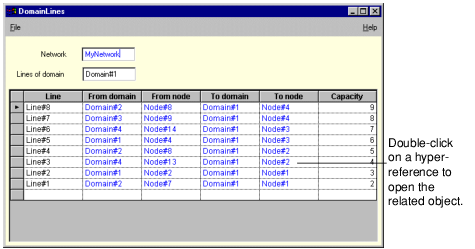
1. In the DomainsOfNetwork panel, double-click on the three dots at the intersection of row Domain#1 and column Lines.
The Domain Lines panel for the Network application.
Opening a Hyper-Reference
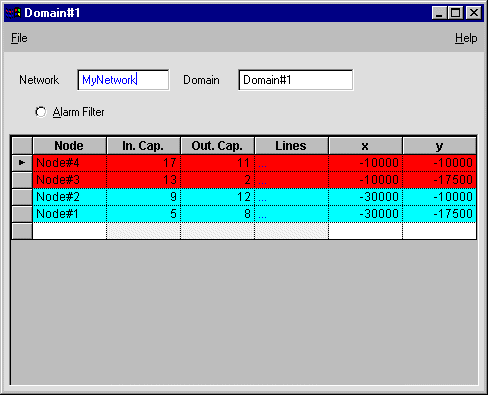
2. Double-click on Domain#1 in any cell.
A panel displaying the nodes attached to Domain#1 appears on screen.
Displaying the Nodes attached to a Domain
Dragging a Hyper-Reference to a New Location
Hyper-references can be dragged to a new location. In this section, you are going to replace one output node for a line by another node in the same Domain Lines panel.
1. If you have not already done so, open the Domain Lines panel for Domain#1.
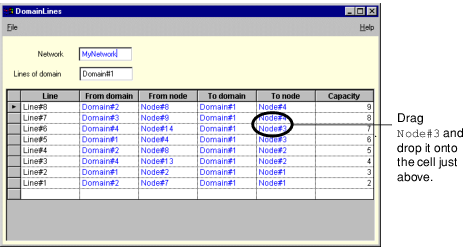
2. Point to the Node#3 hyper-reference in the Line#6 row and drag it over Node#4 in the Line#7 row.
A shadow duplicate or the outline of the hyper-reference name follows as you move the arrow pointer.
Moving a Hyper-Reference
3. Release the mouse button and drop the hyper-reference onto Node#4 in the Line#7 row.
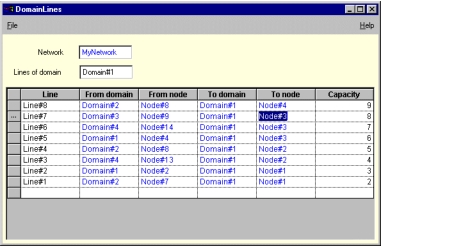
The Domain Lines panel for Domain#1 now appears as illustrated below: Node#3 has replaced Node#4 on Line#7.
Displaying the Changes in DomainLines View
Note that:

The arrow to the left of row
Line#6 has disappeared.

The row header to the left of
Line#7 displays an ellipsis (
"..."). This means that the row has been modified. At this stage, you can undo your action by pressing the
Esc key.
To commit the change to the server, you must click on a different row, whereby the ellipsis changes back to an arrow.
In the subsequent steps, it is assumed that the value was dropped and committed.
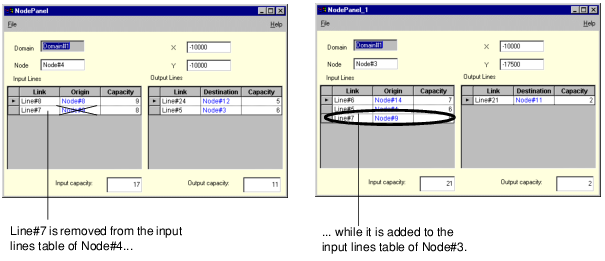
4. Open the NodePanel views for Node#3 and Node#4 by double-clicking on Node#3 and Node#4 in the Domain Lines panel.
You can see that an input line has been added in the Node panel for Node#3.
Symmetrically, an input line is removed from the Node panel associated with Node#4, as illustrated below.
Displaying Changes in Node Panels
Version 6.3
Copyright © 2018, Rogue Wave Software, Inc. All Rights Reserved.
