Launching the Demonstration on Solaris
To launch the Network application, first start the Network object server as explained below:
1. If necessary, start the logical mapper tcpd.
To run the logical mapper on Solaris, type $ {ILSHOME}/bin/${SYSTEM}/tcpd&.
2. Go to the directory $ {ILSHOME}/demo/network1/${SYSTEM}.
3. Type the following command to start the Network object server:
network -ilsn my_network -ilsr network.ls
A message appears indicating that the Network server is ready.
Once the server is running, invoke the predefined client application by typing the following command:
$ {ILSHOME}/bin/${SYSTEM}/swcomp
The predefined Rogue Wave® Views client application swcomp lets you connect to an object server and open views of that server that were designed using Rogue Wave Server Studio.
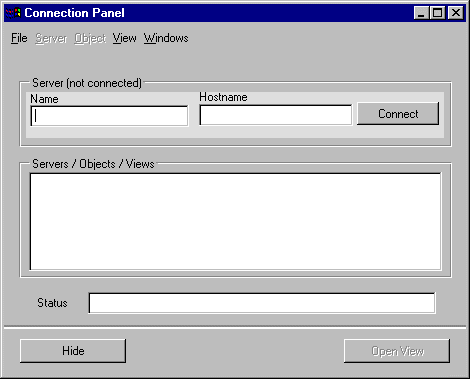
The following Connection Panel appears.
The swcomp Connection Panel
Using Command Line Options
You can also invoke swcomp using the following command line switches:
 –ilsconnect [server name]
 or
–ilsc [server name]— Specifies the server which
swcomp should try to connect to. The server name can be either
"name@host" or
"name", in which case the local host is used.
Note: The commands –ilsconnect and –ilsc are equivalent. However, only those two forms are accepted. For example, –ilsco is not accepted. |

–
ilstrace— Enables the log. Your actions will be listed in sequential order in the log window if you choose Show Log Window from the Windows® menu.
For example:
swcomp -ilsc my_network -ilstrace
 -ilsv ObjectName.ViewName
—Specifies the server object and the view you wish to open.
For example:
swcomp -ilsc network1@eiger.ilog.fr -ilsv Top.NetworkPanel
swcomp -ilsc network1 -ilsv Top.NetworkGraph
Version 6.3
Copyright © 2018, Rogue Wave Software, Inc. All Rights Reserved.

