Defining the DEPT_DS SQL Data Source
You are now going to define another data source, this one based on the I_DEPT table in the Employee database.
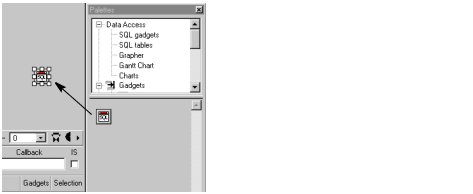
1. Drag the SQL Data Source gadget from the SQL gadgets palette to the Main window.

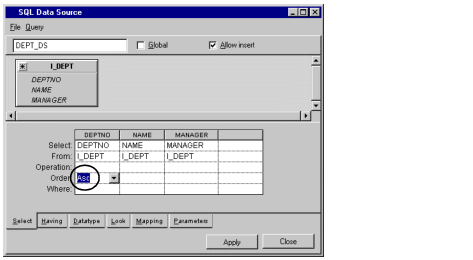
2. Double-click the SQL Data Source gadget you just dragged to open the SQL Data Source inspector. Type DEPT_DS in the Name field at the top of the SQL Data Source inspector.

3. Choose Add Tables... from the Query menu of the SQL Data Source inspector panel.
The Connect panel appears.
4. Select Main from the Name combo box of the Connect panel as you did for the EMP_DS data source in the section Defining the EMP_DS SQL Data Source. The Connect panel changes to show only this name.
5. Click OK.
The Select Tables panel appears.
6. Select the name I_DEPT in the list on the left of the panel and click the -> button to add it to the right list. Then click OK.
The I_DEPT table appears in the FROM section of the SQL Data Source inspector.
7. Create three columns in the SELECT section by dragging from the asterisk in the top left corner of the database table in the FROM section to the column in the SELECT section.
8. On the Select page, choose Asc from the combo box menu in the Order cell of the DEPTNO column.

9. Click Apply in the SQL Data Source inspector.
DEPT_DS appears under the SQL Data Source gadget in the Main window.

You have now defined the DEPT_DS data source.
Published date: 05/24/2022
Last modified date: 02/24/2022


