Attachment Operations
Here are the types of operations you can perform while attaching objects:
 Creating Attachments
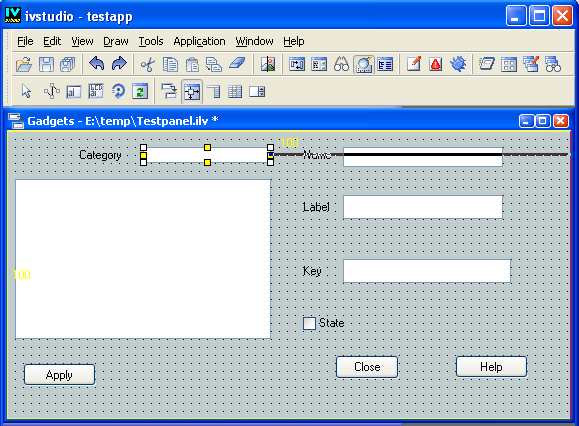
 Select the object you want to attach and drag a line (with the mouse button pressed) from a middle handle of that object to a guide parallel to that side. When the guide becomes highlighted, release the mouse button. Default attachments are made on the opposite side and inside the object. The specified attachments apply to all the selected objects.
Attaching an Object to a Guide
Note: When creating attachments between a guide and an object, you may have problems if the object is too close to the guide. In this case drag the mouse in the opposite direction and then back to the guide. |
 Removing Attachments
 Drag one of the attachment’s handles and release the mouse button when the new line is not touching a guide.
 Changing an Attachment from One Guide to Another
 Drag a line from the attachment handle to a new guide.
 Changing the Type of Attachment
 Click on the attachment line, which toggles between fixed and elastic. This can also be carried out in the Attachments Inspector.
 Showing an Object’s Attachments
 Select the object in Attachments editing mode and double-click the object to show the Attachments Inspector.
Defaults
The defaults selected depend on the handle used to begin the attachment:
 Left and Top Handles
 The object enlarges with the panel (fixed, elastic, fixed).
 Right and Bottom Handles
 The object moves while remaining the same size (elastic, fixed, fixed).
Testing the Attachments
You can test the attachments applied to the objects by clicking the Test icon

in the Main Window toolbar. Change the test window size by using the windowing system. You will see the object behavior as the panel changes size. If you need to make changes, you can click the Test icon

again to close the test panel and make your changes in Attachments mode.
Version 6.1
Copyright © 2016, Rogue Wave Software, Inc. All Rights Reserved.
