Editing the Show State
You need two states for the application. The first one is the initial root state where only the first panel is visible. The second is a state where Panel2 is visible.
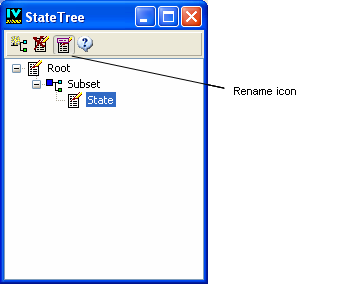
To name this second state Show:
1. Select State in the State Tree panel.
2. Click Rename in the State Tree toolbar.
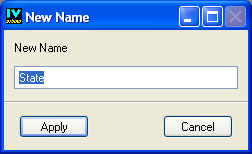
A dialog box opens allowing you to enter a new name for the selected state.
3. Type Show and click Apply.
The application now has two states: Root and Show. Using the State inspector, you can define the requirements for each state. You want Panel2 to be visible when the application is in the Show state.
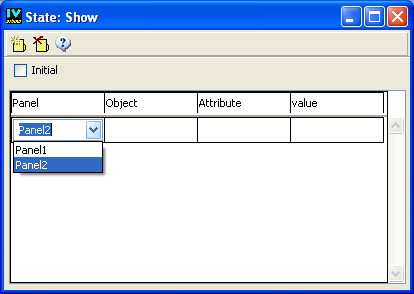
To do this, you are going to set the visible attribute for Panel2 to true:
1. If necessary, activate the Application buffer window.
2. Make sure the Show state is selected in the State Tree panel.
3. In the State inspector, click in the first row of the Panel column.
A combo box appears with a list of the panel instances from the application.
4. Select Panel2 from the list.
5. Click in the Attribute column.
A list of state requirements related to the panel is displayed.
6. Choose visible from the list.
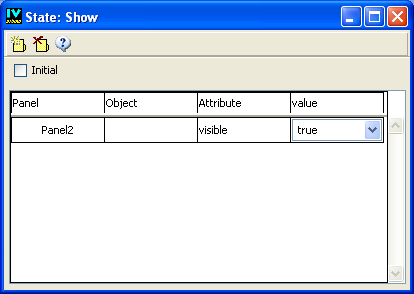
7. Click in the Value column.
A list of values related to visible is displayed.
8. Choose true from the list.
The target of this state requirement is a panel. It is identified by the panel name. Since the target of the state requirement is not an object, the Object column remains blank.
Version 5.8
Copyright © 2014, Rogue Wave Software, Inc. All Rights Reserved.