Creating Gadget Objects
The Gadgets palette in the Palettes panel provides the various predefined gadget objects from which you will create the objects for your panels. You can use either a drag-and-drop operation or the creation mode feature.
Using the Drag-and-Drop Operation
When you use the drag-and-drop operation for creating your objects, the object that is added to the buffer window is an exact copy of the object as it is found in the Palettes panel. The object has the same shape and dimensions of the object in the Palettes panel.
To create an object using the drag-and-drop operation:
1. In the upper pane of the Palettes panel, click the item in the tree corresponding to the type of gadget you want to create.
The related palette appears in the lower pane.
2. Click the gadget you are interested in and drag it to the Gadgets buffer window.
When you release the mouse button, you are in Selection mode. The object remains selected in the buffer window and you can modify it as required.
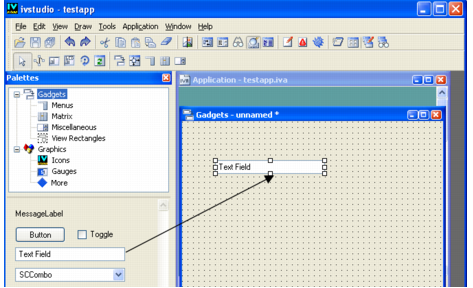
For example, to create a text field:
1. In the upper pane of the Palettes panel, click Gadgets in the tree.
2. In the lower pane of the Palettes panel, click the Text Field gadget.
3. Drag it to the Gadgets buffer window.
Using the Creation Mode
When you use the creation mode, you are essentially drawing the object in the buffer window. You determine for yourself the size and shape of the object. Creation mode also allows you to create multiple objects once you have selected the kind of object you want to create in the Palettes panel.
To create an object using the creation mode:
1. In the upper pane of the Palettes panel, click the item in the tree corresponding to the kind of object you want to create.
The related palette appears in the lower pane.
2. In the lower pane of the Palettes panel, click the object you are interested in. A bounding box appears around the object to indicate that creation mode is active.
If you want to add only one object to the buffer window, click the object in the Palettes window once. (This puts you in transient creation mode. After you have drawn the object in the buffer window, you will leave creation mode automatically.)
If you want to add multiple objects of the same kind, hold down the Shift key and click the object in the Palettes panel. (This puts you in permanent creation mode. You will remain in creation mode and you can draw as many objects as you like. To leave creation mode, you must click the Selection mode icon in the Editing Modes toolbar.)
3. Move the pointer to the buffer window.
4. Click in the buffer window where you want your object positioned and drag the mouse until the object is the size and shape you want.
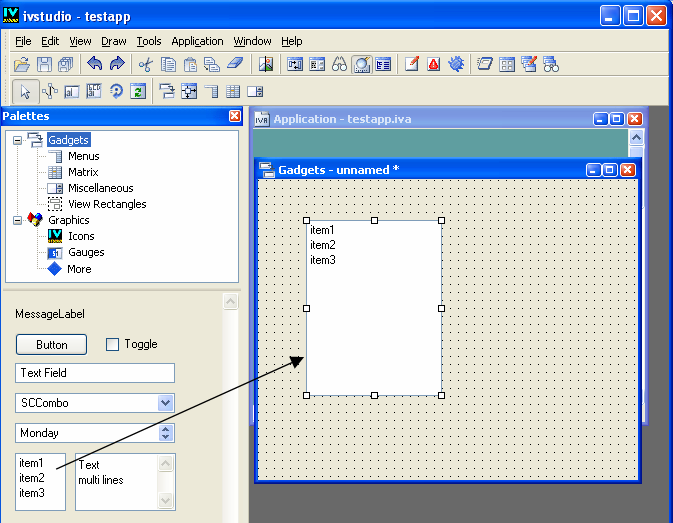
For example, to create a string list box:
1. In the upper pane of Palettes panel, click Gadgets in the tree.
2. In the lower pane of the Palettes panel, click the IlvStringList icon once. Notice the bounding box that appears around the IlvStringList icon indicating you are in creation mode.
3. Click in the Gadgets window at the position where you want to start drawing the string list box.
4. Drag the mouse until the string list box is the size and shape you want.
As you drag the mouse, you see a bounding box that shows the shape and size of your object.
5. Release the mouse button. The string list box appears with the dimensions of the bounding box you have just drawn.
When you release the mouse button, you automatically leave creation mode and are put into Selection mode. Notice that the
IlvStringList icon in the Palettes panel is no longer selected and that the Selection mode icon

is selected in the Editing Modes toolbar.
You can reshape, resize, move, or modify the box as you want.
Version 5.8
Copyright © 2014, Rogue Wave Software, Inc. All Rights Reserved.