Connecting Two Prototype Instances
You will learn how to connect two different prototype instances.
1. Choose myPanel from the Window menu in the Main window.
2. The 2D Graphics buffer window should contain the prototype instance that you created in the tutorial. If it does not, drag the myproto icon from the Prototypes palette to the buffer window to create a new instance of the prototype.
3. In the Palettes panel, choose samples in the Prototypes palette.
4. Drag the display icon to the buffer window.
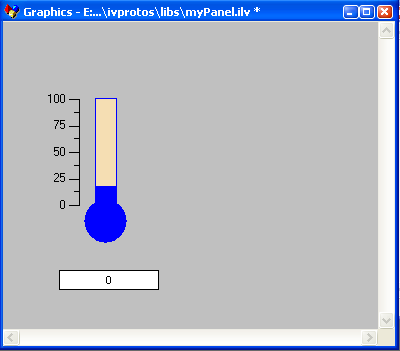
This creates an instance of the display prototype in the same panel as the myproto prototype instance:
5. Select the Group Connection interactor

from the Editing Modes toolbar.
6. Click in the myproto prototype instance. Drag a line from the myproto instance to the display instance. When you start dragging, be sure that you are dragging from a graphic object and not from an empty space.
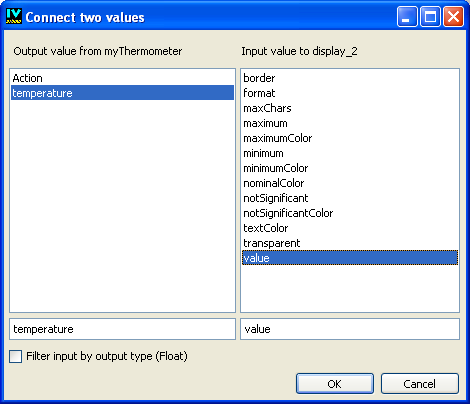
When you release the mouse button, the Connect two values dialog box appears asking you to specify which output value from the myproto instance you wish to connect to which input value of the display prototype:
7. In myproto, the triggering value is temperature. Select temperature in the left pane and value in the right pane. Click the OK button.
A green arrow appears going from the myproto instance to the display instance, indicating that a connection is made.
Each time the temperature is changed, either by the user or the application, the value accessor of the display instance will be notified and will change its value accordingly.
8. To test this action, switch to Active mode by clicking the Active icon

in the Editing Modes toolbar.
Change the level of the gauge by dragging it with the mouse. The label in the display instance changes as you change the level of the gauge.
You have completed the first prototypes tutorial.
Version 5.8
Copyright © 2014, Rogue Wave Software, Inc. All Rights Reserved.