Defining the Visual Representation of the Prototype
You will create the visual representation of your prototype.
1. First, select the next tab of the Group Inspector, to display the Graphics page.
2. Select the Prototype buffer window by clicking in “Prototype - unnamed” in the Main window of Rogue Wave Views Studio.
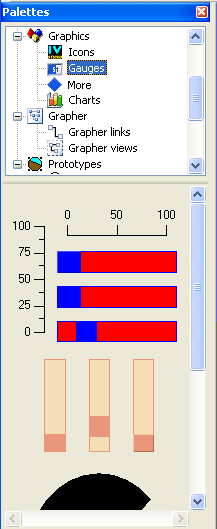
3. In the upper pane of the Palettes panel, use the scroll bars on the right side of the screen to move down through the list of palettes until the Graphics item appears. Choose Gauges under the Graphics item to display the palette containing gauges and scales.
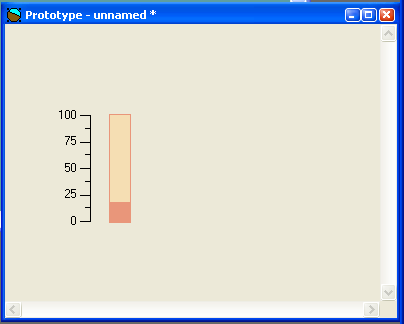
4. Drag a vertical rectangular scale (
IlvRectangularScale) from the palette to the “Prototype - unnamed” window. Then drag a vertical rectangular gauge (
IlvRectangularGauge) and place it next to the scale. Stretch the gauge vertically so that it matches the height of the scale:
5. Choose Save As from the File menu to save the prototype to the prototype library.
6. A Message dialog box asks you if you want to save the prototype in a library. Click Yes.
7. A Prompt String dialog box appears to let you choose the library in which to save your new prototype. Make sure myLib is selected in the list of libraries, or type myLib in the text field. Click Apply.
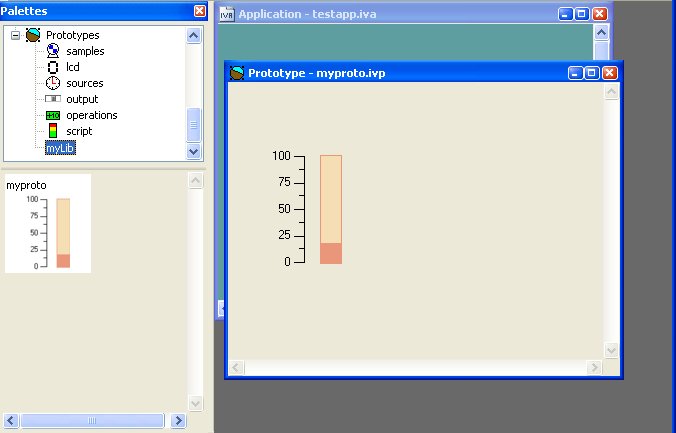
8. A new Prompt String dialog box asks you to name the prototype. Type myproto and click Apply.
In the Main window, the Prototype buffer window name changes to myproto.ivp and a new prototype icon, labeled myproto, appears in the Prototypes palette on the myLib page.
9. If necessary, bring the Graphics panel of the Group Inspector to the front by choosing Group Inspector from the Tools menu of the Main window and clicking the Graphics tab.
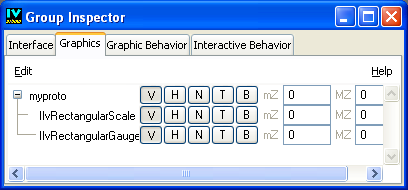
A hierarchical sheet showing the prototype structure and the attributes of each node appears on the page:
10. Select the graphic node IlvRectangularScale. You may want to enlarge the window to better view the names of the objects, or move the pointer over a name to see the tooltip giving the full name of the object underneath the pointer.
Notice that the scale is selected in the Main window as well.
11. Click again to make the field editable, and type scale. Press the Enter key.
The IlvRectangularScale in the tree gadget changes to scale.
12. Repeat steps 8 and 9 to rename the IlvRectangularGauge node as gauge.
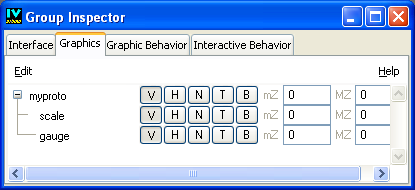
The Graphics notebook page of the Group Inspector should look like this:
13. Choose Save from the File menu of the Main window to save the prototype.
Version 5.8
Copyright © 2014, Rogue Wave Software, Inc. All Rights Reserved.