Designing the Dialog Box Using Rogue Wave Views Studio
1. Launch Rogue Wave Views Studio. For more information on Rogue Wave Views Studio, see the Rogue Wave Views Studio User’s Manual.
2. Select File > New > Gadget. This will create an empty gadget buffer.
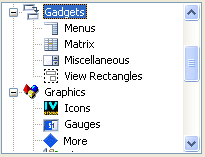
3. Select the Gadgets item in the Drag and Drop palette:
4. Drag an
IlvFrame from the objects palette and drop it into the gadget buffer.
5. Drag an
IlvNumberField and set its name to
Width. Inspect it and change its default value to
128.
6. Drag another
IlvNumberField and set its name to
Height. Inspect it and change its default value to
128.
7. Drag two
IlvMessageLabel and change their labels; one to
Width and the other to
Height.
8. Drag an
IlvButton and change its label to
OK. Also change its callback to
apply. This callback is a predefined callback for subclasses of
IlvDialog objects. See
IlvDialog::apply for more information.
9. Drag an
IlvReliefLine to separate the button from the number fields.
11. Save the file as bmpsize.ilv in the data directory of the Bitmap Editor application.
12. Select File > New > Make Default Application. This is needed to generate the C++ code.
13. Select Code > Panel Class Inspector.
14. Change the class name to BitmapSizeDialog.
16. Change the directory headers and sources to match the directories of your Bitmap Editor application.
17. Click Apply.
18. Select Code > Generate Panel Class to generate the code.
Two files have been generated: a header file (include/bmpsize.h) and a source file (src/bmpsize.cpp).
19. Quit Rogue Wave Views Studio.
Version 5.8
Copyright © 2014, Rogue Wave Software, Inc. All Rights Reserved.