Adding the Employee Window to the Application
To add the Employee window to the employdb application, do the following:
1. Make sure the Employee window (employee.ilv) is the current buffer in the work space of the Main window.
2. Click the Panel Class Palette button

in the toolbar of the Main window.
The Panel Class Palette is displayed in the bottom half of the Main window.
3. In the Panel Class Palette toolbar, click the New Panel Class button

.
The employee panel appears in the palette as an icon with the name Employee.
4. Maximize the employdb application buffer window. (You minimized this window at the beginning of the tutorial.) If the employdb.iva file is no longer open, open the file by selecting Open from the File menu.
Choose Edit Application from the Window menu. The current buffer changes to the employdb application buffer and the Panel Class Palette remains displayed.
5. Drag the Employee icon from the Panel Class Palette to the application buffer work space.
The Employee panel appears in the application buffer. This means that an instance of the employee panel has been successfully added to the application.
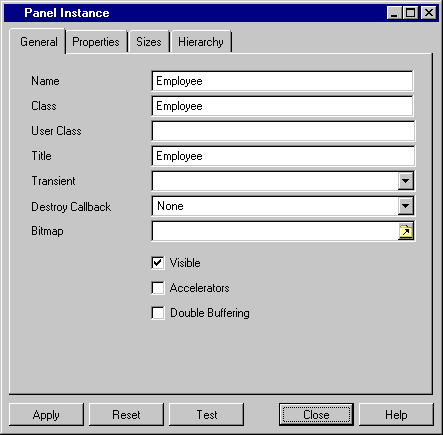
6. Double-click the Employee panel title bar or choose Panel Inspector from the Employee panel pop-up menu within the application buffer.
The Panel Instance inspector appears for the Employee panel.
7. In the Panel Instance inspector, click the Visible toggle switch to deactivate it.
The panel will now be invisible when the application is launched. You want to do this because you are going to use a Control window to display this window.
8. Click Apply. Then click Close in the Panel Instance inspector.
9. Click the Save button

in the Main window.
The application is saved with the new Employee window.
Version 5.8
Copyright © 2014, Rogue Wave Software, Inc. All Rights Reserved.
 in the toolbar of the Main window.