Defining a Form
In this section, you are going to learn what a form is and how to define and connect it to the DEPT_DS data source.
How to Define a Form
To define a form and connect it to the DEPT_DS data source, follow these steps:
1. In Selection mode

, choose Forms Assistant from the Data Access menu of the Main window.
The Forms Assistant panel appears.
2. Select the DEPT_DS data source from the combo box menu and click OK. The Forms Assistant Panel closes.
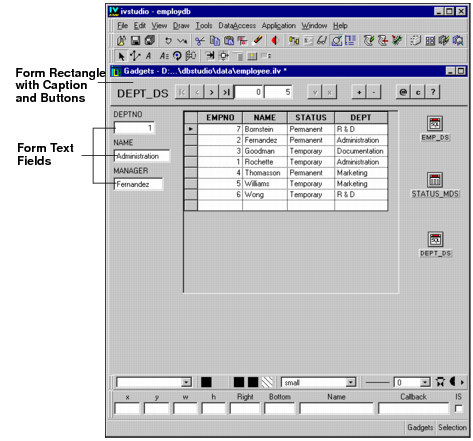
The I_DEPT form appears in the Gadgets buffer of the Main window.
There is a text field gadget for each of the columns in the data source: DEPTNO, NAME, and MANAGER.
There is also a rectangle at the top of the screen that contains the data source name DEPT_DS as a caption and a group of 10 buttons. (See
Additional Information about Forms for a description of the buttons.) In addition, there are two fields that show you the current row of the data source table that is being displayed and the total number of rows in the data source table.
3. If necessary, rearrange the objects in the work space of the Main window.
The work space should now show a table gadget connected to the EMP_DS data source and a form connected to the DEPT_DS data source.
4. In Active mode

, click the “
@” button to refresh the data source and go to the first record.
The DEPTNO, NAME and MANAGER text field gadgets of the I_DEPT form display the data for the first record in the DEPT_DS data source.
5. Click the “+” button.
The DEPTNO, NAME and MANAGER fields of the I_DEPT form become empty and ready for editing. At this point, you could enter a new department if you wanted, but leave the table as it is for now.
Version 6.0
Copyright © 2015, Rogue Wave Software, Inc. All Rights Reserved.