Connecting a Table Gadget to the EMP_DS Data Source
To connect a table gadget to the EMP_DS data source, do the following:
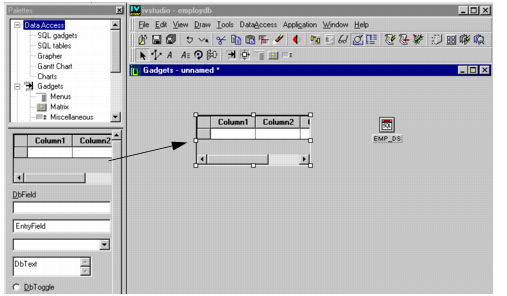
1. Drag a table gadget from the Data Access palette to the Main window.
2. Double-click the table gadget.
The Table Gadget inspector appears.
3. Use the combo box to enter EMP_DS in the Data source field of the Table Gadget inspector. Click Apply.
The column headers in the table gadget in the Main window change to match those of the EMP_DS data source table. Adjust the size of the table gadget so you can see all of the columns in the table. Your table gadget should now look like this:
4. In the Main window, click the Active button

in the Editing Mode toolbar at the top.
You can now edit the table gadget.
Leave the table gadget as it is, as you will be using it in the next section.
Note: You can always refresh your table by clicking the table in Active editing mode to give it the focus and then pressing the F9 key. The F9 key clears the data source cache and then updates the table by querying the database. The display will thus reflect the current state of the database. If your keyboard does not have an F9 key, do the following: 1. Drag the database navigator gadget (the one with ten buttons) from the Data Access palette to the Main window. 2. In Selection mode, click the gadget to open its DbNavigator inspector. 3. Connect the gadget to the data source by selecting the data source in the combo box menu of the Data Source field. 4. Click the Active button in the Main window. 5. Click the @ button of the database navigator gadget. The @ button works like the F9 key described above. |
Version 6.0
Copyright © 2015, Rogue Wave Software, Inc. All Rights Reserved.