Working in the timeline view
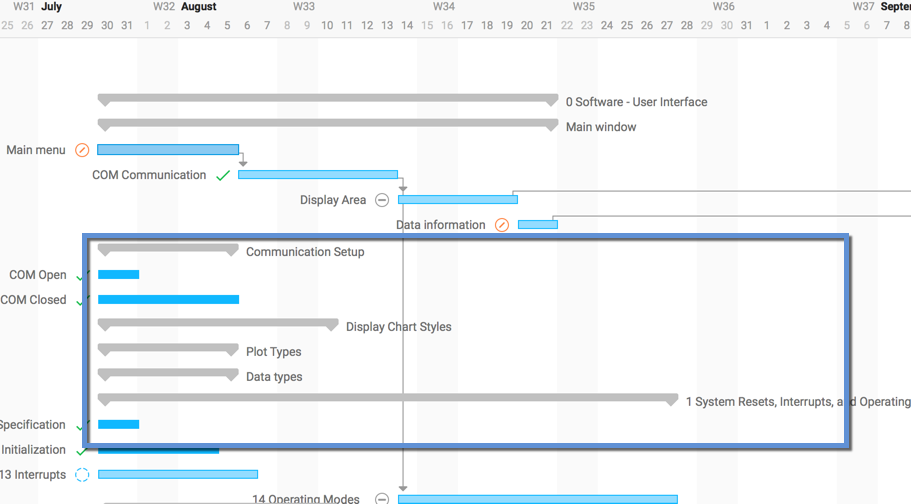
The timeline view is a cornerstone in visualizing and editing items and the connections between them. The timeline view shows both scheduled tasks and backlog items. Past sprints are displayed in gray.
This is an introduction to the most important aspects of the timeline view.
Changing the position of the time scale
Hansoft recommends that you use the right mouse button and click in the view when you are not hovering above an item, dragging the time scale along with your mouse. This is the quickest and most effective way to navigate.
You can also use the horizontal scroll bar located below the timeline view. According to the timescale the earliest task begins when the scroll bar is at the far left. When the scroll bar is at the far right, it means that this is when the latest task ends according to the time scale.
Zooming in and out of the time scale
You can either click the Zoom in and Zoom out buttons located in the main timeline toolbar or use the mouse scroll wheel while pressing the Ctrl button on the keyboard (Cmd button on Mac).
Time box selecting
Use left mouse button and drag across the timeline view.
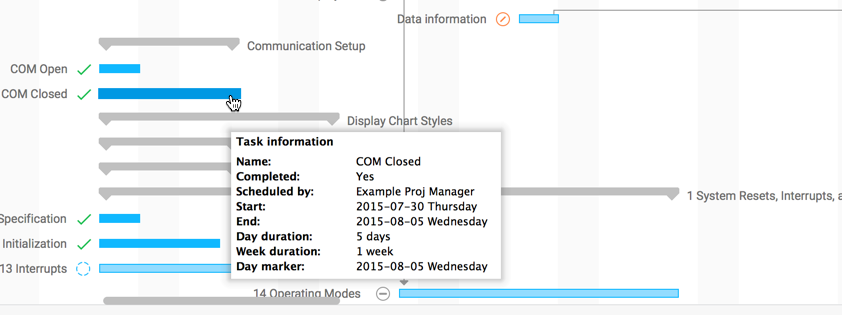
Changing the start or end date of a task
Change the position of the mouse to the far left or right of the task and then press the left mouse button. The information window will give you specific details on the change and how it will affect the task.
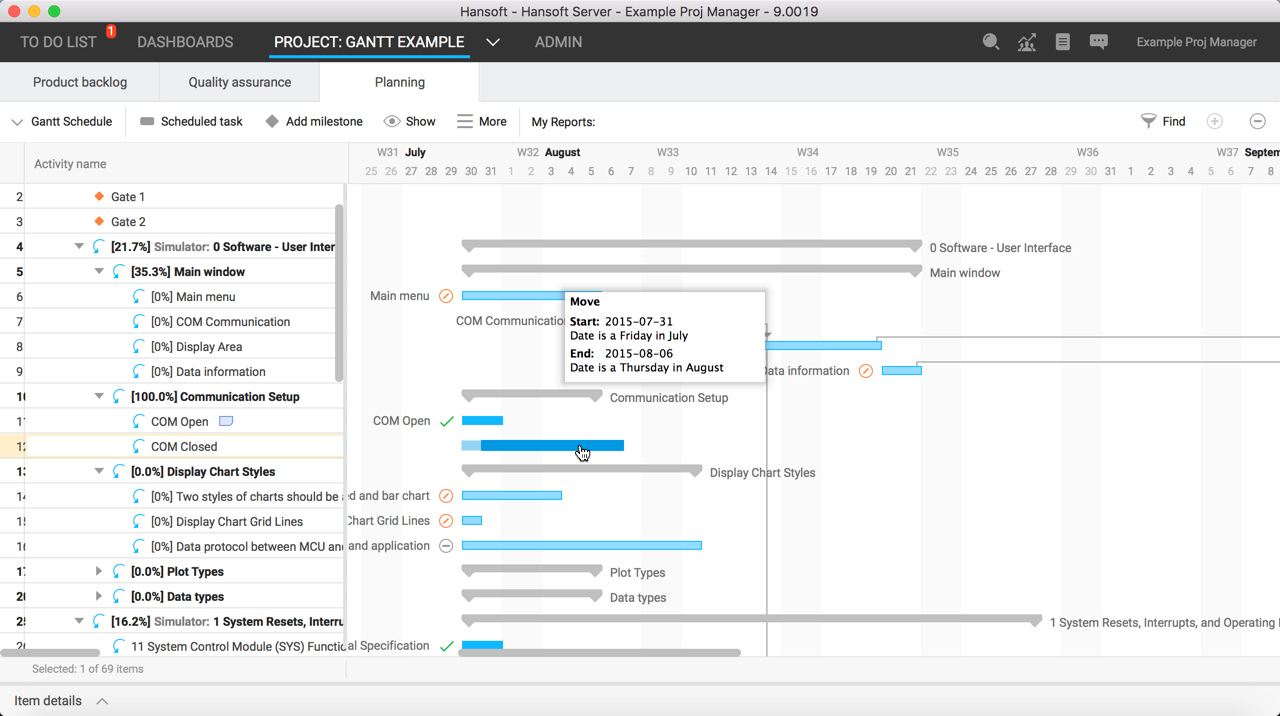
Moving an item
You can move an item (both tasks and releases can be moved) by moving the mouse to the middle of the task or item and pressing the left mouse button.
Connecting items
A cornerstone in the project planning is to set logical dependencies (referred to here as connections) between items. This is an easy (and sometimes fundamental) way to work with large portions of the plan without moving every single task every time.
You can connect two items by pressing the left mouse button on an item, moving the mouse to another item, and then releasing the mouse button. The action is indicated by an orange arrow and orange items.

The item you disconnected from (the first) now affects the item you connect to (the second). The start date of the second item will now always be later than the end date of the first item.
You can not create illegal dependencies:
A blinking red arrow along with red items indicate that the connection you are about to make is impossible.
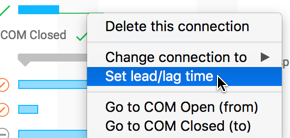
You can configure the connection by clicking on it with the right mouse button:
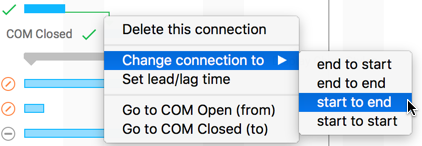
When you connect two items, the end date of the first task affects the start date of the second task. This is referred to as an "end to start" connection. This can be changed to other types of logical dependencies that work in the same way. Select the type of connection that suits you best.
You can also connect summary items to items and vice versa:

You can set the lead/lag time on a connection by right clicking on the connection and selecting Set lead/lag time:
Right click on the connection and select Delete this connection from the menu.
Item menu
If you click the right mouse button on an item in the timeline view, a menu will pop up:
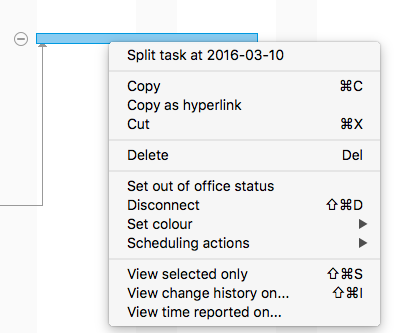
You can now perform the following actions:
- You can split up a task into two or more parts. This can, for example, be useful when you have a task with long duration and you have to make room for out of office.
- Cut deletes and copies the item from the Hansoft clipboard and to the Windows clipboard as raw text information.
- Copy simply copies the item to the Hansoft clipboard, and to the Windows clipboard as raw text information.
- Delete deletes the item.
- Disconnect removes all connections to and from the item.
- Set color sets the color of the item
Note: All actions can be undone.


