Advanced release tagging
When working with release tags in Hansoft it is not uncommon that you need to update a large amount of items at once, adding, removing or replacing a specific release. Below you'll find a couple of examples of how to efficiently use the release tag dialog box.
Note that changes in the release dialog box are not applied until you click OK and you can always discard pending changes by clicking Cancel.
Releases/milestones in Hansoft are explained in more detail here: Release tags/milestones.
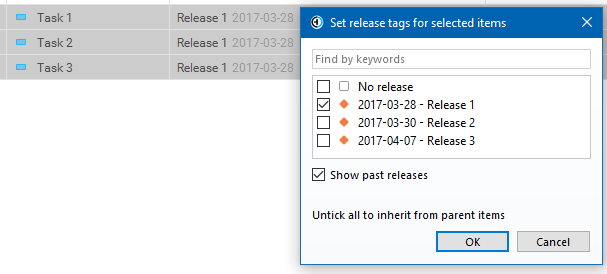
In this setup all three tasks are tagged to the same release which is reflected by the selected check box. A check box that is not selected means none of the selected items has the release set.
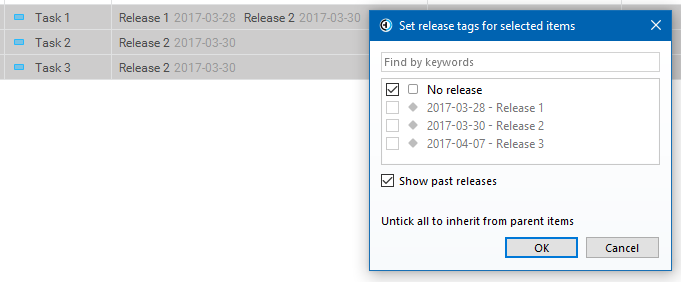
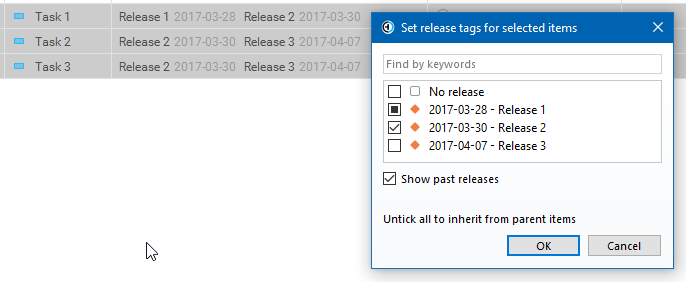
The selected check box indicates that the items are in an indeterminate state. One item has "Release 1" set, none of them have "Release 2" and two have "Release 3".

Selecting Release 2 and clicking OK will add it to all marked items.
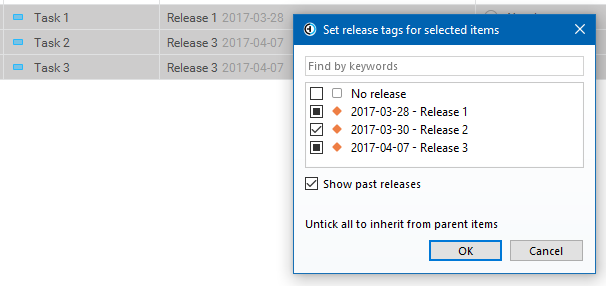

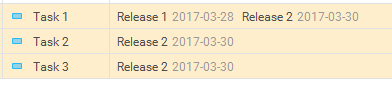
Continuing on the same example you realize that "Release 3" should be removed from all items. Open the dialog box, clear Release 3, and click OK.
 a
a
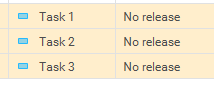
Using the same setup, selecting "No release" will replace all existing tags with "No release" and all other releases will be grayed out.