Step 12: Set up and use game integrations (optional) | Admin
If you are using Unreal Engine or Unity 3D, you can either submit changes in P4V using the steps in Add and work with versioned files, or by using the source control menu built into Unreal Engine or Unity 3D. Before you can use the source control menu in your game engine, you must configure it.
If you are not using Unreal Engine or Unity 3D, skip this step and continue to Add users and learn about user permissions.
On this page:
Set up the source control extension in Unreal Engine
Unreal Engine (UE) has a built-in source control extension that integrates with P4. You can use it to submit changes. Use the following steps to configure the source control extension.
-
In P4V, open the UE project to use the integration with. When the project opens in UE, it is added to the list of recent projects, and UE recognizes the project's workspace.
As a best practice, open your project in P4V first to ensure you are logged in to P4V before you start working on project files. -
In UE, click the Revision Control or Source Control icon (depending on your UE version) and select Connect to. In UE5, the extension is in the bottom right of the screen, and in UE4, it is in the upper left. You can also access the extension in the Tools menu.
-
In the Revision Control Login pane, select Perforce as your provider.
-
Enter your server address, including the port number and SSL (if your server uses it), user name, and workspace. For example,
192.168.0.1:1666orssl:p4d-1.example.com:1666.You can either enter the workspace in the Workspace field or select it from the Available Workspaces dropdown menu. If you are not logged into P4V or the project is not in your P4V workspace, a
No workspaces found!error is displayed. If you get this error, check that you are logged in and that the workspace exists in P4V.If you enter a workspace that does not match the project you have open in UE, your changes will not be recognized.
-
Click Accept Settings.
When you successfully connect P4 to UE, the Revision Control icon changes to show you are connected.
Work with files using the source control extension in Unreal Engine
When you make changes to project files, Unreal Engine displays a message to confirm if you want to check out files. You can check out files manually or automatically.
Check out files manually
-
Check out files you are working with before saving changes.
-
When you are ready to submit the files, click the Revision Control or Source Control icon and click Submit.
Check out files automatically
You can automatically check out files when you modify them, so you do not need to check them out every time.
To set up automatic check out, in Editor Preferences, under General, click Loading & Saving. Under Source Control, select the Prompt for Checkout on Asset Modification checkbox.
If you check out a file that you did not intend to check out, revert it so other users can edit it. Right-click the file in the Content Browser, click Revision Control, and select Revert Files.
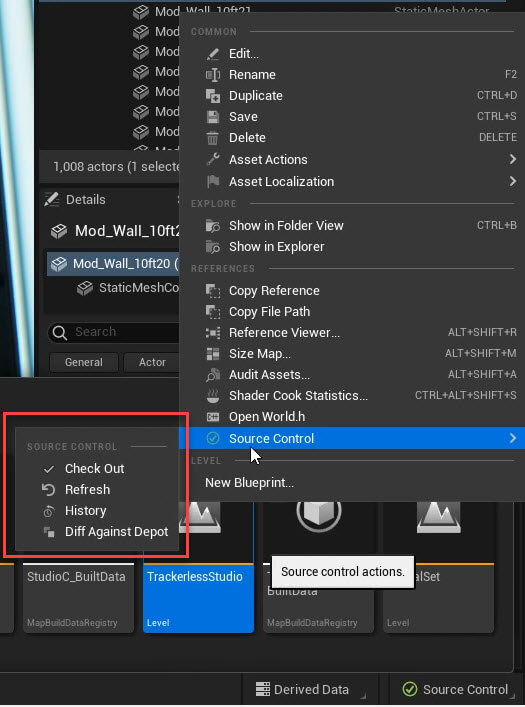
Access the Source Control menu on individual assets
You can get the latest changes from other users from the Source Control menu. To access the Source Control menu on individual assets, right-click in the Content Browser and select Revision Control. This allows you to compare your changes with the server, revert your changes to undo them, view the history of changes on the file, get the latest version of the file, and more.
Avoid issues
Refresh assets
In most cases, you can use either the UE integration or P4V to make updates.
However, when you get the latest updates to assets for your project, and you want to get a small number of changes, use UE. If you try to get the latest files from P4V while UE is open, P4V might become unresponsive. If that happens, close UE to allow P4V to get the updated files. If you have a large number of files that you need to get updates for, the quickest way to do that is to close UE and get the latest assets via P4V.
Reorganize files
When you want to reorganize files in a UE project, do it in UE (not P4V) so that references in asset files and temporary redirection files are updated correctly.
After you organize files in UE, right-click the Content folder, select Update Redirector References, and then save all changes before you submit the files in P4V.
Learn more
The following video shows a typical workflow using P4 integration with Unreal Engine.
Set up the source control extension in Unity 3D
Unity 3D has a built-in source control extension that integrates with P4. You can use it to submit changes. Use the following steps to configure the source control extension.
-
In your Unity 3D workspace, open the project to use the integration with. In later steps, Unity 3D will recognize changes to the files in your workspace.
-
Select Edit > Project Settings.
-
Under Version Control, select Perforce as the Mode.
-
Enter your user name, password, workspace name, and server address, including the port number and SSL (if your server uses it). For example,
192.168.0.1:1666orssl:p4d-1.example.com:1666. -
Optionally, configure other settings under Version Control, such as Automatic Add to automatically add your files to P4 when you add them to the project and Overlay Icons to display version control status icons in Unity 3D.
To learn more about these settings, see the Unity documentation for Setting up version control integrations.
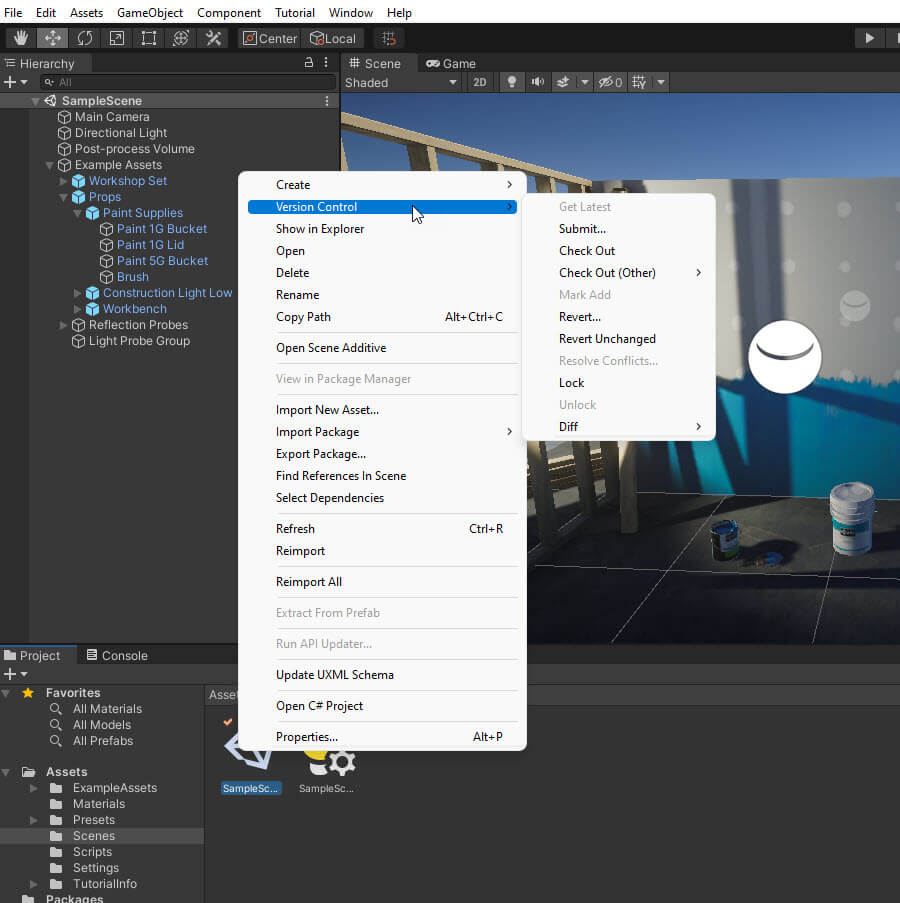
In your project tab, you can now right-click any asset to access Version Control options, such as Check Out, Get Latest, Submit, Revert, and more. Some of these options are also in the upper right corner of the Inspector tab for each asset.
Submit multiple assets at the same time in Unity 3D
To submit multiple assets at the same time, complete the following steps.
-
Select Window > Asset Management > Version Control.
-
In the Version Control window, you can see assets that are checked out in changelists. You can submit the entire changelist instead of submitting each asset individually.
What's next
Next, add team members as P4 users and learn about user permissions.