Create a workspace
In order to work on files in Helix Core, you need to create a workspace. A workspace is a folder on your local machine that is linked to files on the server.
Using this workspace, you can add new files to the server, edit existing files, get the latest changes from others, or go back to previous versions of files.
To create a workspace and associate it with a stream:
-
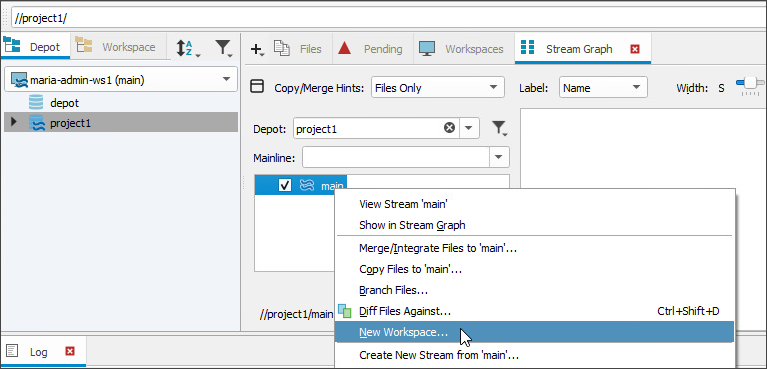
In the main window of P4V, click the Workspace tab, open the drop-down list, and click New Workspace.... Alternatively, you can right-click on a stream and select New Workspace....
-
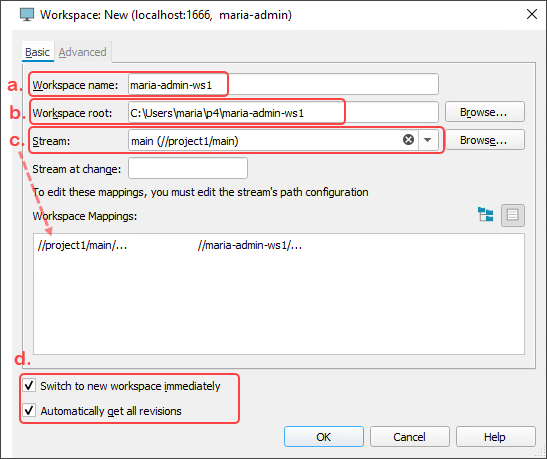
Configure the Basic tab:
-
Workspace name: Enter the name your want for your workspace. By default, the workspace name follows the pattern of <Username>_<Machine_Name>_<Stream_Name>_<Number>.
TipBe aware that the once assigned, a workspace name cannot be changed. We recommend including your user name and project name to easily identify the workspace later.
- Workspace root: Click Browse and navigate to the local directory you want to use for uploading files to the server and downloading files from the server. You can also create a new directory for this purpose.
-
Stream: The Stream is already set to the one we selected and it automatically fills in the Workspace Mappings.
-
Check the Switch to New Workspace and Automatically get all revisions options at the bottom.
-
-
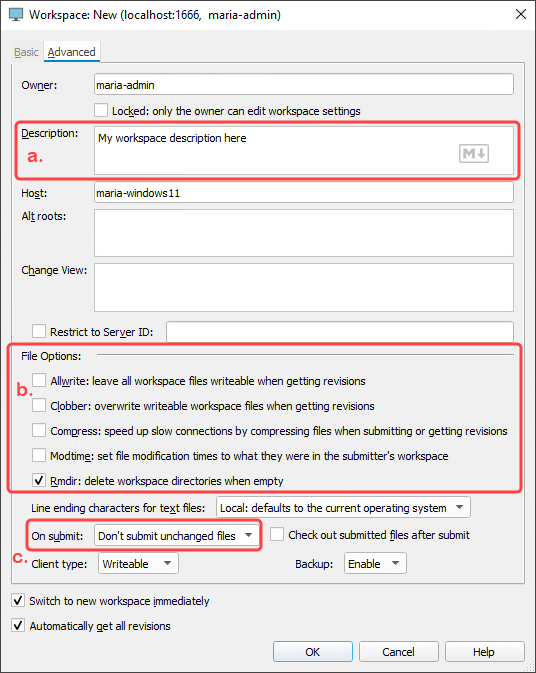
(Optional) Configure the Advanced tab to set up a few more helpful options:
-
Add a description of the workspace.
-
Under File Options: you can read about the options you can select. For example, to keep your workspace folder clean, you can check the Rmdir option so that empty folders will be removed.
-
For On Submit, we recommend changing from "Submit all selected files" to Don’t submit unchanged files so that you don’t waste time and space uploading new versions of files that haven’t changed.
-
-
Click OK. You will see your new workspace under the Workspace tab.


