Add project files
Now that you have set up your server to properly recognize file types and ignore files, you can add project files to the workspace.
-
Copy your game engine project files into your workspace root folder.
-
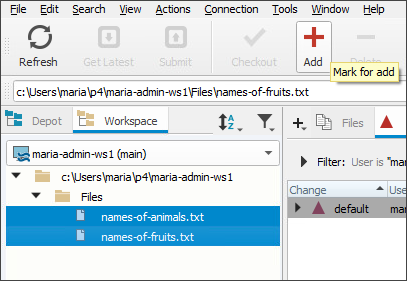
In P4V, click the Refresh button on the toolbar.
-
Add all the files to the default changelist by choosing one of the following methods:
-
Select the files you wish to add from the Workspace tab, then click Add on the toolbar. Alternatively, right-click the files and select Mark for Add
 Tip
TipUse the Shift key to select multiple files.
-
Right-click your top-level folder inside the Workspace tab and select Reconcile Offline Work....
This method will look through all the subfolders for any files that have been changed or have not yet been added.
-
-
Go to the Pending tab on the right pane to see your pending changelists. Right now that should just include the default changelist.
If you don’t see the Pending tab, open it from the View menu or the + icon to the left of the tabs.
-
Select your changelist, then click the Submit button on the toolbar. Alternatively, right-click the changelist and select Submit….
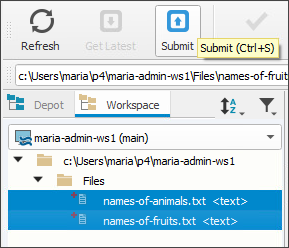
The first time you submit a game engine project, it may take some time to upload all of the files to your server, depending on your network connection. Once you have submitted the initial project files, future submits will only include files that have been changed or added since the last submit.
Congratulations! Now your files are stored in the depot on your server and you can start working on them.


