Create a project from source control
If a .p4config file is present, it is automatically loaded and your Simulink project is connected to the P4 Server. However, if a .p4config file is not present, follow these steps to create a project from source control and connect to the P4 Server:
- From the MATLAB home page, click New> Simulink Model.
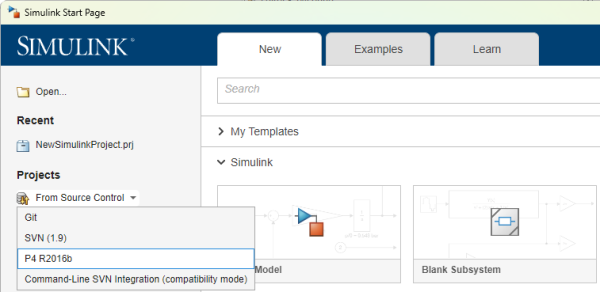
- In the Simulink Start Page dialog, select the New tab.
- Under the Projects section of the sidebar, select From Source Control > P4 2016b.
-
Alternatively, you can click the Project from P4 R2016b within the same dialog box.
- The Repository path needs to be entered as a URI for the P4 Server.
- From the New Project From Source Control dialog, click Change to open the P4 Connection dialog.
-
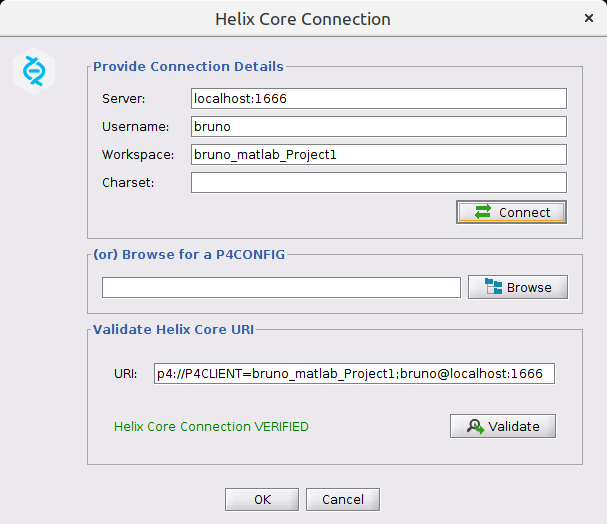
Enter the your credentials for the following:
-
P4 Server
-
Username
-
Workspace
Click Connect.
-
- Click OK to close the dialog and return to the New Project From Source Control dialog. The URI is automatically added to the Repository path of the New Project From Source Control dialog.
-
Set the Sandbox path to your P4 Server Workspace root, this is the location on your local machine you want to populate with the versioned files.

-
Click Retrieve to fetch the files from the P4 Server. If you are prompted to create the Sandbox directory, enter a name and click Ok.

The URI is automatically generated and verified when Simulink successfully connects to the P4 Server.

-
Simulink displays the Let's get started dialog. To set up your project, click Set Up Project and work through the set up wizard. Click Finish to complete you project setup.
Simulink creates or updates the project files because of the change and they are displayed in the Modified tab.

To commit the project files to the P4 Server, open the Current Folder view, right-click, and click View and Commit Changes....

Add a change description to the Comment text box and click Commit to commit the changes.
You can add further files and folders to your project after you have created your project with the Simulink P4 Server menu. For instructions on adding files to your project, see Simulink P4 Server menu.
Your project is now connected to the P4 Server. For details of the P4 Server file and folder operations available to you, see File management.