Create a new Simulink project and connect to the P4 Server
When you create a new Simulink project the .p4config file might not be present. The following steps will create a new project, connect the project to the P4 Server, and write a .p4config file for the project.
Create a new Simulink project and connect to the P4 Server:
- From the Home tab, select New > Project > From Simulink Template.
-
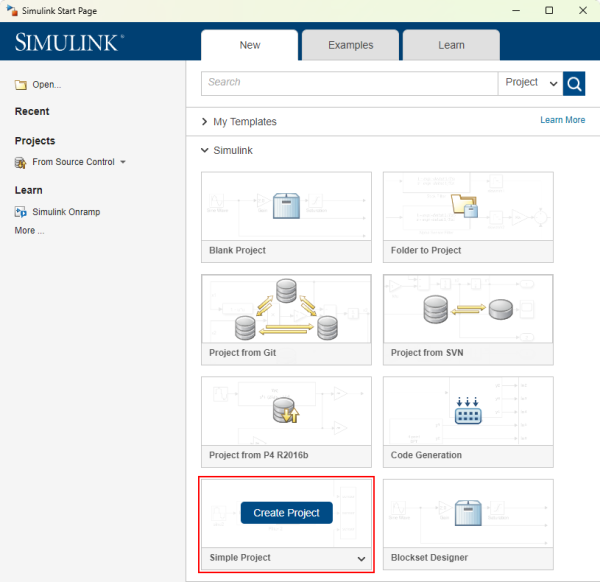
In the Simulink Start Page dialog, select the Simple Project template and click Create Project.
-
In the Create Project dialog, enter a name for the project. The project name is then assigned to the project folder name that you create
- Click the Folder icon in the Create Project dialog to open the Select a Project Directory dialog.
- (Optional) To change the project directory, click the folder icon and select or create a new project directory.
- Click OK in the Create Project dialog to create your project.
- Close the Welcome to your project dailog box to start setting up the P4 source control.
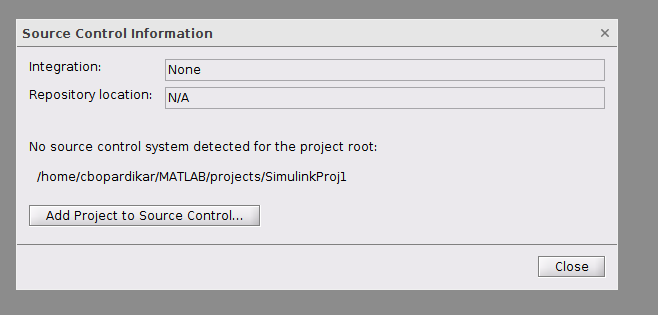
- From the Simulink Project tab, click Use Source Control to open the Source Control Information dialog.
- Click Add Project to Source Control...
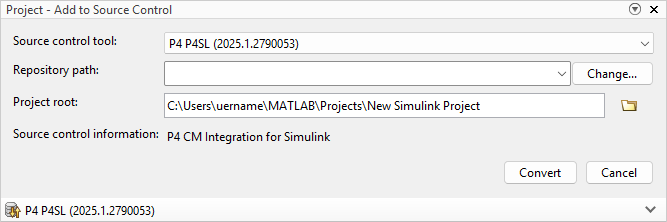
- In the Source control tool drop down, select P4 P4SL.
-
To the right of the Repository path field, click Change to open the P4 Connection dialog.
-
Enter the your credentials for the following:
-
P4 Server
-
Username
-
Workspace
Click Connect.
The URI is automatically generated and verified when Simulink successfully connects to the P4 Server.
-
- Check that your P4 Connection is verified.
- Click OK to close this dialog.
- Click Convert to connect to the P4 Server


Your project is now connected to the P4 Server. For details of the P4 Server file and folder operations available to you, see File management.