Attaching files to test case steps
You can add attachments to test case steps and expected results to provide additional information for users performing manual test runs. Attachments are copied to generated manual test runs.
1. Click the Steps tab when you are adding or editing a test case.
2. If you are entering steps in grid view, select the step or expected result to add the attachment to.
If you are entering steps in text view, select the line to add the attachment to.
3. Click  .
.
The Add Attachments dialog box opens.
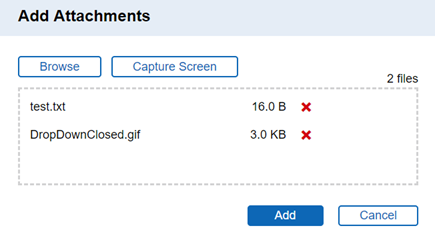
4. Click Browse to select the files. You can also paste the files or drag and drop them. To remove a file, click  next to it.
If you are pasting a file, make sure you select the drop area first. You can only paste images from the clipboard.
5. Click Add.
The attachments are added to the Attachments column in grid view or the selected line in text view, and the test case Files tab.
In grid view, you can view, rename, download, and delete attachments. You can also edit image file attachments. In text view, you can view attachments.
- To view an attachment, click the thumbnail or name. If the browser cannot open the file, it is automatically downloaded. You can then open the local copy in the associated application.
-
To rename an attachment, click Rename. The Rename Attachment dialog box opens. Enter a new Attachment name and click Rename. You can only rename attachments before saving the item. Do not include the file extension in the new attachment name.
- To download an attachment, click
 .
. - To edit an image file attachment, click
 . You can only edit images before saving the item.
 - To delete an attachment, click .